Free Crochet Kids Granny Square Sweater Pattern
A free, beginner-friendly crochet pattern for a cozy, colorful Granny Square Sweater. Perfect for kids and fun to make!
Published · by Sara
- Skill level
- Intermediate
- Yarn weight
- Worsted (4)
- Hook size
- 5.0 mm (H-8)
- Yardage
- about 600 yards
- Gauge
- 12 dc and 7 rows = 10 cm
- Time
- 9 hours
- Sizes
- 66 × 41 cm (26 × 16 in), 71 × 46 cm (28 × 18 in), 76 × 51 cm (30 × 20 in)
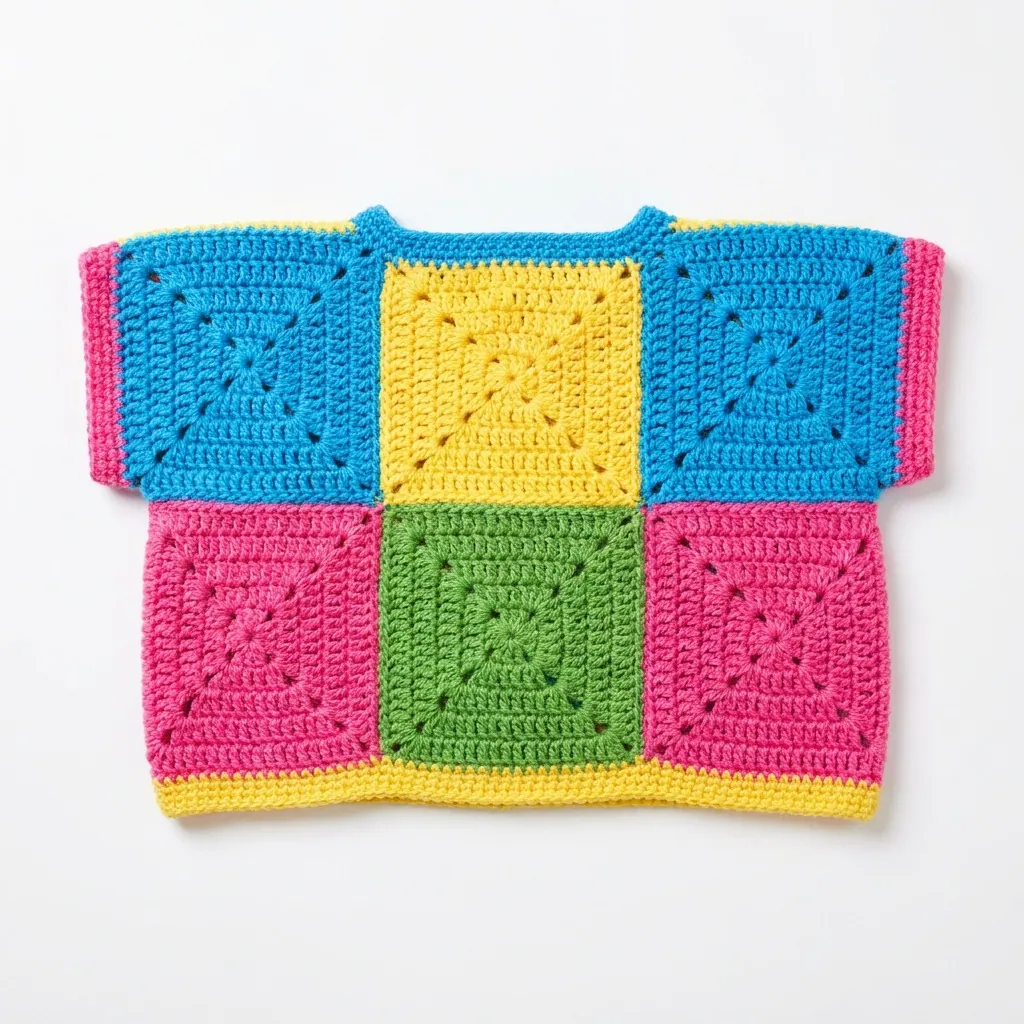
This crochet pattern creates a cozy Granny Square Sweater for kids, featuring colorful squares that come together for a stylish and fun look. The design is perfect for layering and adds a playful touch to any outfit. The pattern covers sizes 4, 6, and 8 years, making it a delightful project for young ones.
You’ll learn to create your own unique granny squares and assemble them into a sweater. With the vibrant colors and simple construction, this pattern is enjoyable and beginner-friendly.
Why You'll Love This Granny Square Sweater
- Fun and colorful design – perfect for kids and easy to customize.
- Stylish layering option – keeps little ones warm and trendy.
- Simple construction – learn the classic granny square technique while making a functional garment.
- Great for gifting – an ideal handmade present that children will love to wear.
Is This Pattern Good for Beginners?
Yes! While this pattern is categorized as intermediate, it primarily involves making granny squares, which are straightforward and enjoyable. You’ll gain confidence in your crochet skills while creating something special for kids.
Crochet Abbreviations (US Terms)
- ch – chain
- sl st – slip stitch
- sc – single crochet
- dc – double crochet
- sp – space
Special Stitch:
- Granny Square Round: Begin by making a magic circle (or ch 4 and join to the first chain to form a ring). Work [3 dc, ch 1] into the ring to create corner spaces.
Size and Gauge
- Gauge: 12 dc and 7 rows = 10 cm (4 in) in Granny Square pattern.
- Finished Sizes:
- Size 4: Chest – 66 cm (26 in), Length – 41 cm (16 in)
- Size 6: Chest – 71 cm (28 in), Length – 46 cm (18 in)
- Size 8: Chest – 76 cm (30 in), Length – 51 cm (20 in)
- Each Granny Square measures 15 × 15 cm (6 × 6 in).
Step 1: Granny Squares
You will make a total of 6 Granny Squares - 2 of each color (A, B, C, D).
Square Construction (each square):
Round 1:
- Begin with Color A.
- Ch 4, join to form a circle.
- (3 dc, ch 1) 3 times, join with sl st to top of first dc. (12 dc, 4 sp)
Round 2:
- Change to Color B.
- Sl st to the corner sp, (3 dc, ch 1, 3 dc) in same corner sp, ch 1; (3 dc, ch 1, 3 dc) into the next corner sp, repeat around, join with a sl st. (36 dc, 4 sp)
Round 3:
- Change to Color C.
- Sl st to the corner sp, (3 dc, ch 1, 3 dc), ch 1; repeat in each corner. Join with sl st. (72 dc, 4 sp)
Round 4:
- Change to Color D.
- Sl st to the corner sp, (3 dc, ch 1, 3 dc), ch 1; repeat in each corner. Join with sl st. (108 dc)
- Finish off and weave in ends.
Continue until you have 2 squares each from Colors A, B, C, and D.
Step 2: Assembly & Sweater Body
- Arrange the six squares in two rows of three.
- Join squares using slip stitch or whip stitch along the edges.
- Turn squares inside out for a neater finish.
- For the first row of squares, sew the three pieces together, holding them with a stitch marker until secured (this will create the upper part of the sweater).
- Repeat for the second row of squares.
- Now join the upper row to the lower row with side edges aligned using slip stitch for a seamless look.
Step 3: Edging
Neckline:
- Join Color A at the neck edge.
- Ch 1, work 1 sc into the first st, ch 1, skip 1, sc in next, repeat around. Join.
Sleeves:
- Measure 10 cm (4 in) down from the shoulder seam; join yarn Color D to create sleeve openings.
- Work into the opening with 1 sc, ch 1. Repeat until the sleeve edge is finished.
Bottom Edge:
- Use Color B along the bottom edge.
- Ch 1, sc all around.
Beginner Tips for a Neat Granny Square Sweater
- Keep your workspace organized – ensure all materials are easily accessible.
- Maintain consistent tension – this will keep your granny squares uniform.
- Check your gauge regularly – a small difference can impact the final fit of the sweater.
Common Mistakes (and How to Fix Them)
- "My squares are different sizes." – This can happen due to inconsistent tension. Try to keep your tension even throughout your work.
- "The stitches look messy." – You might be working too tightly. Relax your grip on the yarn for easier stitches.
- "I’ve joined the squares wrong." – Always count your stitches carefully. If you're unsure, check your work regularly.
How to Care for Your Granny Square Sweater
To keep your sweater looking great, hand wash it in cold water. Lay it flat to dry to maintain its shape and prevent stretching.
FAQ
Can I customize the size?
Absolutely! You can make more squares or adjust the rows to create different sizes while following the same construction method.
How long will this take?
The total estimated time is around 9 hours, including making the squares, assembly, and adding edging.
Can I use different yarns?
Yes, you can use any worsted weight yarn. Just ensure you check your gauge for the best fit!
Want a matching set? Check out our crochet purse patterns or see all our free crochet bag patterns.
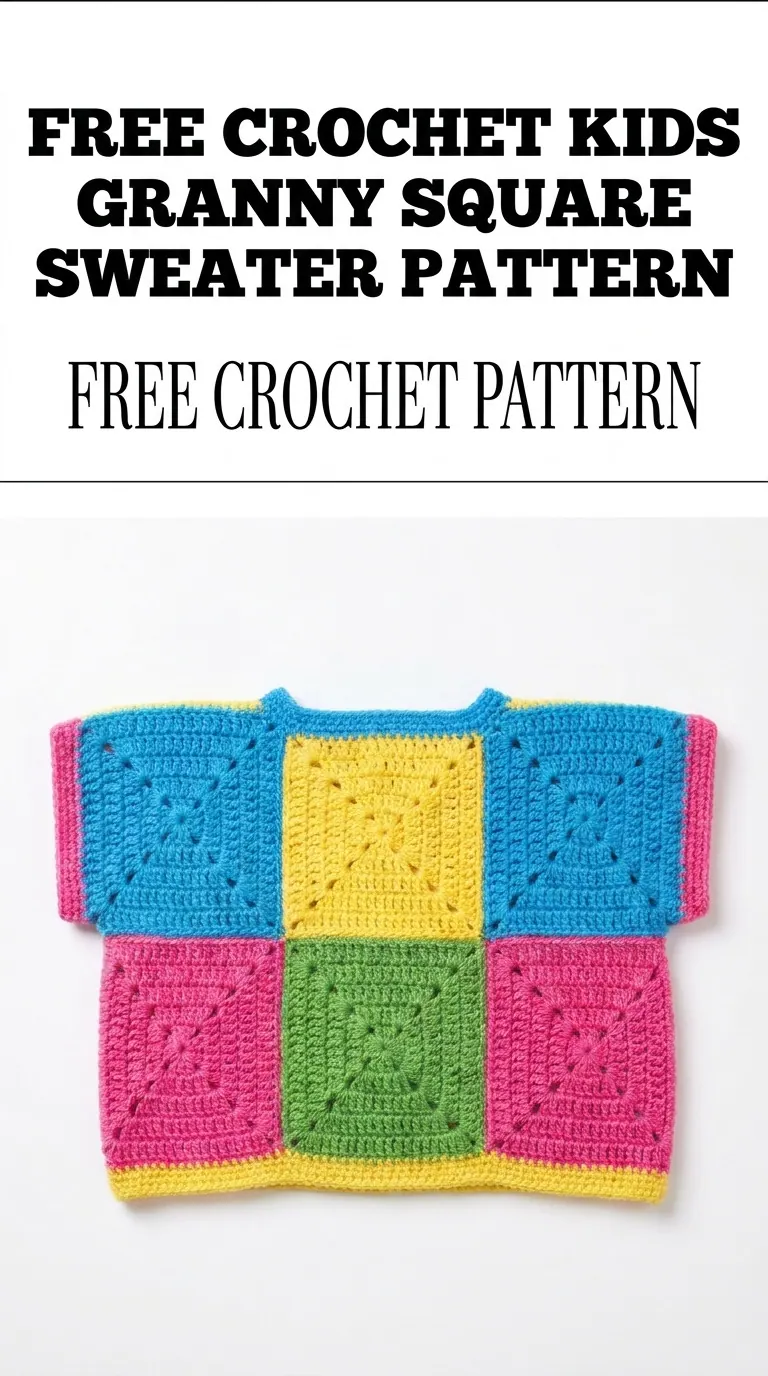
Image shown for inspiration — your finished result may vary slightly.