Neutral Granny Square Shoulder Bag Crochet Pattern for Beginners
A free crochet pattern for a stylish and functional shoulder bag made with neutral granny squares. Perfect for everyday use with easy-to-follow steps.
Published · by Sara
- Skill level
- Beginner
- Yarn weight
- Worsted (4)
- Hook size
- 5 mm (H-8)
- Yardage
- about 600 yards
- Gauge
- 5 dc and 2 rows = 10 cm
- Time
- approximately 3.5 hours
- Sizes
- 30 × 25 cm (12 × 10 in)
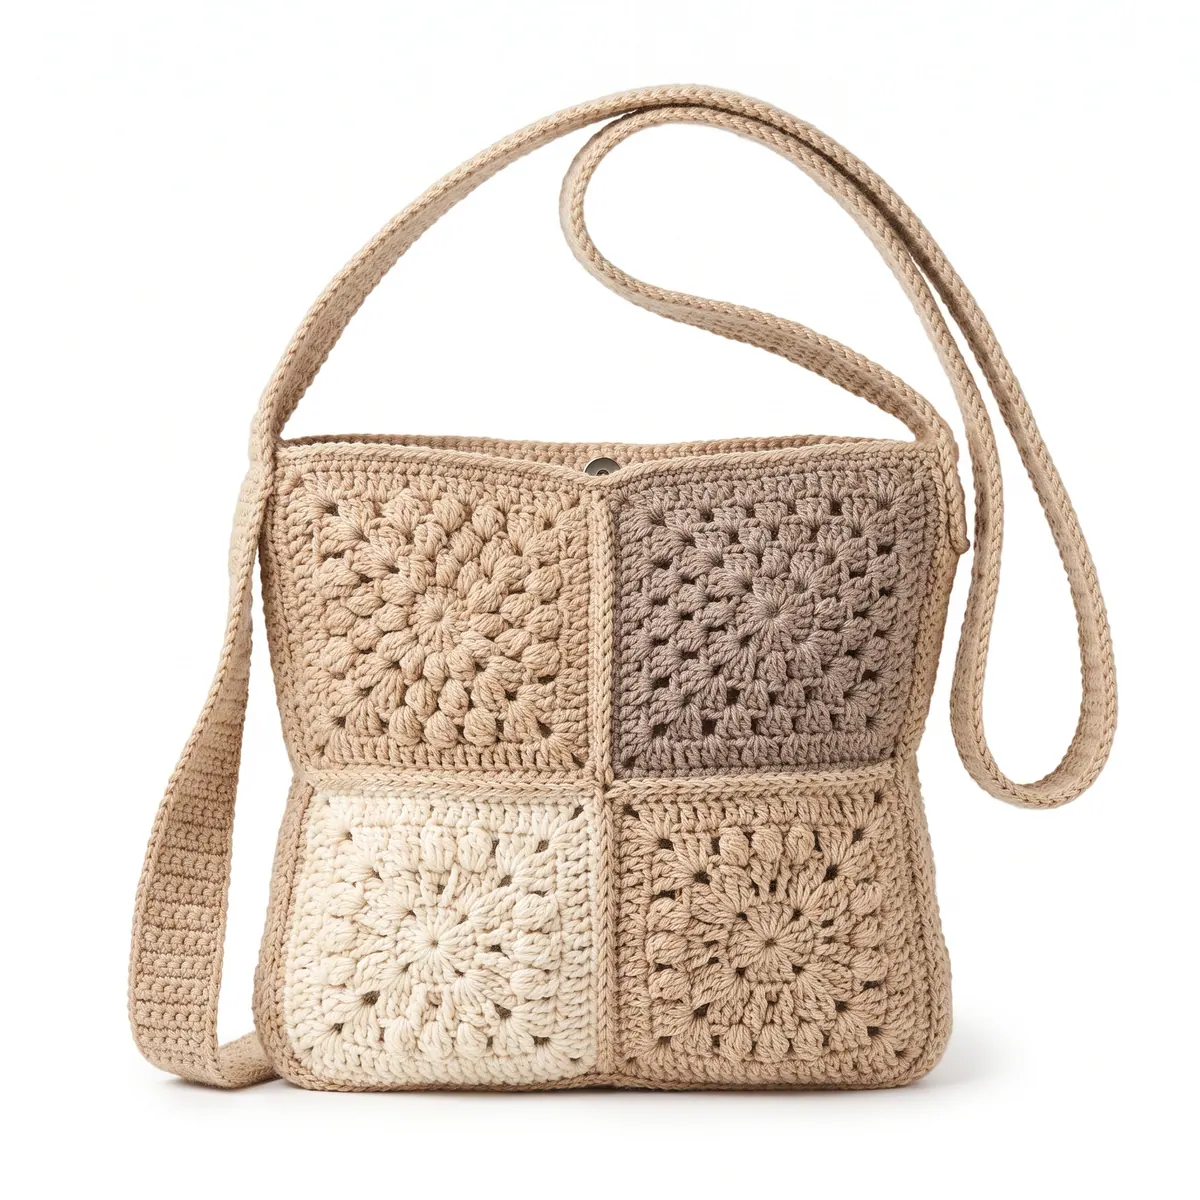
This crochet pattern is for a stylish and functional Neutral Granny Square Shoulder Bag made up of chic, neutral-colored granny squares. The bag is perfect for everyday use and showcases a classic square motif that’s both easy to create and enjoyable to use. We’ll guide you through the simple steps to create this beautiful bag with just a few basic stitches.
Whether you’re a beginner or looking to refine your skills, this pattern suits anyone who wants a lovely accessory. You'll explore how to make granny squares and join them together, giving you a perfect beginner project to boost your crochet confidence.
Why You'll Love This Bag
- Stylish and functional – this bag is great for carrying your essentials or adding flair to any outfit.
- Quick and easy to make – with straightforward granny squares, you’ll feel accomplished in no time.
- Versatile colors – you can customize it with any neutral or colorful yarn that suits your style.
- Great for beginners – it’s a perfect project to practice your crochet skills.
Is This Pattern Good for Beginners?
Yes! This pattern uses simple stitches like chains and double crochets to create granny squares. You’ll learn how to join these squares together, making it an excellent project to enhance your skills.
Crochet Abbreviations (US Terms)
- ch – chain
- dc – double crochet
- sl st – slip stitch
- sp – space
- st(s) – stitch(es)
- Fo – fasten off
Special Stitch: Granny Square
- Start with a magic ring or chain 4 and join with a sl st to form a circle.
- Round 1: ch 3 (counts as first dc), work 2 dc in the ring, ch 2, 3 dc in the ring, repeat from * to * two more times, ch 2, join with sl st to top of first ch 3. (12 dc, 4 ch-2 spaces)
- Round 2: Sl st to the first ch-2 sp, ch 3 (counts as first dc), work 2 dc, ch 2, 3 dc in the same sp (first corner). In the next ch-2 sp, work 3 dc, repeat around, joining with sl st to top of first ch 3. (24 dc, 4 ch-2 spaces)
Size and Gauge
- Finished Bag Size: 30 × 25 cm (12 × 10 in)
- Each Granny Square Size: 25 × 25 cm (10 × 10 in)
- Gauge: 5 dc and 2 rows = 10 cm (4 in) in granny square pattern.
- Note: Check your gauge to ensure your squares are the right size. Adjust your hook if needed!
Step-by-Step Instructions
Granny Squares (Make 4 total — 1 for each side of the bag):
- Square 1 (Color A):
- Make a magic ring.
- Round 1: Ch 3, 2 dc in ring, ch 2, 3 dc in ring; repeat twice (12 dc, 4 ch-2 spaces).
- Round 2: Sl st into ch-2 sp, ch 3, 2 dc, ch 2, 3 dc in same sp; 3 dc in each ch-2 sp around, join with sl st (24 dc, 4 ch-2 spaces).
- Round 3: Repeat the increase around until you have 36 dc.
- Fasten off and weave in ends.
- Squares 2 & 4 (Color B & A): Repeat the same steps as Square 1.
- Square 3 (Color C): Repeat the same steps as Square 1.
Joining Squares
The squares will be joined to create the bag.
- Lay squares in two rows of two.
- Using a yarn needle, join squares with slip stitch through the outer edges.
- For the bottom, seam squares together on three sides, leaving the top open.
Strap
- Using Color A, ch 120.
- Row 1: Sc in each ch across (119 sc).
- Fasten off and attach the strap to the bag.
Lining (Optional)
- Cut fabric to fit inside the bag and pin in place.
- Hand-sew or machine sew the lining inside the bag.
Closure
- Sew the magnetic snap closure inside the top edges of the bag for functionality.
Finishing Tips: Join Squares Neatly
- Join squares together carefully, ensuring edges align.
- Weave in all ends with a tapestry needle.
- Block the finished bag to ensure even shape and square dimensions.
- If using lining, ensure it is secured. Hand stitch or attach with fabric glue.
Beginner Tips for a Neat Bag
- Keep your workspace organized – it helps avoid losing track of pieces.
- Maintain even tension – this ensures your squares are consistent in size.
- Check your gauge – it's key to making sure your squares fit together properly.
Common Mistakes (and How to Fix Them)
- "My squares aren’t the same size." – This might be due to varying tension. Check your gauge and adjust your hook size.
- "I can't figure out how to join the squares." – Make sure to align edges closely as you join them. Practice slip-stitching until you’re comfortable.
- "The bag is too floppy." – If you want more structure, consider adding a lining or using a firmer yarn.
How to Care for Your Bag
Hand wash your bag in cold water and lay it flat to dry. Avoid wringing it out to maintain its shape and integrity.
FAQ
Can I customize the size?
Yes! You can adjust the number of squares or the size of each square to create a larger or smaller bag.
What if I don’t have the exact yarn colors?
No problem! Feel free to use any neutral colors that you like or have on hand.
How long will it take to make this bag?
The total estimated time for this project is about 3.5 hours, but it may vary depending on your crochet speed.
Want a matching set? Check out our crochet purse patterns or see all our free crochet bag patterns.
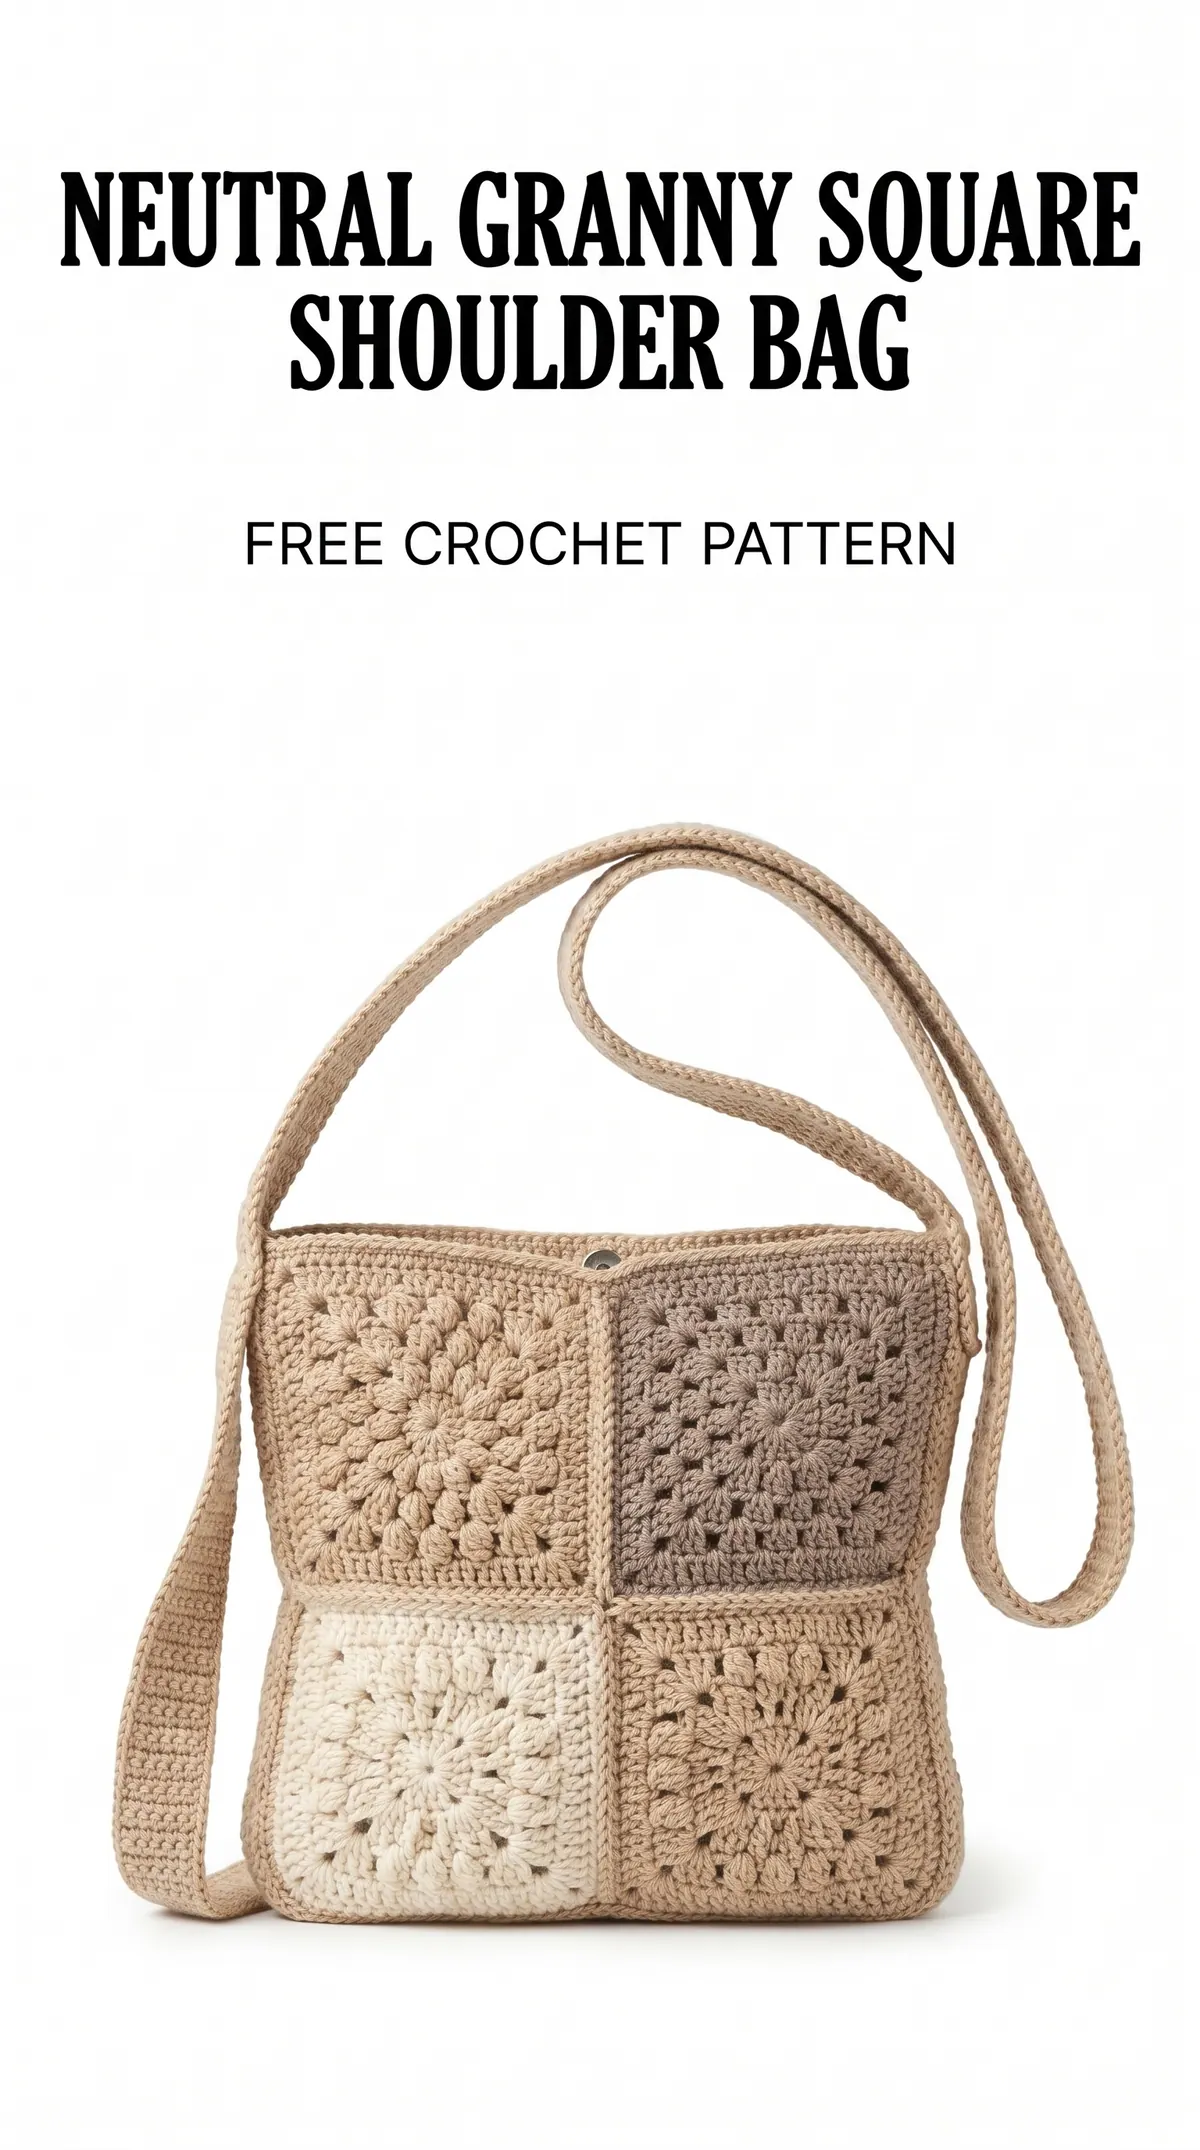
Image shown for inspiration — your finished result may vary slightly.