Crochet Honeycomb Drawer Divider for Socks (The Hive Divider)
A free crochet pattern that helps you create a stylish and functional drawer divider for socks, easy enough for beginners.
Published · by Sara
- Skill level
- Beginner
- Yarn weight
- Worsted (4)
- Hook size
- 5 mm (H-8)
- Yardage
- about 366 m
- Gauge
- 14 dc and 7 rows = 10 cm
- Time
- 2.5 hours
- Sizes
- 30.5 cm × 30.5 cm (12 in × 12 in)
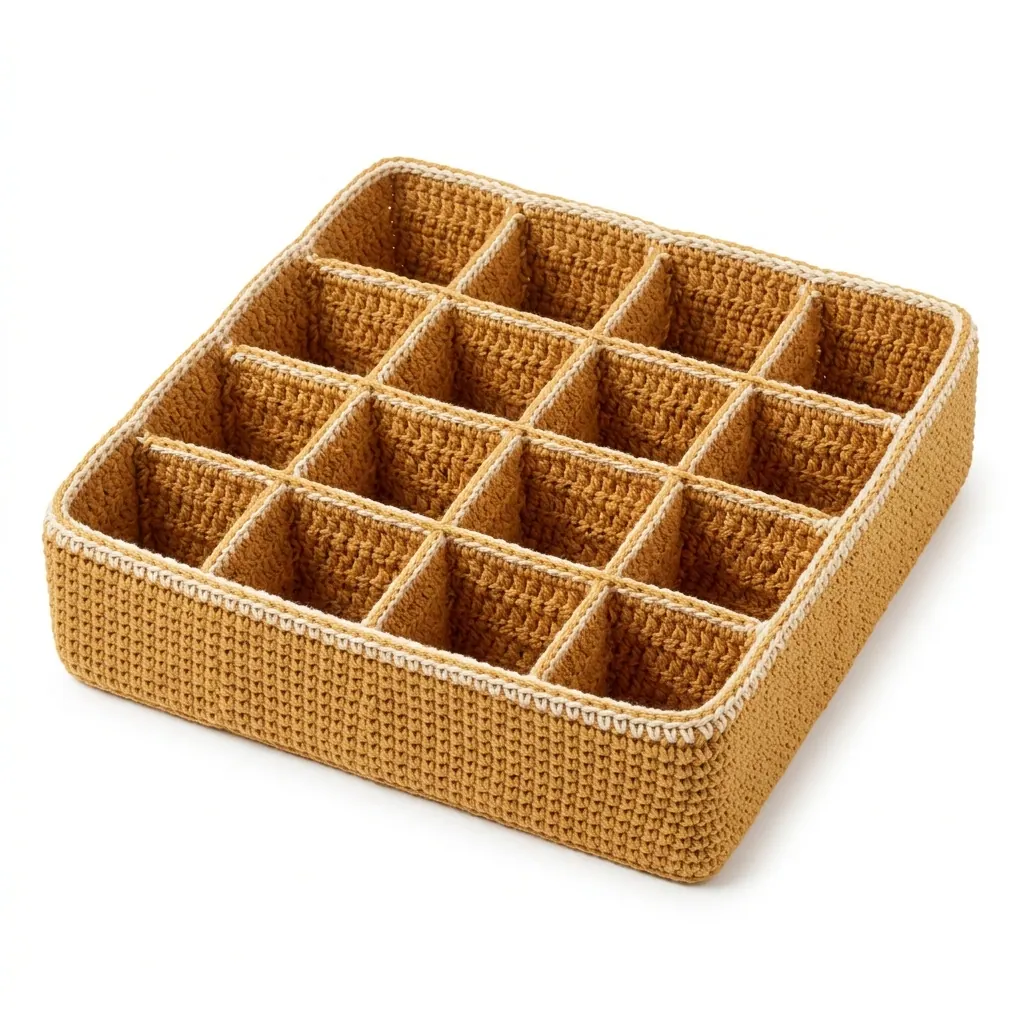
This crochet honeycomb drawer divider pattern makes organizing your socks a breeze. The Hive Divider is stylish and functional, featuring a fun honeycomb pattern that is both easy to create and enjoyable to use. You’ll learn basic stitches while making something practical to keep your sock collection tidy.
Whether you're a beginner or looking to expand your crochet skills, this pattern is perfect for organizing your drawers. It provides clear instructions and helpful tips to guide you through the process.
Why You'll Love This Hive Divider
- Stylish design – the honeycomb pattern adds a touch of charm to your organization.
- Functional and practical – great for keeping your socks neatly arranged and accessible.
- Quick to make – complete this divider in about 2.5 hours.
- Versatile colors – use different tones to personalize your divider to match your decor.
Is This Pattern Good for Beginners?
Yes! This pattern uses simple stitches like double crochet and single crochet. The clear, step-by-step instructions make it easy to follow along, even if you’re new to crochet.
Crochet Abbreviations (US Terms)
- ch – chain
- dc – double crochet
- sc – single crochet
- sl st – slip stitch
- sp – space
- ( ) – work instructions in parentheses the indicated number of times
Special Stitch - Honeycomb Stitch: The honeycomb stitch pattern works in alternating rows.
Row 1: dc in next st, dc in next sp (repeat).
Row 2: dc in next sp, dc in next st (repeat).
Size and Gauge
- Finished Item Dimensions: 30.5 cm × 30.5 cm (12 in × 12 in)
- Base Height: 3.8 cm (1.5 in)
- Total Height (with sides): 8.9 cm (3.5 in)
- Gauge: 14 dc and 7 rows = 10 cm (4 in). Check your gauge by crocheting a swatch of 20 dc and 10 rows, and adjust if necessary.
Step 1: Making the Base
The base is worked in rows to create a sturdy foundation.
- Foundation Chain: Ch 44.
- Row 1: Dc in 4th ch from hook (counts as first dc), dc in each ch across. (42 dc)
- Row 2: Ch 3 (counts as first dc); dc in next sp (between dc’s from previous row), dc in next dc; repeat from * to * across. (42 sts)
- Row 3: Ch 3; dc in next dc, dc in next sp; repeat from * to * across. (42 sts)
- Row 4-16: Repeat rows 2 and 3, alternating until you reach 16 rows total.
- Final Row: Ch 1, turn, sl st across to join and finish the base fabric. Fasten off.
Step 2: Crochet the Sides
Now we’ll add sides for structure.
- Foundation for Sides: Attach Color A to any corner stitch of the base.
- Row 1: Ch 1, sc in same st, sc along the edge of the base (42 sc).
- Row 2: Ch 1, turn. Sc in each stitch around the side edge, join with sl st.
- Row 3-5: Repeat Row 2 two more times (for a total of 3 rows), ensuring to keep the fabric tight at the corners for structure.
- Fasten off.
Finishing Tip: Weave Ends Neatly
Don't forget to weave in all loose ends using a tapestry needle for a clean finish. You can also block your divider to shape if necessary.
Beginner Tips
- Keep your workspace organized to avoid losing your yarn and tools.
- Maintain even tension as you crochet to ensure uniform stitches.
- Check your gauge regularly to ensure your piece turns out the right size.
Common Mistakes (and How to Fix Them)
- "My divider is too small." – Check if your gauge matches the pattern; adjust your hook size if needed.
- "The stitches look uneven." – This may be due to varying tension. Practice maintaining the same tension throughout.
- "The base is curling up." – Ensure you are keeping track of your stitches and rows. Blocking can also help shape it properly.
How to Care for Your Hive Divider
Hand wash your crochet divider in cold water to keep it looking fresh. Lay it flat to dry to maintain its shape. If you desire extra structural support, consider applying fabric stiffener.
FAQ
Can I customize the size?
Yes! You can increase or decrease the number of chains in the foundation to create a larger or smaller divider.
Is this pattern suitable for beginners?
Absolutely! It includes basic stitches and straightforward steps that are easy to follow.
How long will it take to make?
This project takes about 2.5 hours to complete, depending on your skill level.
Want a matching set? Check out our crochet purse patterns or see all our free crochet bag patterns.
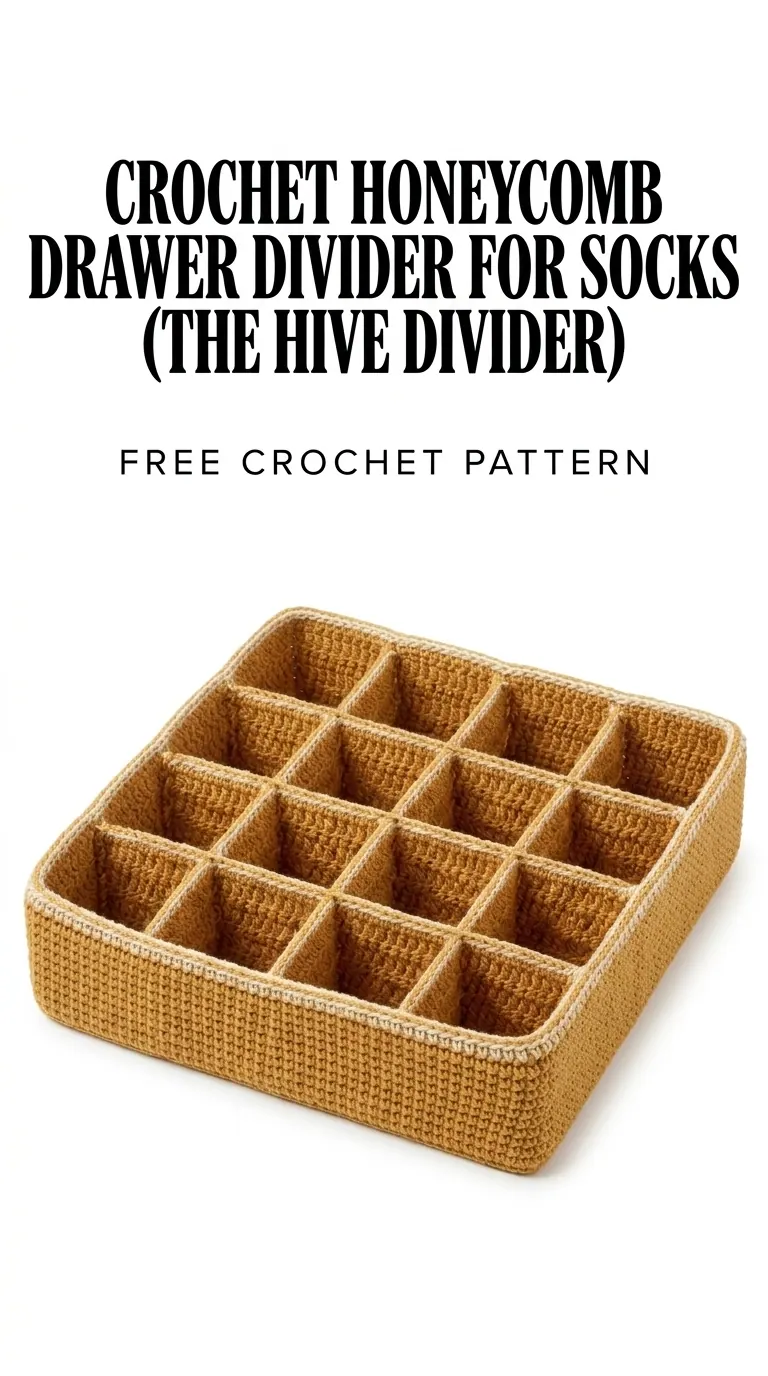
Image shown for inspiration — your finished result may vary slightly.