Crochet Throw Pillow Band With Remote Pockets (The Pillow Belt) Pattern for Beginners
A free crochet pillow band pattern with easy steps and helpful tips. Keep your remotes organized while adding style to your living space.
Published · by Sara
- Skill level
- Beginner
- Yarn weight
- Worsted (4)
- Hook size
- 5 mm (H/8), 4 mm (G/6)
- Yardage
- about 250 yards
- Gauge
- 12 dc and 10 rows = 10 cm
- Time
- 8-10 hours
- Sizes
- 41 × 30.5 cm (16 × 12 in)
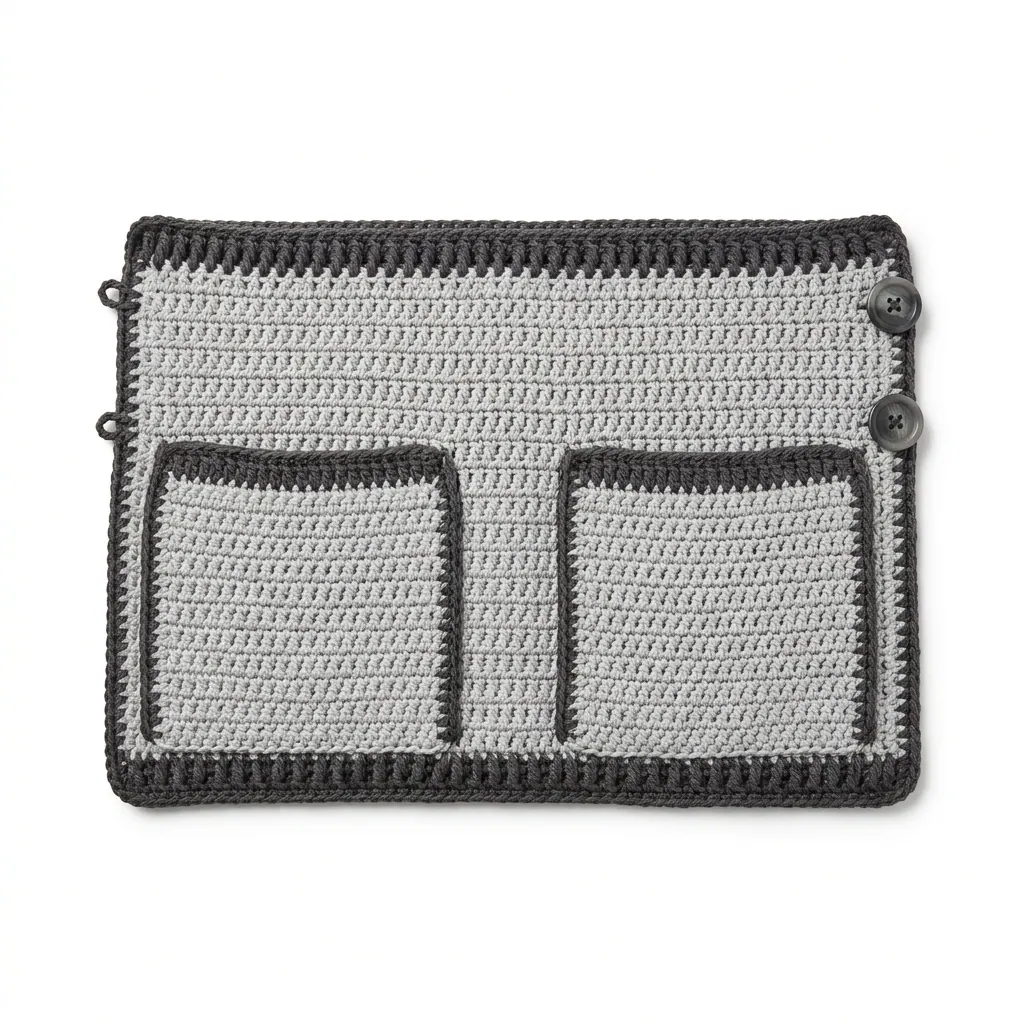
This crochet throw pillow band with remote pockets, also known as The Pillow Belt, is a practical and stylish accessory for your living space. It’s an enjoyable project that utilizes beginner-friendly stitches, making it easy to follow. You will learn how to create pockets to keep your remote controls organized and within reach.
Why You'll Love This Pillow Belt
- Functional design – keeps your remotes handy while adding style to your pillows.
- Easy to crochet – perfect for beginners and experienced crafters alike.
- Customizable colors – choose any colors to match your home décor.
- Quick project – ideal for making as gifts or adding to your own living space.
Is This Pattern Good for Beginners?
Yes! This Pillow Belt pattern uses basic stitches like double crochet and single crochet, making it perfect for beginners. You’ll also learn how to make front post half double crochet stitches to add texture.
Crochet Abbreviations (US Terms)
- ch – chain
- sc – single crochet
- dc – double crochet
- sl st – slip stitch
- st(s) – stitch(es)
- FPHDC – front post half double crochet: yarn over, insert hook around front of post, yarn over, pull up a loop, yarn over, pull through all three loops on hook.
Size and Gauge
- Finished Size: Approximately 41 × 30.5 cm (16 × 12 in)
- Gauge: 12 dc and 10 rows = 10 cm (4 in) in double crochet. To check the gauge, work a swatch and adjust your hook size if necessary.
Step 1: Main Band
The main band is worked flat in rows.
- Foundation Chain: Ch 51.
- Row 1: Dc in 4th ch from hook (counts as first dc), dc in each ch across. (49 dc)
- Row 2: Ch 3, turn, dc in each dc across. (49 dc)
- Rows 3–10: Repeat Row 2 until piece measures 28 cm (11 in) tall.
- Row 11: Ch 1, turn, sc in each dc across. (49 sc)
- Row 12: Ch 1, turn, sc in first st, FPHDC around next repeat from * to * across. (49 sts)
Step 2: Pockets (Make 2)
The pockets are also worked flat in rows.
- Foundation Chain: Ch 25.
- Row 1: Dc in 4th ch from hook and in each ch across. (23 dc)
- Rows 2–8: Repeat Row 2 until pocket measures 20 cm (8 in) tall.
- Row 9: Ch 1, turn, sc in each dc across. (23 sc)
- Rows 10–11: Ch 1, turn, sc in first st, FPHDC around next repeat from * to * across. (23 sts)
Step 3: Assembly
- Attach Pockets: Align an upper edge of each pocket with the band starting from the left edge. Pin in place.
- Sew Pockets: Using a tapestry needle, sew the bottom and sides of the pockets to the main band (leave the top open).
- Borders: Add a border of sc around the entire perimeter of the Pillow Belt, starting on the left side of the pockets for a neat finish.
- Buttons: Sew buttons on the main band to secure the ends when wrapped around a pillow.
Beginner Tips
- Keep your workspace organized to help you stay focused.
- Maintain consistent tension in your stitches for an even finish.
- Regularly check the size against your pillow to ensure it fits properly.
Common Mistakes (and How to Fix Them)
- "My Pillow Belt is too tight." – This may be due to pulling stitches too tightly. Relax your grip as you crochet.
- "The pockets are uneven." – Check your stitch counts in each row. Count your stitches frequently to stay on track.
- "My gauge swatch looks different." – Adjust your hook size if your swatch does not match the gauge, trying larger or smaller as needed.
How to Care for Your Pillow Belt
Hand wash in cold water and lay flat to dry. Avoid machine washing and drying to maintain the integrity of your crochet work.
FAQ
Can I customize the size?
Absolutely! To fit larger pillows, adjust the foundation chain in multiples of 2.
What if I don’t have cotton yarn?
You can substitute with any worsted-weight yarn, but ensure it maintains the gauge for the best fit.
How long will this take to make?
The total estimated time is about 8–10 hours, depending on your crocheting speed, with the main band taking approximately 4 hours and each pocket around 2 hours.
Want a matching set? Check out our crochet purse patterns or see all our free crochet bag patterns.
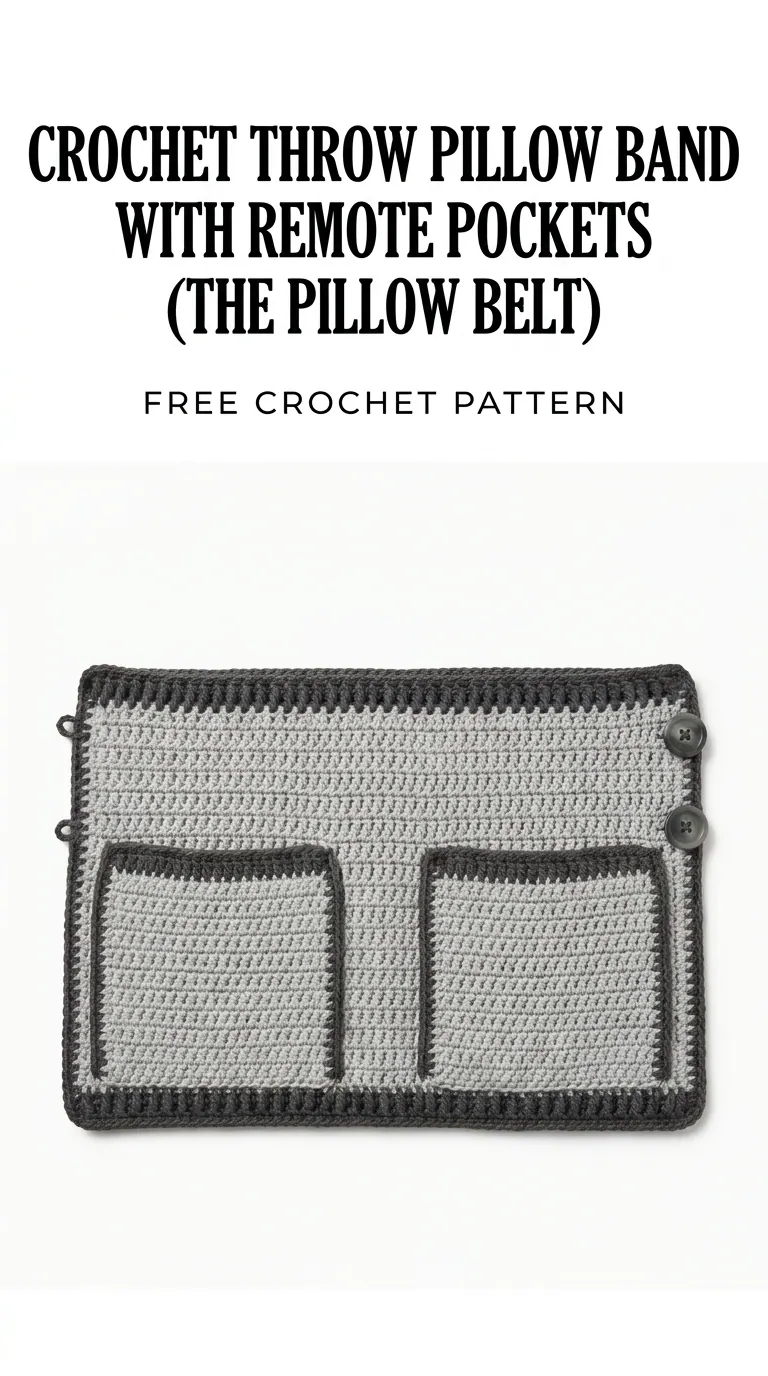
Image shown for inspiration — your finished result may vary slightly.