Free Bobble Stitch Crochet Cushion Cover Pattern for Beginners
A free, beginner-friendly pattern with clear steps, tips, and helpful illustrations. Create a beautiful cushion cover using the bobble stitch.
Published · by Sara
- Skill level
- Intermediate
- Yarn weight
- Worsted (4)
- Hook size
- 5.0 mm (H/8), 6.0 mm (J/10)
- Yardage
- approximately 500 yards
- Gauge
- 12 bobbles and 10 rows = 10 cm
- Time
- approximately 9–11 hours
- Sizes
- 45 × 45 cm (18 × 18 in)
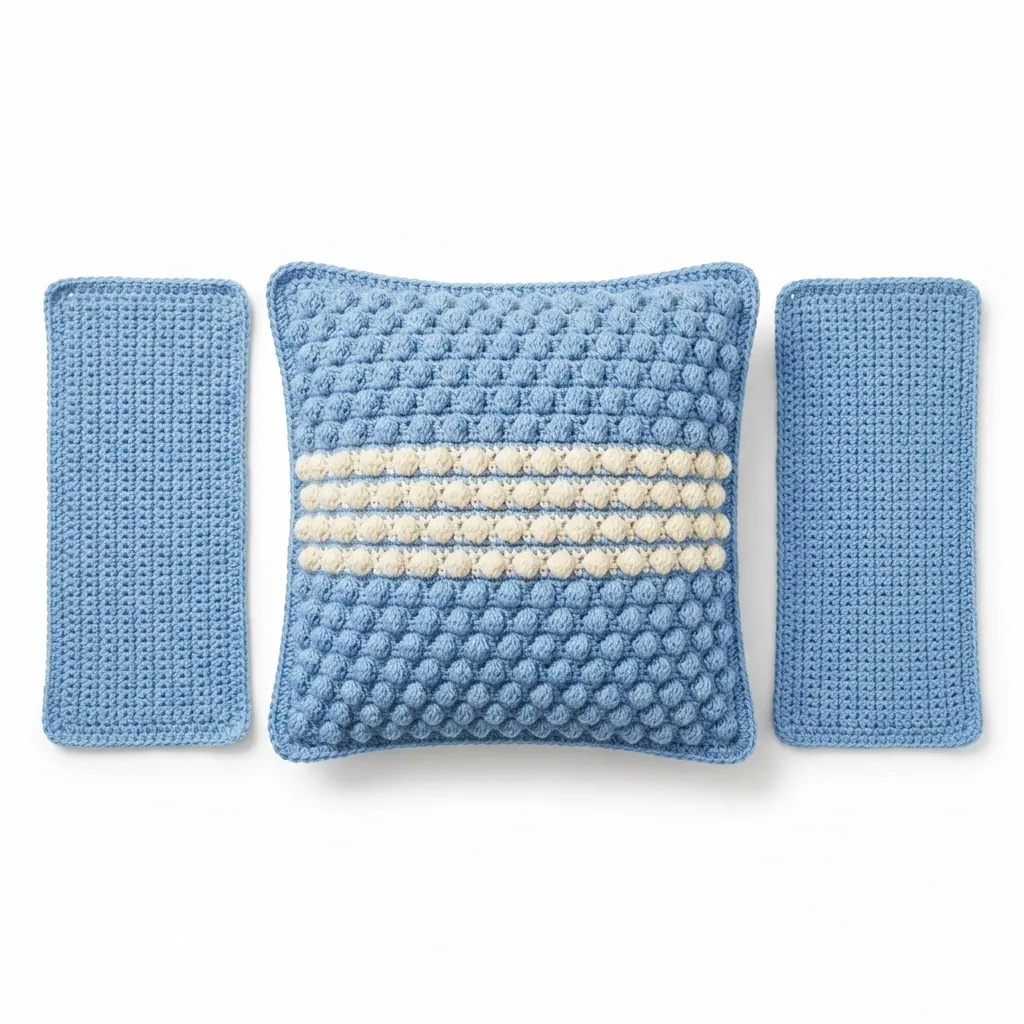
This cushion cover features an eye-catching bobble stitch design, perfect for adding texture and style to any living space. It is enjoyable to make, and the project will help you practice your bobble stitch while creating a beautiful home decor item.
This project is suited for intermediate crocheters eager to enhance their skills. You'll learn how to create a stunning cushion cover that will brighten up your sofa or bed.
Why You'll Love This Cushion Cover
- Textured design – the bobble stitch adds a fun and cozy look to your decor.
- Customizable colors – choose your favorite colors to match your home.
- Intermediate skill builder – enhance your crochet skills with this engaging pattern.
- Fun and relaxing – immerse yourself in a satisfying crochet session!
Is This Pattern Good for Beginners?
Yes! While the bobble stitch may seem tricky at first, it's a great way to level up your skills. With clear instructions, you'll be making beautiful bobbles in no time!
Crochet Abbreviations (US Terms)
- ch – chain
- sc – single crochet
- dc – double crochet
- sl st – slip stitch
- sp – space
- bobble – (Insert hook into stitch, yarn over, pull up a loop, yarn over, pull through two loops on hook) 4 times, then yarn over and pull through all loops.
Size and Gauge
- Finished dimensions: 45 × 45 cm (18 × 18 in)
- Gauge: 12 bobbles and 10 rows = 10 cm (4 in) in the bobble stitch pattern. Ensure to check your gauge to get the right size!
Step 1: Making the Cushion Cover Front
The cushion cover front is worked in rows.
- With Main Color (MC), chain 45.
- Row 1: Sc in 2nd ch from hook and in each ch across. (44 sc)
- Row 2: Ch 3 (counts as dc), turn. Bobble in first st, skip next st, bobble in next st; repeat from * to * across to last sc, sc in last sc. (22 bobbles, 1 sc)
- Row 3: Ch 1, turn. Sc in first bobble, bobble in next sp between bobbles, sc in next bobble; repeat from * to * across to last bobble, sc in last bobble. (22 bobbles, 1 sc)
- Row 4: Repeat Row 3.
- Rows 5–24: Repeat Row 4 four times.
- Change to Contrast Color (CC) and repeat Row 4 until you have 4 rows of CC.
- After the last row of CC, change to MC and repeat Row 3 six times.
- Fasten off.
Step 2: Making the Cushion Cover Back (Make 2)
The back pieces are also worked in rows.
- With MC, chain 45.
- Rows 1–24: Repeat Rows 1–24 from the front, but skip the last row of CC.
- Fasten off.
Step 3: Assembly & Finishing
Now we'll assemble the cushion cover.
- Place one back piece facing up and lay the front piece on top, right side facing down.
- Place the remaining back piece on top of the front piece, right side down.
- Align all edges and insert stitch markers to hold in place.
- Using a 5.0 mm hook, join MC and sc around the perimeter, working through all layers.
- Start on one side, sc into each st and corner (3 sc in corners).
- Sl st to the first sc to close the round. Fasten off and weave in ends.
- Block if desired.
Beginner Tips for a Neat Cushion Cover
- Keep your work organized – use stitch markers to help track your pattern.
- Maintain even tension – this will ensure your stitches and bobbles come out beautifully.
- Check your size regularly – make sure your pieces match up as you go along.
Common Mistakes (and How to Fix Them)
- "My cushion cover is too small." – This might be due to incorrect gauge. Make sure to check your swatch and adjust your hook size.
- "The bobbles look uneven." – This can happen if your tension varies. Try to keep an even grip on your yarn.
- "The stitches seem loose." – If your work feels too loose, practice keeping your tension consistent and avoid crocheting too quickly.
How to Care for Your Cushion Cover
To keep your cushion cover looking fresh, wash it on a gentle cycle in cold water and air dry flat to maintain its shape.
FAQ
Can I customize the size?
Yes! Simply adjust the chain length in the starting row to create a larger or smaller cover, keeping in mind the gauge.
What if I can’t find the yarn colors listed?
You can substitute with any worsted weight yarn in colors you love. Make sure to do a gauge swatch!
How long will this take me to finish?
This project takes about 9–11 hours in total, depending on your experience and how much time you have to dedicate.
Want a matching set? Check out our crochet purse patterns or see all our free crochet bag patterns.
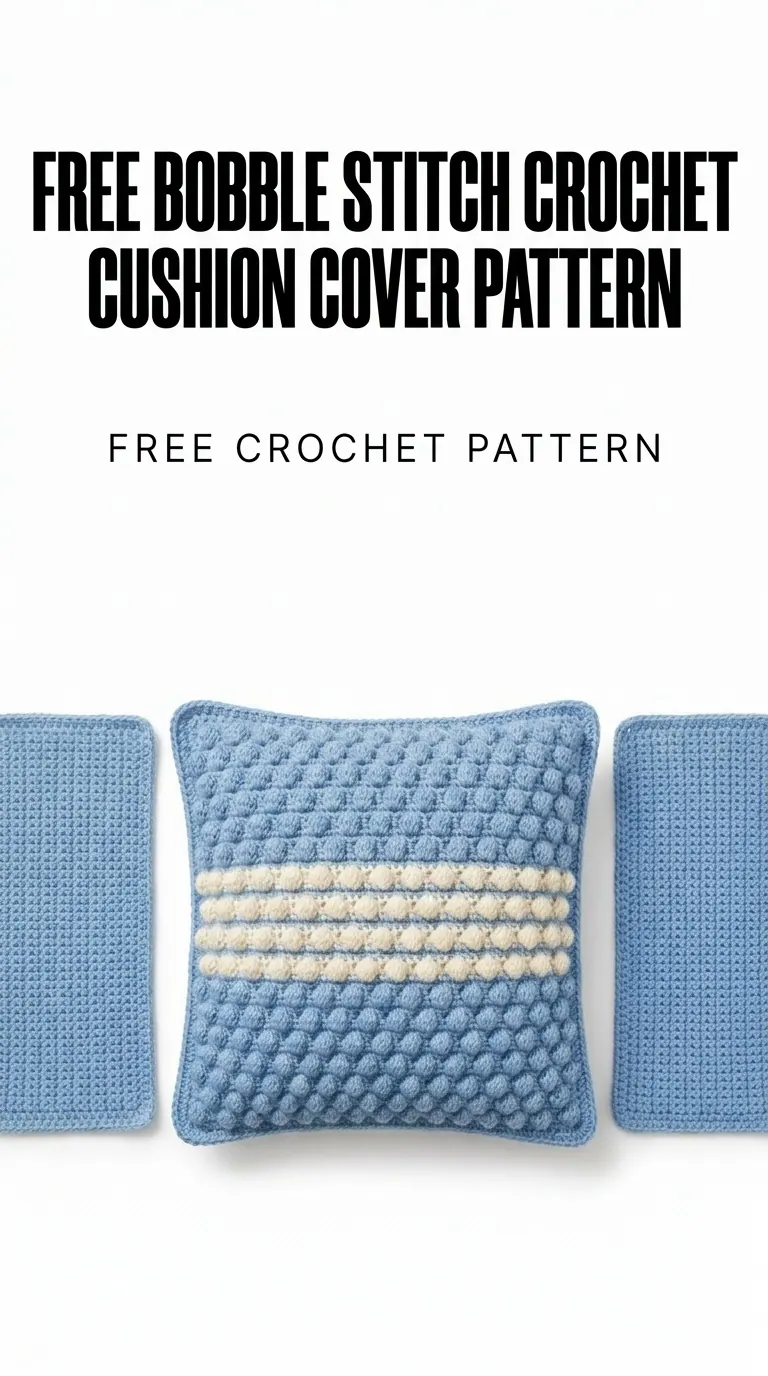
Image shown for inspiration — your finished result may vary slightly.