Crochet Detachable Pouch for Any Bag Strap (Free)
A free crochet detachable pouch pattern for beginners, featuring easy steps and helpful tips for making a stylish accessory.
Published · by Sara
- Skill level
- Beginner
- Yarn weight
- Worsted (4)
- Hook size
- 5.5 mm (I-9)
- Yardage
- about 300 yards
- Gauge
- 12 dc and 8 rows = 10 cm
- Time
- 3 hours
- Sizes
- 12.7 cm × 10.2 cm (5 in × 4 in)
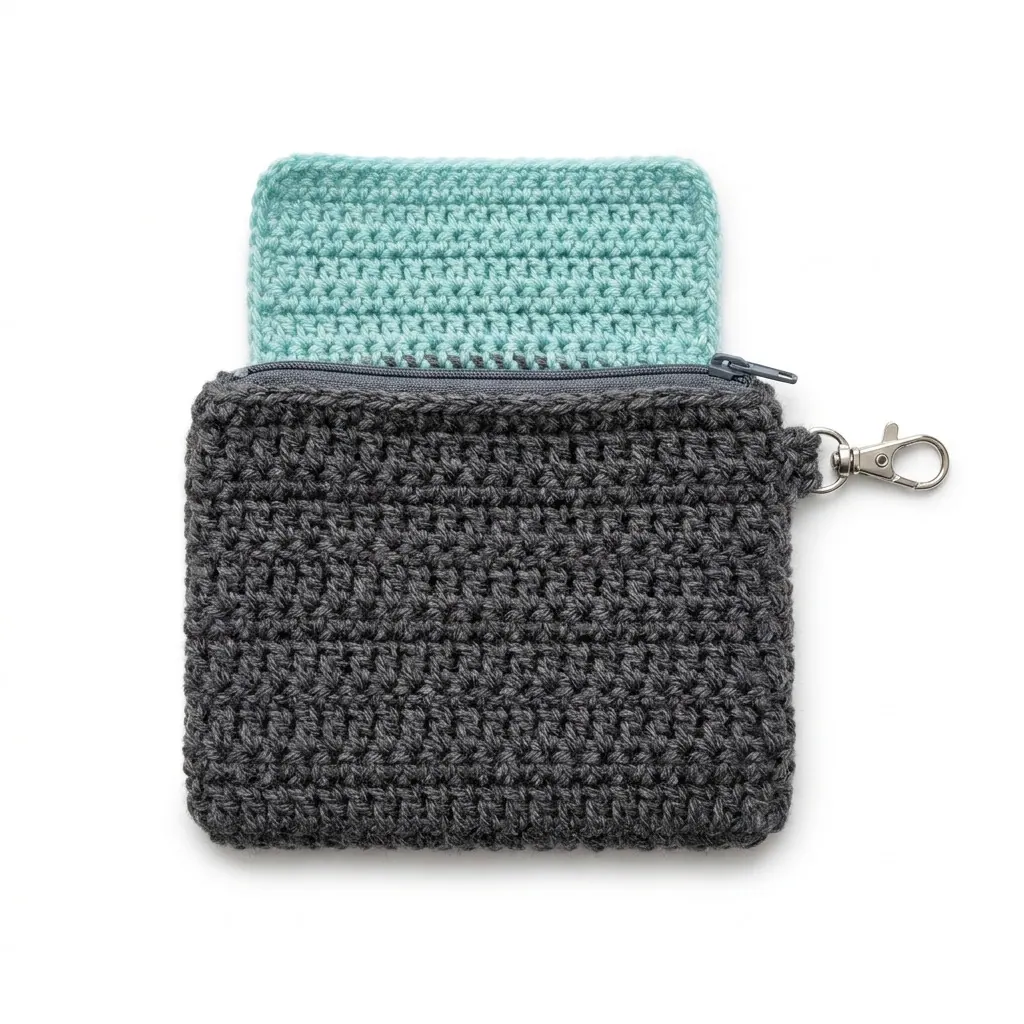
This crochet detachable pouch pattern makes a stylish and functional accessory that you can clip onto any bag strap. It’s perfect for carrying small essentials like keys, coins, or cards. With a modern look and simple stitches, this project is both enjoyable and great for beginners.
You'll learn how to create a textured pouch and flap, attach a zipper, and add a lobster clasp. It's an excellent way to practice your double crochet and finishing techniques!
Why You'll Love This Detachable Pouch
- Stylish and functional – perfect for keeping your small items organized and easily accessible.
- Quick to make – you can finish this pouch in about 3 hours.
- Customizable – change the colors for a personal touch or use variegated yarn for added flair.
- Great for beginners – simple stitches and straightforward assembly make it super doable!
Is This Pattern Good for Beginners?
Yes! This project uses basic double crochet stitches and simple assembly techniques. You'll learn new skills while making something useful.
Crochet Abbreviations (US Terms)
- ch – chain
- dc – double crochet
- sl st – slip stitch
- sp – space
- st – stitch
- sc – single crochet
Size and Gauge
- Finished size: Approximately 12.7 cm × 10.2 cm (5 in × 4 in)
- Gauge: 12 dc and 8 rows = 10 cm (4 in) in double crochet.
To check your gauge, make a swatch of 20 dc in a square, then measure. Adjust your hook size as needed to match the gauge.
Step 1: Making the Pouch Body
The pouch body is worked in rows. Start with the foundation chain.
- Ch 22.
- Row 1: Dc in 4th ch from hook, dc in each ch across (20 dc).
- Row 2: Ch 2, turn, dc in each st across (20 dc).
- Row 3: Ch 2, turn, dc in the back loop only of each st across (20 dc).
- Row 4–10: Repeat Row 2 (20 dc each).
- Row 11: Ch 2, turn, dc in first, dc2tog across to last st, dc in last (11 dc).
- Row 12: Ch 2, turn, dc in each st across (11 dc).
- Row 13: Ch 2, turn, dc in the back loop only of each st across (11 dc).
- Row 14–18: Repeat Row 12 (11 dc each).
- Row 19: Ch 2, turn, dc in first, dc2tog across to last st, dc in last (6 dc).
- Row 20: Ch 1, turn, sc across (6 sc).
- Fasten off, leaving a long tail for seaming.
Step 2: Making the Pouch Flap
The flap is worked separately and then sewn onto the main body.
- Flap Foundation: Ch 10.
- Row 1: Dc in 4th ch from hook, dc in each ch across (8 dc).
- Row 2–5: Ch 2, turn, dc in each st across (8 dc).
- Row 6: Ch 2, turn, dc in first, dc2tog across to last st, dc in last (5 dc).
- Row 7: Ch 2, turn, dc in each st across (5 dc).
- Row 8: Ch 2, turn, dc in the back loop only of each st across (5 dc).
- Row 9: Ch 2, turn, dc in first, dc2tog across to last st, dc in last (3 dc).
- Row 10: Ch 1, turn, sc across (3 sc).
- Fasten off, leaving a long tail for seaming.
Step 3: Assembly & Finishing
- Seaming: Align the top of the pouch with the flap. Using the long tail from the main body, sew the flap in place securely with a whip stitch on the back.
- Adding the Zipper: Pin the zipper onto the top opening of the pouch. Using a tapestry needle and the same yarn, slip stitch along the zipper edge to attach it to the pouch.
- Attach Lobster Clasp: Use a small piece of leftover yarn to attach the lobster clasp to the side of the pouch, creating a loop big enough for the clasp to fit through.
- Weaving in Ends: Weave in all remaining ends using a tapestry needle.
Beginner Tips for a Neat Detachable Pouch
- Stay organized – keep your materials and tools close at hand.
- Check your tension regularly to ensure consistent sizing.
- Measure your work as you go to make sure it matches the finished dimensions.
Common Mistakes (and How to Fix Them)
- "My pouch is too small." – You may have miscounted your stitches. Double-check that you're following the pattern accurately.
- "The stitches are uneven." – This often happens with inconsistent tension. Practice keeping an even grip while crocheting.
- "The zipper isn't aligned." – Make sure to pin the zipper well before stitching so it stays in place.
How to Care for Your Detachable Pouch
Hand wash in cold water and lay flat to dry. Avoid bleach and ironing to keep your pouch looking its best.
FAQ
Can I customize the size?
Yes! You can adjust the foundation chain to make a larger or smaller pouch. Just remember to keep the proportions the same for the main body and flap.
What if I don’t have a lobster clasp?
You can use any clip or keychain ring to attach the pouch to your bag strap. Get creative!
How long will it take to make?
This project takes about 3 hours in total. It can be done in smaller sessions if you like.
This pouch provides a functional accessory that can be customized to fit any style or need. Happy crocheting!
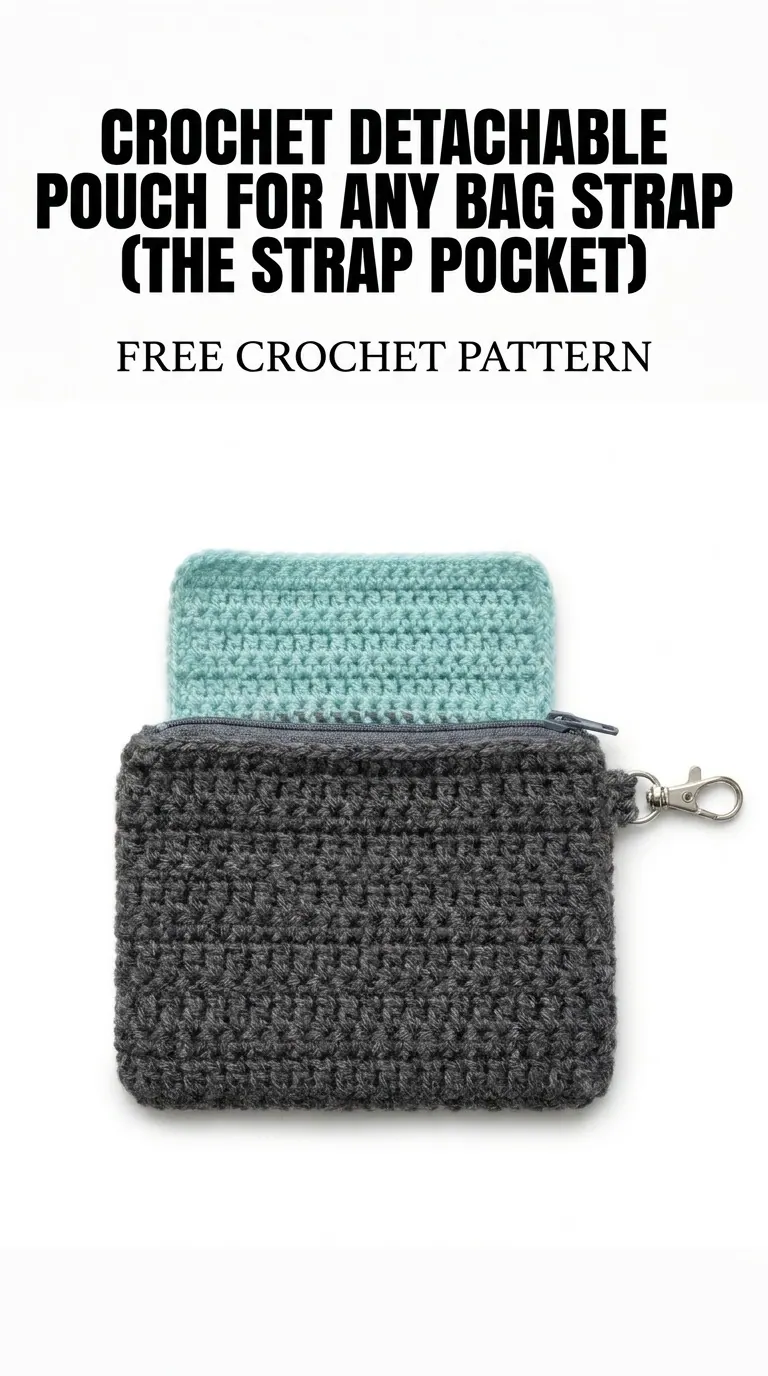
Image shown for inspiration — your finished result may vary slightly.