Crochet Face Scrubby Drying Line Pattern for Beginners
A free, beginner-friendly pattern for a crochet face scrubby drying line with easy steps and tips for creating functional decor.
Published · by Sara
- Skill level
- Beginner
- Yarn weight
- Worsted (4)
- Hook size
- 5 mm (H-8)
- Yardage
- approximately 240 yards
- Gauge
- 12 sts and 14 rows = 10 cm
- Time
- approximately 4 hours
- Sizes
- 91 cm (36 in)
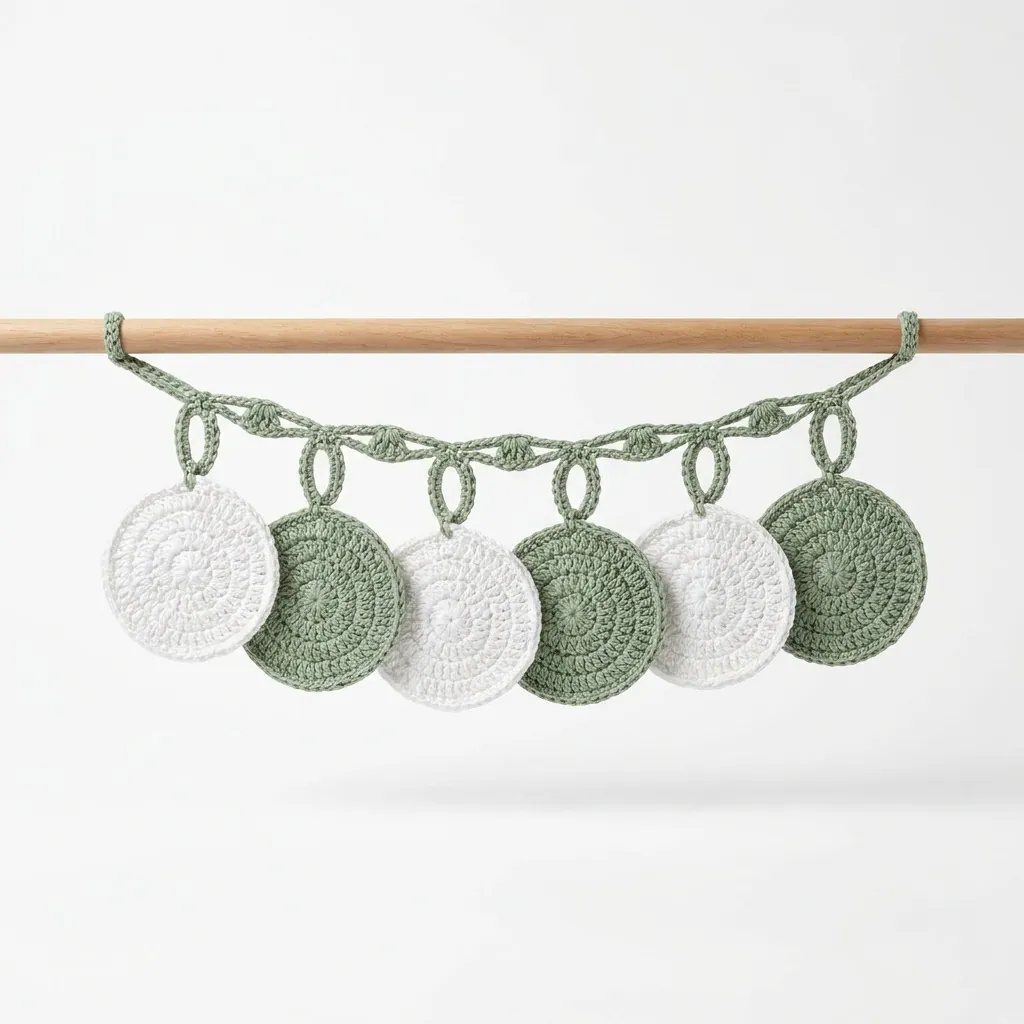
This crochet face scrubby drying line pattern makes a charming and practical accessory to hold your handmade scrubbies for easy drying and display. The design features loops for hanging, and the project is not only straightforward but enjoyable to crochet. You’ll be using basic stitches like chains and double crochet, ensuring that you’re learning while creating something beautiful.
This project suits those who want to reduce waste and be more eco-friendly while also providing a delightful way to keep your scrubbies handy. Let’s get started!
Why You'll Love This Crochet Face Scrubby Drying Line
- Eco-friendly – a delightful way to use your handmade scrubbies and reduce waste.
- Easy to customize – experiment with colors and create unique scrubbies!
- Practical design – perfect for keeping your scrubbies organized and well-ventilated.
- Quick project – complete it in just a few hours, making it ideal for gift-giving.
Is This Pattern Good for Beginners?
Yes! You will be working with basic stitches, and the pattern is easy to follow. Plus, you’ll learn how to create both scrubbies and a drying line.
Crochet Abbreviations (US Terms)
- ch – chain
- sl st – slip stitch
- sc – single crochet
- dc – double crochet
- st(s) – stitch(es)
Gauge and Finished Size
- Gauge: 12 sts and 14 rows = 10 cm (4 in) in double crochet.
- Finished size: Drying line approximately 91 cm (36 in) long; each scrubby measures approximately 10 cm (4 in) in diameter.
Step 1: Crochet Face Scrubbies
The scrubbies are made individually. Make 6 scrubbies total.
Foundation Round:
With Color A, ch 4, join with a sl st to form a ring. (1 ring)Round 1:
Ch 3 (this counts as your first dc), dc 11 into the ring. Join with sl st to the top of ch 3. (12 sts)Round 2:
Ch 3, dc in same st, 2 dc in each st around. Join with sl st to the top of ch 3. (24 sts)Round 3:
Ch 3, *dc in next st, 2 dc in next st; repeat from * around. Join with sl st to the top of ch 3. (36 sts)Rounds 4–5:
Ch 3, dc in each st around. Join with sl st to the top of ch 3. (36 sts)Finishing Round:
Ch 1, sc in each st around. Join with sl st to the first sc. Fasten off. Weave in ends.
Repeat these steps to make a total of 6 face scrubbies.
Step 2: Crochet Drying Line
The drying line will hold your scrubbies.
Foundation:
With Color B, ch 4, join with a sl st to form a ring. (1 ring)Round 1:
Ch 1, sc in ring, ch 2, *sc in ring, ch 2; repeat from * 4 times total. Join with sl st to first sc. (5 loops)Round 2:
Working in the ch 2 spaces, ch 3, 2 dc in same ch 2 space, *ch 1, 3 dc in next ch 2 space; repeat from * around. Join with sl st to top of ch 3. (20 sts)Finishing Round:
Ch 1, sc in each st around. Join with sl st to first sc. Fasten off, leaving a long tail for attaching to dowel.Assembly:
Tie the completed drying line onto the wooden dowel or branch evenly spaced. Make sure the loops are wide enough to hang the scrubbies comfortably.
Assembly & Finishing
Attach the drying line securely to the dowel by tying knots at each end. Ensure it’s evenly balanced. Weave in all ends from the scrubbies and drying line.
Beginner Tips for a Neat Crochet Face Scrubby Drying Line
- Keep it tidy – regularly check your work for consistent tension.
- Take your time – don’t rush; enjoy each stitch and step of the process.
- Use stitch markers – if needed, to mark the beginning of rounds for clarity.
Common Mistakes (and How to Fix Them)
- "My scrubbies are too small." – You might not be counting your stitches correctly. Double-check your stitch count in each round.
- "The loops on my drying line are uneven." – This could be due to inconsistent tension. Try to maintain the same tightness throughout.
- "I can't seem to join rounds neatly." – Make sure you’re joining with sl st correctly at the top of the first stitch.
How to Care for Your Crochet Face Scrubby Drying Line
Machine wash on a cold cycle and tumble dry on low or lay flat to dry. Avoid fabric softeners to preserve the scrubbing texture of your face scrubbies.
FAQ
Can I customize the size?
Yes, you can adjust the number of chains or stitches used to create larger or smaller scrubbies and drying lines as needed.
What yarn can I use instead of cotton?
You can use any worsted weight yarn, but be mindful that cotton is best for the scrubbies due to its absorbency and scrubbing texture.
How long will this project take to complete?
The total estimated time is about 4 hours—3 hours for the scrubbies and roughly 1 hour for the drying line.
Want a matching set? Check out our crochet purse patterns or see all our free crochet bag patterns.
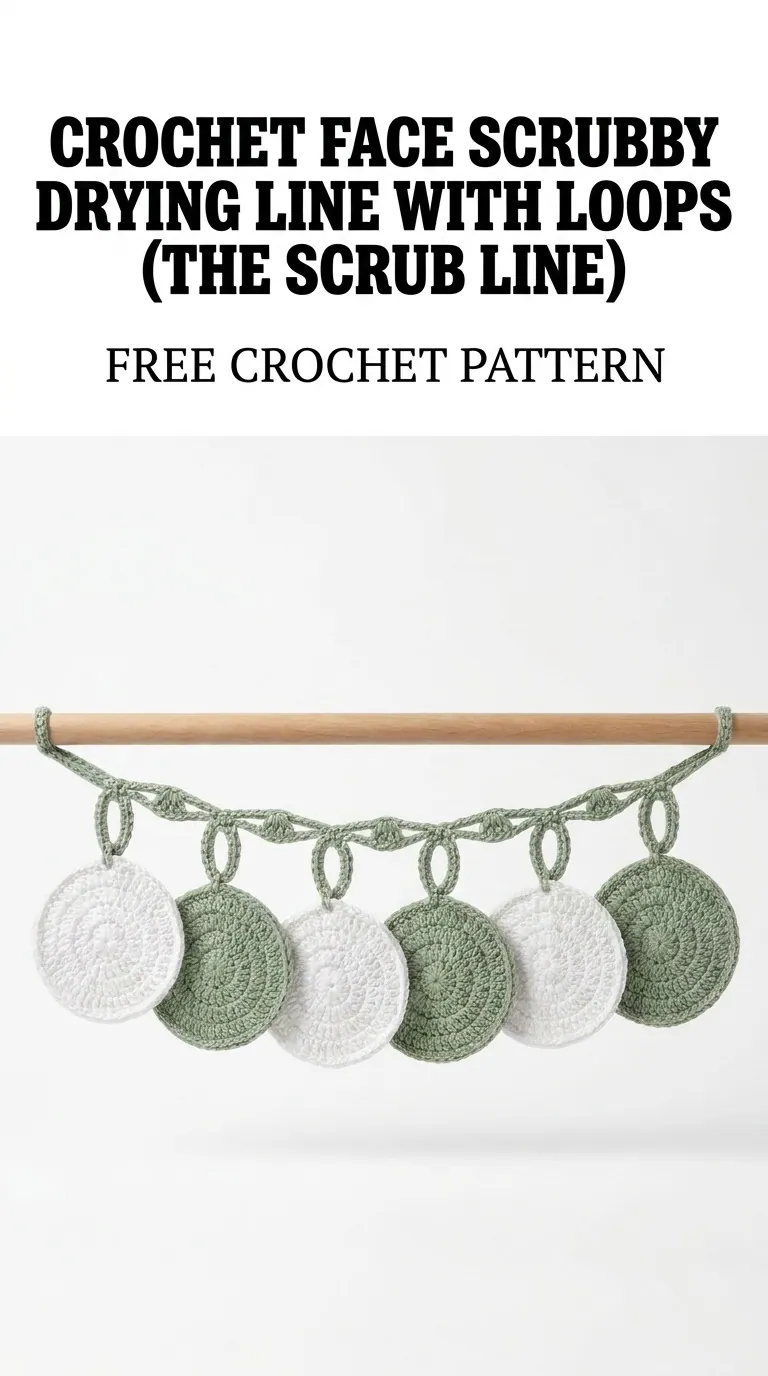
Image shown for inspiration — your finished result may vary slightly.