Crochet Front-Flap Storage Bin Pattern for Beginners
A free crochet storage bin pattern with straightforward steps and helpful tips. Perfect for organizing toys or craft supplies.
Published · by Sara
- Skill level
- Intermediate
- Yarn weight
- Bulky (#5)
- Hook size
- 9.00 mm (K-10.5)
- Yardage
- about 770 yards
- Gauge
- 9 sc and 9 rows = 10 cm
- Time
- 5 hours
- Sizes
- 30.5 × 30.5 × 25.4 cm (12 × 12 × 10 in)
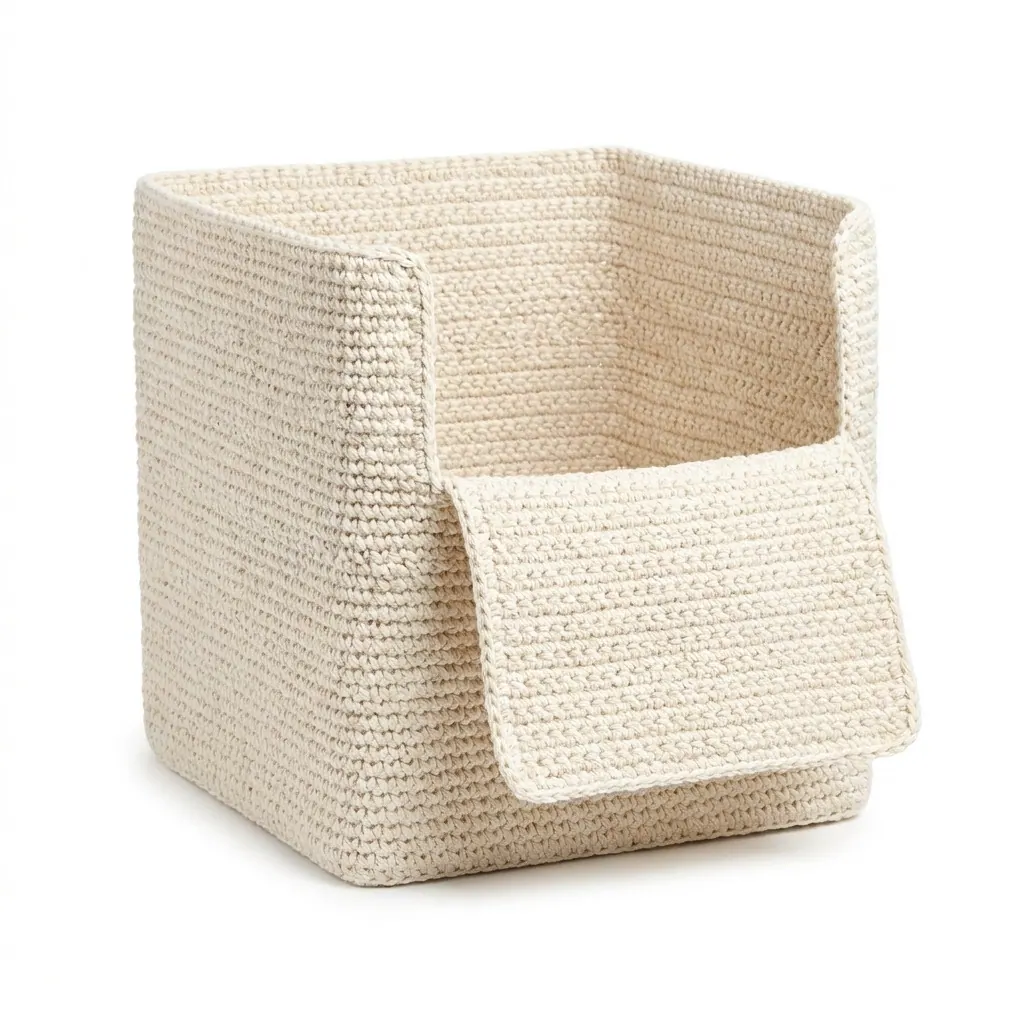
This crochet front-flap storage bin pattern makes a functional and stylish addition to any home. With its clever drop-front design, it's perfect for organizing toys, craft supplies, or miscellaneous items. We’ll be using basic stitches like single crochet and some increases and decreases, making this a great project for intermediate crocheters.
You'll learn how to create a structured bin that can be easily stacked. Plus, you'll enjoy the satisfaction of crafting a useful piece for your space!
Why You'll Love This Crochet Front-Flap Storage Bin
- Multi-functional – ideal for organizing toys, craft supplies, or office items.
- Stylish design – the drop-front feature adds a modern touch to any room.
- Customizable colors – you can easily mix and match yarn colors for a personalized look.
- Stackable convenience – save space by stacking these bins in closets or on shelves.
Is This Pattern Good for Beginners?
Yes! While this pattern is labeled as intermediate, it primarily uses basic stitches. The step-by-step instructions will guide you through the more complex parts, so don’t be afraid to give it a try!
Crochet Abbreviations (US Terms)
- ch – chain
- sc – single crochet
- st – stitch
- sl st – slip stitch
- blo – back loop only
- inc – increase (2 sc in same st)
- dec – decrease (sc2tog - single crochet 2 together)
Size and Gauge
- Finished size: 30.5 × 30.5 × 25.4 cm (12 × 12 × 10 in)
- Gauge: 9 sc and 9 rows = 10 cm (4 in) in single crochet
Check your gauge to ensure the final size matches what you expect. If your swatch is too small, try a larger hook, and if it's too large, switch to a smaller hook.
Step 1: Body of the Bin
The body of the bin is worked in rows.
- Foundation Chain: Ch 50 (50 sts).
- Row 1: Sc in 2nd ch from hook, sc in each ch across (49 sts).
- Row 2: Ch 1, turn. Sc in each st across (49 sts).
- Row 3: Ch 1, turn. Sc in each st across (49 sts).
- Row 4: Ch 1, turn. Inc in first st, sc in each st across to last st, inc in last st (51 sts).
- Rows 5-10: Repeat Row 2 for a total of 6 rows.
- Row 11: Ch 1, turn. Sc in each st across (51 sts).
- Row 12: Ch 1, turn. Dec in first st, sc in each st across to last st, dec in last st (49 sts).
- Rows 13-22: Repeat Row 2 for a total of 10 rows.
- Row 23: Ch 1, turn. Dec in first st, sc in each st across to last st, dec in last st (47 sts).
- Rows 24-30: Repeat Row 2 for a total of 7 rows.
- Row 31: Ch 1, turn. Dec in first st, sc in each st across to last st, dec in last st (45 sts).
- Row 32: Ch 1, turn. Sc in each st across (45 sts).
- Row 33: Ch 1, turn. Inc in first st, sc in each st across to last st, inc in last st (47 sts).
- Rows 34-38: Repeat Row 2 for a total of 5 rows, skipping Row 9.
- Row 39: Ch 1, turn. Sc in next 4 sts, ch 10 (for flap opening), skip next 10 sts, sc in remaining 33 sts (47 sts counted).
- Row 40: Ch 1, turn. Sc in first 4 sts, sc in each of the chains (10), sc in remaining st (47 sts).
- Row 41: Ch 1, turn. Sc in each st across (47 sts).
- Rows 42-46: Repeat Row 2 for 5 rows.
- Final Row 47: Ch 1, turn. Sc in each st across (47 sts).
Step 2: Flap Closure
The flap is created to cover the opening of the bin.
- Row 1: Ch 1, turn. Sc in first 6 sts, ch 10 (flap opening), skip next 10 sts, sc in remaining 21 sts (27 sts counted).
- Row 2: Ch 1, turn. Sc in first 6 sts, sc in each of the chains (10), sc in remaining st (27 sts).
- Rows 3-4: Repeat Row 2 twice.
Assembly & Finishing
- Joining: Fold the side edges of the bottom section to form the walls of the bin. Join with slip stitches or whip stitch.
- Interfacing: Insert stiff interfacing or plastic canvas at the base and sides to help maintain the bin's shape.
- (Optional) Lining: If desired, sew cotton fabric lining to the inside for a clean finish.
- Weaving in Ends: Weave in all loose ends with a tapestry needle for a neat finish.
- Blocking: Block the finished bin to shape using the appropriate blocking technique.
Beginner Tips for a Neat Crochet Front-Flap Storage Bin
- Stay organized by keeping your yarn and tools together.
- Check your tension regularly to ensure even stitches.
- Verify your size as you go, especially when working with the base.
Common Mistakes (and How to Fix Them)
- "My bin looks floppy." – This might be due to not using interfacing. Make sure to add stiff interfacing for shape.
- "I don't understand where to join." – If the joins are unclear, try laying out the edges before sewing to see how they fit together.
- "I skipped stitches." – Count your stitches after each row to catch mistakes early.
How to Care for Your Crochet Front-Flap Storage Bin
Hand wash your bin in cold water and lay it flat to dry. This will help maintain its shape and ensure it lasts for a long time.
FAQ
Can I customize the size?
Yes, you can easily adjust the number of foundation chains to create a larger or smaller storage bin. Just remember to maintain the same stitch counts in the following rows.
What type of yarn can I use?
You can substitute for any bulky weight (#5) cotton yarn. Different brands may vary slightly, so checking gauge is key!
How long will this project take?
The estimated project completion time is about 5 hours, including finishing touches.
Want a matching set? Check out our crochet purse patterns or see all our free crochet bag patterns.
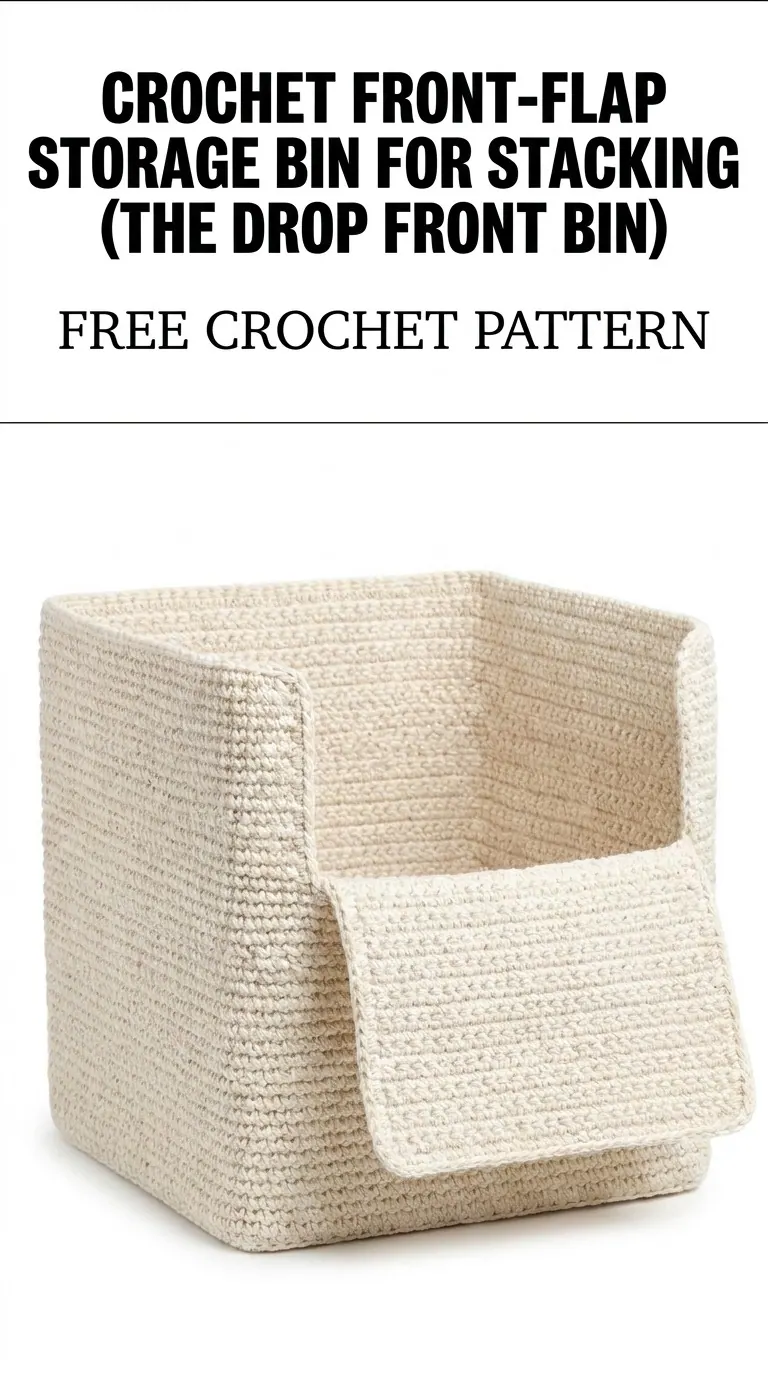
Image shown for inspiration — your finished result may vary slightly.