Crochet Hair Dryer Holster Pattern for Beginners
A free, beginner-friendly pattern for a stylish crochet hair dryer holster to keep your bathroom organized. Clear steps make it easy to follow!
Published · by Sara
- Skill level
- Beginner
- Yarn weight
- Worsted (4)
- Hook size
- 5.5 mm (I-9)
- Yardage
- about 200 yards
- Gauge
- 14 dc and 8 rows = 10 cm
- Time
- approximately 4 hours
- Sizes
- 25 × 15 cm (10 × 6 in)
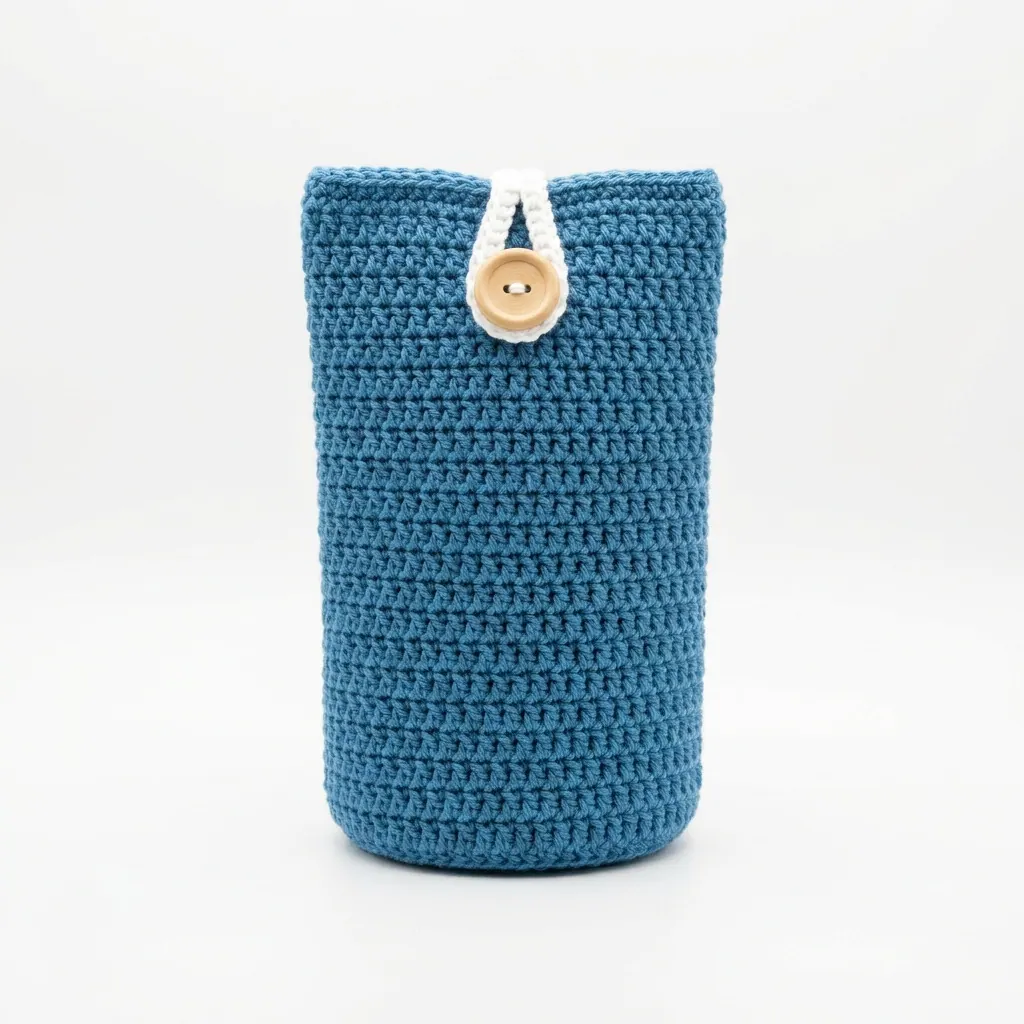
This crochet hair dryer holster is designed to hang neatly on bathroom hooks, providing easy access to hair dryers while keeping your space organized. The finished item features a stylish design that suits a variety of bathroom styles and is made using simple stitches, making it enjoyable to create.
This pattern is perfect for anyone wanting to add a touch of handmade charm to their bathroom decor. You’ll learn to work in rows and create a button loop while finishing with a neat edging!
Why You'll Love This Hair Dryer Holster
- Stylish and functional – keeps your hair dryer accessible while adding a personal touch to your bathroom.
- Easy to customize – adjust the size by changing the initial chain length for different hair dryers.
- Quick and practical – you can finish it within approximately 4 hours, perfect for last-minute gifting.
- Beginner-friendly – straightforward instructions make it accessible for those new to crochet.
Is This Pattern Good for Beginners?
Yes! If you know how to chain, single crochet, and double crochet, you're ready to go. The steps are clear and the stitches are easy to follow.
Crochet Abbreviations (US Terms)
- ch – chain
- sl st – slip stitch
- sc – single crochet
- dc – double crochet
- st(s) – stitch(es)
- – repeat instructions that follow
Size and Gauge
- Finished Size: Approximately 25 cm tall and 15 cm wide at the base (10 × 6 in).
- Gauge: 14 dc and 8 rows = 10 cm (4 in).
To check gauge, use the specified yarn and hook size. If your gauge does not match, switch to a larger or smaller hook until you achieve the desired measurement.
Step 1: Making the Base
The base is worked in rows.
- Ch 25.
- Row 1: Sc in 2nd ch from hook, sc in next 22 ch, turn. (23 sc)
- Row 2: Ch 1, sc in each st across, turn. (23 sc)
- Repeat Row 2 until the base measures 15 cm (6 in) wide. Finish with a sl st to the last st and cut the yarn.
Step 2: Crochet the Body
The body is worked in rounds now. 5. Join Main Color at any corner of the base. 6. Row 1: Ch 2 (counts as first dc), dc in each of the next 23 sc. Turn. (24 dc) 7. Row 2: Ch 2, dc in each st across. Turn. (24 dc) 8. Repeat Row 2 until the body measures 25 cm (10 in) in height. (15 rows total)
Step 3: Adding the Top Edging
- Ch 1, sc in the first st, *ch 1, skip next st, sc in next st; repeat from * to the end. (12 sc)
- Fasten off and weave in ends.
Adding the Button Loop
- With Bright White, ch 10.
- Row 1: Sc in 2nd ch from hook and in each ch across. (9 sc)
- Fasten off, leaving a long tail for sewing. Sew one end of the button loop to the top edge of the holster, aligning the other end to the back to create a loop for the button.
Finishing Touches
- Attach the 1.5-inch wooden button on the opposite side of the loop on the top edge to secure the hair dryer snugly.
- Weave in all loose ends using the tapestry needle.
- For a polished finish, block the holster to even out the stitches.
Beginner Tips for a Neat Hair Dryer Holster
- Keep your workspace tidy – organize your yarn and tools to make the process smoother.
- Maintain even tension – try to keep your stitches consistent for a polished look.
- Check your size – measure as you go to ensure your project comes out just right.
Common Mistakes (and How to Fix Them)
- My bag is too small. – You might have chained too few. Make sure to start with a length that meets your hair dryer size.
- The stitches are uneven. – This can happen with tension. Take a moment to relax while crocheting to find a comfortable grip.
- There are gaps in the top edging. – You may have skipped stitches. Count your stitches to ensure you're doing the pattern correctly.
How to Care for Your Hair Dryer Holster
Hand wash your holster in cold water, then lay it flat to dry. This will maintain its shape and keep it looking great over time.
FAQ
Can I customize the size?
Yes! You can adjust the initial chain length in multiples of 2 to widen or narrow the base as needed.
What yarn can I use as a substitute?
You can use any worsted weight (Category 4) cotton yarn for this project. Just ensure it has a comparable gauge for the best fit.
How long will it take to make?
It should take approximately 4 hours in total, with about 1 hour for the base, 2 hours for the body, and 1 hour for the top edging and assembly.
Want a matching set? Check out our crochet purse patterns or see all our free crochet bag patterns.
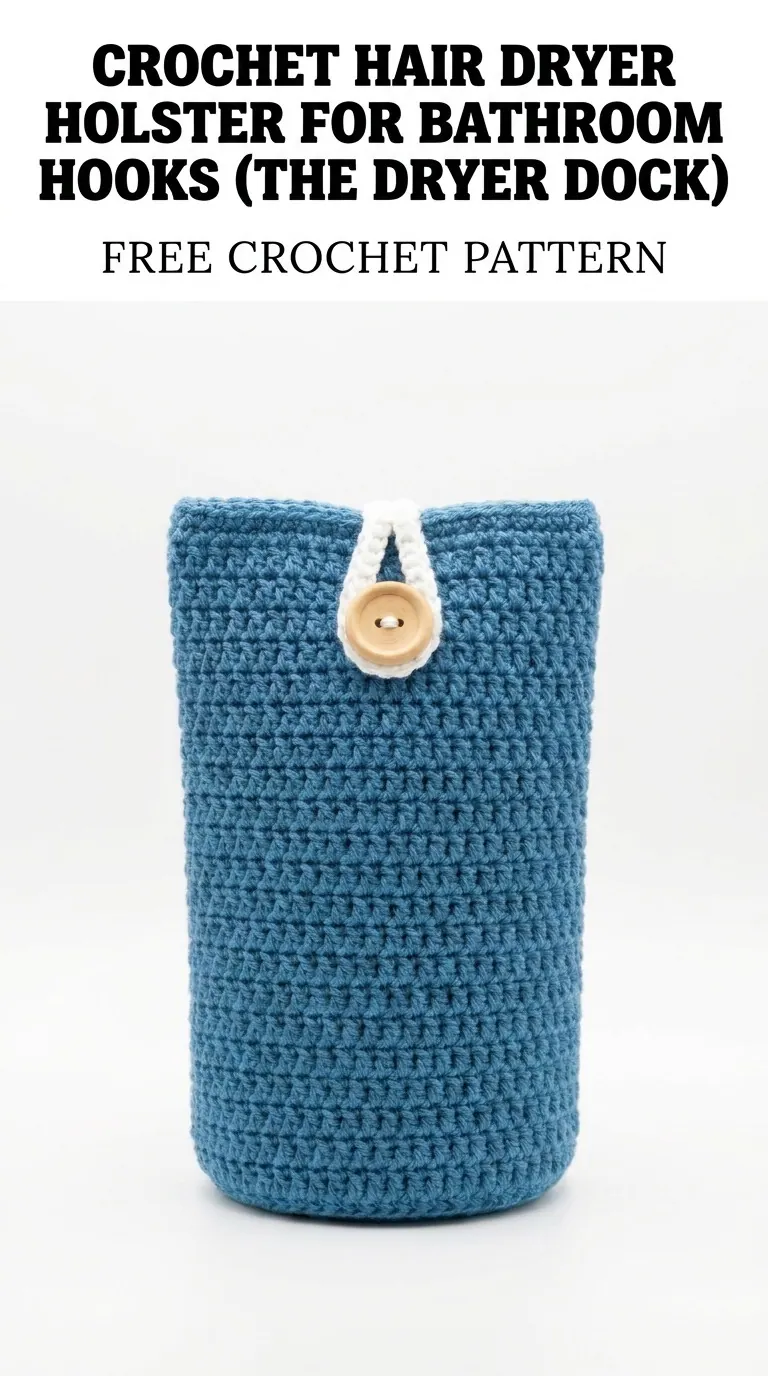
Image shown for inspiration — your finished result may vary slightly.