Crochet Kids Backpack That Unfolds Into a Sit Mat Pattern for Beginners
A free, beginner-friendly backpack crochet pattern offering clear steps to create a fun and practical kids' backpack that unfolds into a sit mat.
Published · by Sara
- Skill level
- Intermediate
- Yarn weight
- Worsted (4)
- Hook size
- 5.0 mm (H-8) and 6.0 mm (J-10)
- Yardage
- about 400 yards main color, 100 yards accent color, 50 yards lining color
- Gauge
- 12 dc and 7 rows = 10 cm
- Time
- 7 hours
- Sizes
- 30 × 38 cm (12 × 15 in), 76 × 76 cm (30 × 30 in)
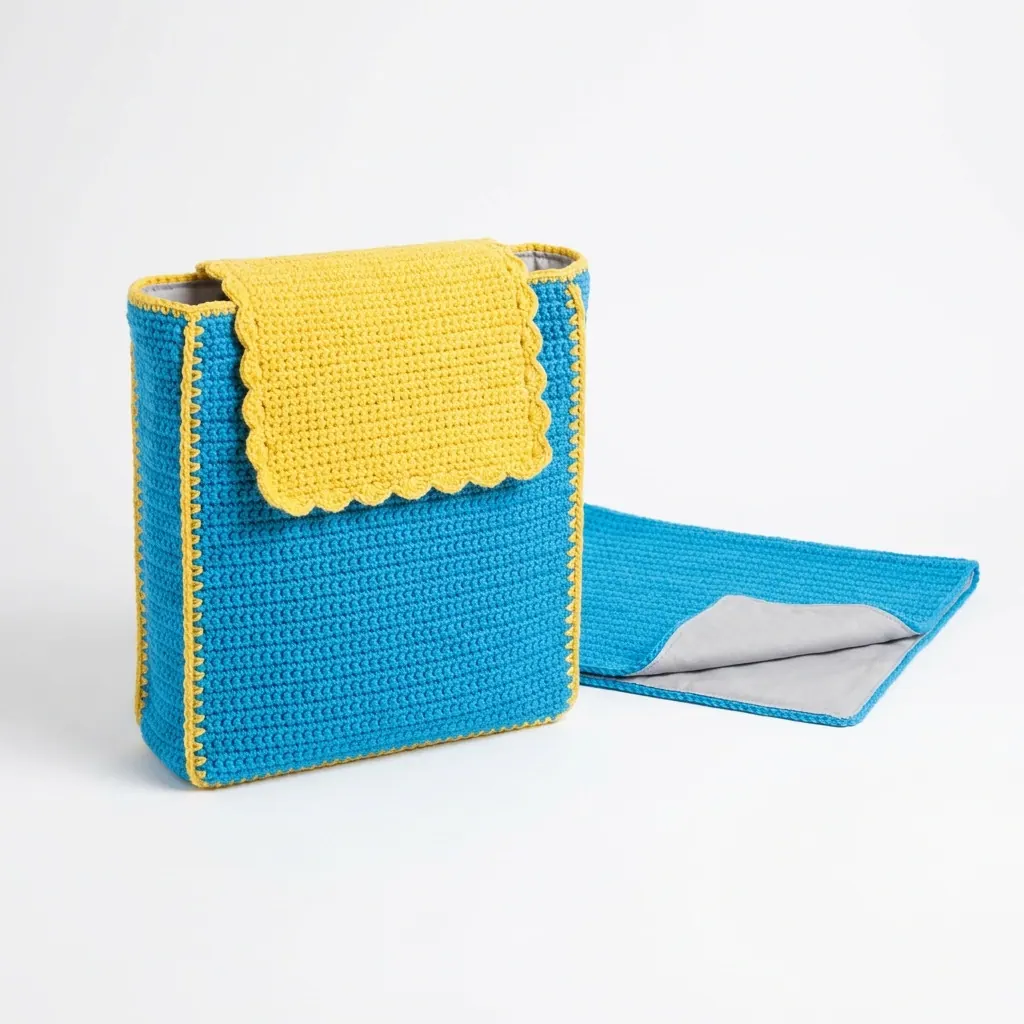
This crochet kids backpack pattern makes a delightful and practical accessory that unfolds into a comfy sit mat. It's an excellent project for adventurous kids and can be used for school, picnics, or playdates. You'll learn to combine basic stitches like double crochet and single crochet to create something functional and fun.
This pattern is perfect for those who want to create a useful project for children, as it offers both practicality and an opportunity to express creativity through color choices.
Why You'll Love This Backpack
- Fun and functional – it doubles as a backpack and sit mat.
- Easy to customize – pick your favorite colors or add embellishments.
- Engaging project – you'll stay motivated from start to finish.
- Suitable for kids – perfect for school or outdoor adventures.
Is This Pattern Good for Beginners?
Yes! While this project is labeled as intermediate, confident beginners can tackle it with some patience. You'll learn to work in rounds, change colors, and sew fabric, making it a rewarding experience.
Crochet Abbreviations (US Terms)
- ch – chain
- dc – double crochet
- sc – single crochet
- sl st – slip stitch
- st(s) – stitch(es)
- sk – skip
- inc – increase (2 stitches in the same stitch)
Size and Gauge
- Finished Size:
- Backpack: 30 × 38 cm (12 × 15 in)
- Sit Mat: 76 × 76 cm (30 × 30 in)
- Gauge: 12 dc and 7 rows = 10 cm (4 in)
Step 1: Backpack Body
The backpack body is made with double crochet stitches and some single crochet for stability.
- With MC, ch 39. (38 sts)
- Row 1: Dc in 4th ch from hook and in each ch across. Turn. (36 sts)
- Row 2-30: Ch 3, dc in each st across. Turn. (36 sts)
- Row 31: Ch 1, sc in each st across. Turn. (36 sts)
- Row 32: Ch 1, sc in each st across, change to AC. (36 sts)
- Row 33-34: Ch 1, sc in each st across with AC. (36 sts)
- Row 35: Ch 3, dc in each st across with MC. Turn. (36 sts)
- Row 36-40: Repeat Rows 2-5.
Step 2: Flap
Our flap is the top of the backpack, providing a secure closure.
- Row 1: Ch 20. (19 sts)
- Row 2: Dc in 4th ch from hook and in each ch across. Turn. (18 sts)
- Row 3-5: Ch 3, dc in each st across. Turn. (18 sts)
- Row 6: Ch 1, sc in each st across. Turn. (18 sts)
- Row 7: Ch 1, sc in each st across, change to AC. (18 sts)
- Row 8: Ch 1, sc in each st across. (18 sts)
Step 3: Sides
We will add sides next to give the backpack some height.
- With MC, ch 2.
- Round 1: Sc around the entire edge of the backpack body and flap; sl st to first sc to join. (36 sts)
- Round 2: Ch 1, sc in each sc around; join. (36 sts)
- Repeat Round 2 until the side is approximately 5 cm (2 in) high.
- Fasten off and weave in all ends.
Step 4: Lining
Adding a lining keeps everything neat and adds comfort.
- Cut the fabric into 2 pieces measuring 76 × 76 cm (30 × 30 in) and 30 × 38 cm (12 × 15 in).
- Pin the fabric pieces inside the crocheted backpack, ensuring the lining is smooth.
- Sew the lining to the top edge of the backpack body.
Finishing Tip: Weave Ends Neatly
- Fold the backpack in half and align the top edges, creating the backpack shape.
- Attach plastic snaps or Velcro on the inside top edges of the backpack.
- Use tapestry needle to weave in all loose ends.
- Block the backpack and mat if desired for crisp edges.
Beginner Tips for a Neat Backpack
- Keep your yarn organized, so it doesn't tangle.
- Maintain an even tension throughout your stitches for a consistent look.
- Check your dimensions regularly to ensure a perfect fit.
Common Mistakes (and How to Fix Them)
- "My backpack doesn't hold its shape." – This may be due to crocheting too loosely. Try tightening your tension or using a smaller hook.
- "The flap is too short." – Double-check your row counts, and ensure you follow the pattern closely.
- "My stitches look uneven." – This may be a result of inconsistent tension. You can practice on a swatch to improve.
How to Care for Your Backpack
Hand wash the backpack in cold water and lay flat to dry. This keeps your creation looking fresh and bright for all your adventures.
FAQ
Can I customize the size?
Yes! Simply adjust the number of chains in the base or add/subtract rows as needed while maintaining the stitch count for the sides.
What yarn can I use instead of the recommended one?
You can substitute with any worsted weight (#4) yarn that meets your gauge. Just be sure to check the yarn label for care instructions.
How long will it take to complete this project?
Expect to spend about 7 hours total, around 6 hours for the backpack and 1 hour for the lining and assembly.
Want a matching set? Check out our crochet purse patterns or see all our free crochet bag patterns.
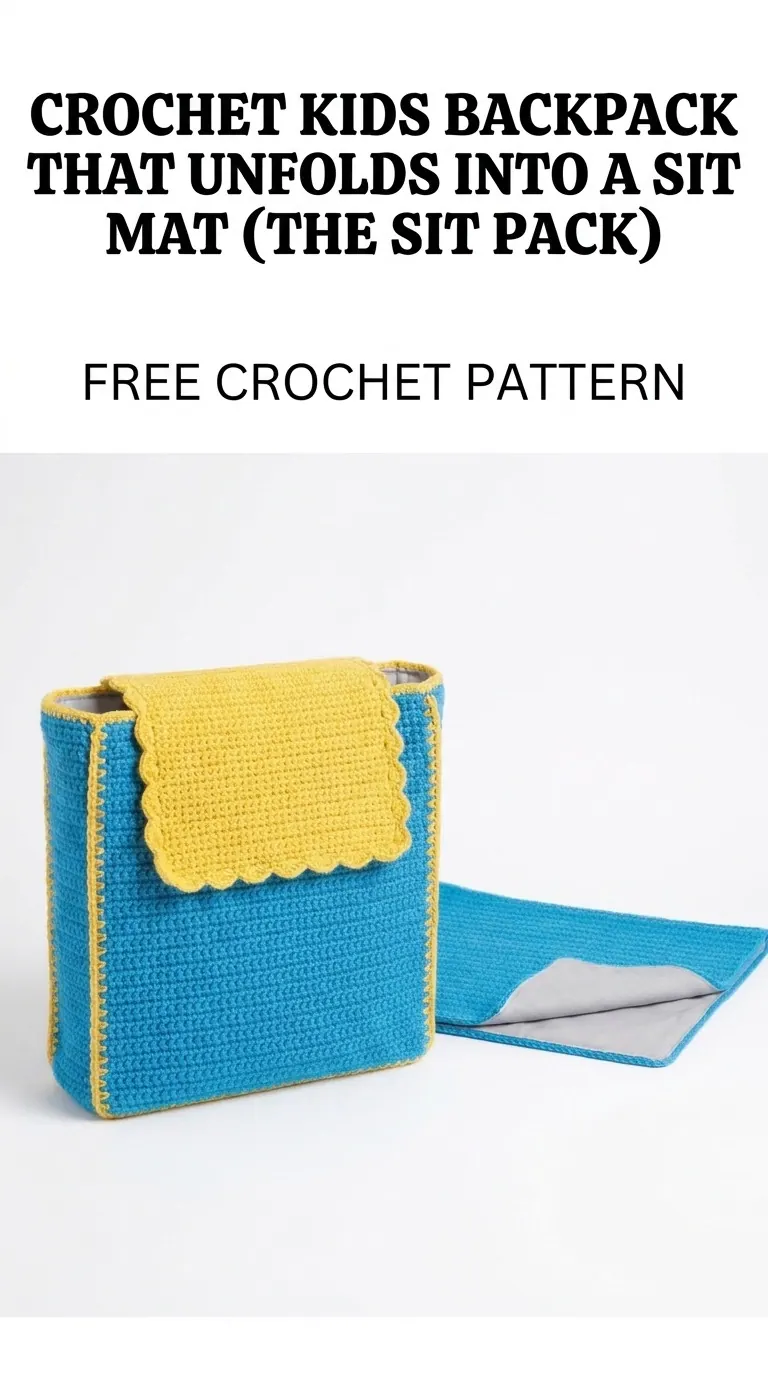
Image shown for inspiration — your finished result may vary slightly.