Crochet Monitor Top Caddy for Sticky Notes (Free)
A free crochet pattern for a monitor top caddy to keep sticky notes organized. Enjoy crafting this easy project that adds charm to your workspace.
Published · by Sara
- Skill level
- Beginner
- Yarn weight
- Worsted (4)
- Hook size
- 5 mm (H-8)
- Yardage
- about 150 yards
- Gauge
- 12 hdc x 10 rows = 10 cm
- Time
- 3 hours
- Sizes
- 25 × 10 cm (10 × 4 in)
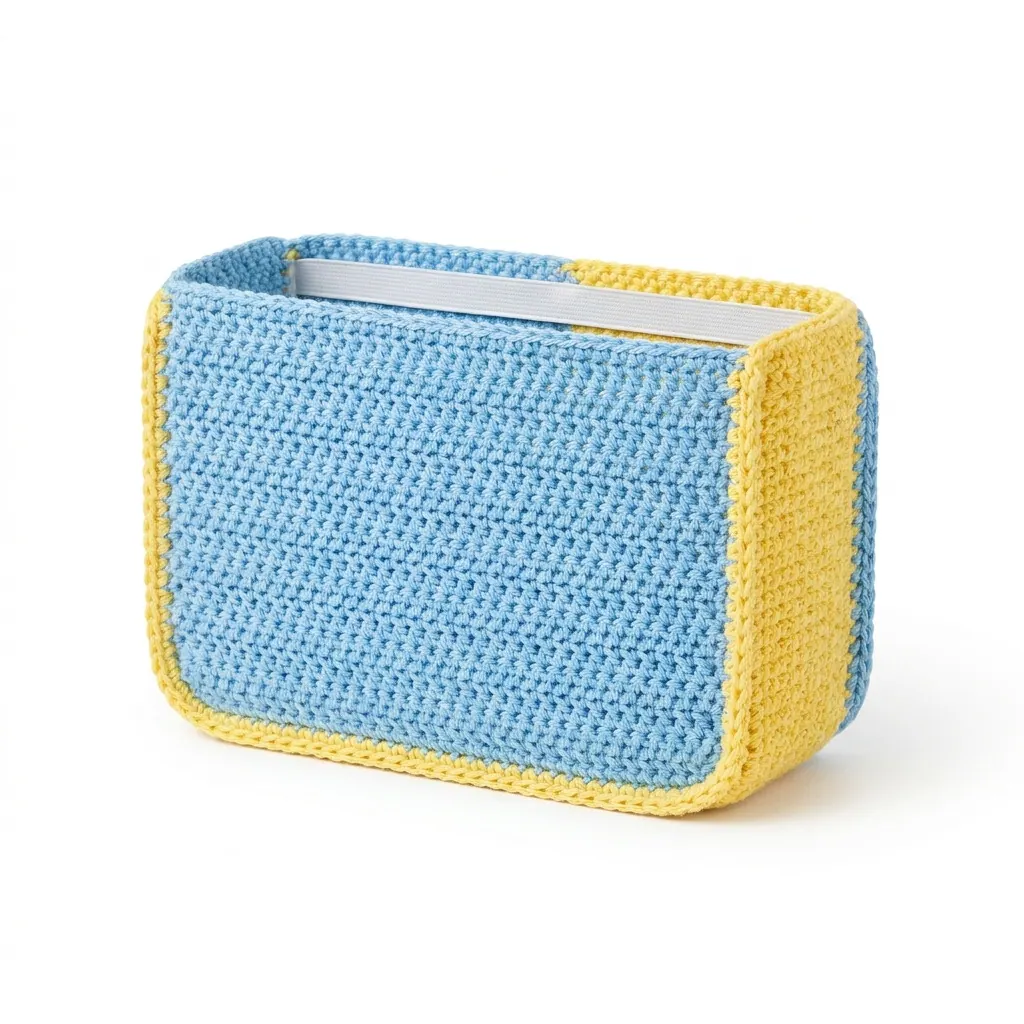
This crochet monitor top caddy is perfect for keeping your sticky notes and small office supplies organized. It's easy and quick to make, using basic half double crochet stitches, and adds a fun handcrafted touch to your workspace.
Whether you're a beginner or just looking for a simple crafting project, you'll enjoy creating this caddy in your favorite colors. It also makes a lovely gift for colleagues or friends!
Why You'll Love This Monitor Top Caddy
- Functional design – provides a neat space for sticky notes and office supplies.
- Quick to make – the entire caddy can be completed in about three hours!
- Customizable colors – easily match it to your personal workspace or mood.
- Easy stitch pattern – perfect for beginners to practice half double crochet.
Skill Level: Easy
You should know how to chain and make half double crochet stitches. This pattern will help you improve your tension and learn to work with color changes.
Crochet Abbreviations (US Terms)
- ch – chain
- hdc – half double crochet
- sl st – slip stitch
- st(s) – stitch(es)
Size and Gauge
- Finished size: 25 × 10 cm (10 × 4 in)
- Gauge: 12 hdc and 10 rows = 10 cm (4 in)
To check gauge, crochet a swatch of 20 hdc for 20 rows. If your swatch is larger than 10 cm, try a smaller hook; if smaller, use a larger hook.
Step 1: Making the Main Body
The main body is worked in rows, alternating colors for added charm.
- Foundation Row: Ch 41.
- Row 1: Hdc in the 3rd ch from the hook, hdc in each ch across. (39 hdc)
- Row 2: Ch 2, turn. Hdc in each st across. (39 hdc)
- Row 3: Ch 2, turn. Hdc in each st across. (39 hdc)
- Row 4: Ch 2, turn. Hdc in each st across. (39 hdc)
- Row 5: Ch 2, turn. Hdc in each st across. (39 hdc)
- Row 6: Ch 2, turn. Hdc in each st across. (39 hdc)
- Row 7: Ch 2, change to Color B. Hdc in each st across. (39 hdc)
- Row 8: Ch 2, turn. Hdc in each st across. (39 hdc)
- Row 9: Ch 2, turn. Hdc in each st across. (39 hdc)
- Row 10: Ch 2, turn. Hdc in the first 10 sts, (increase) hdc in the next st, hdc in each of the next 18 sts, (increase) hdc in the next st, hdc in each of the last 10 sts. (41 hdc)
- Row 11: Ch 2, turn. Hdc in each st across. (41 hdc)
- Row 12: Ch 2, turn. Hdc in each st across. (41 hdc)
- Row 13: Ch 2, turn. Hdc in each st across. (41 hdc)
- Row 14: Ch 2, turn. Hdc in each st across. (41 hdc)
- Row 15: Ch 2, turn. Hdc in each st across. (41 hdc)
- Row 16: Ch 2, change to Color A. Hdc in each st across. (41 hdc)
- Row 17: Ch 2, turn. Hdc in each st across. (41 hdc)
- Row 18: Ch 2, turn. Hdc in each st across. (41 hdc)
- Row 19: Ch 2, turn. Hdc in each st across. (41 hdc)
- Row 20: Ch 2, turn. Hdc in each st across. (41 hdc)
- Row 21: Ch 2, turn. Hdc in each st across. (41 hdc)
- Row 22: Ch 2, turn. Hdc in each st across. (41 hdc)
- Row 23: Ch 2, turn. Hdc in each st across. (41 hdc)
- Row 24 (Last Row): Ch 1, sc in each st across. (41 sc)
Step 2: Side Edging
The side edging will enhance the finished look of your caddy.
- Side Edging: Ch 1, sc down the sides of the caddy. Work 2 sc in the corners for rounding. Join with sl st to the first sc.
Finishing Tip: Weave Ends Neatly
Weave in all ends with the tapestry needle. If you prefer, you can use fabric stiffener to help shape the caddy. Follow the manufacturer’s instructions for application.
If you want extra stability, measure and cut a piece of flat elastic. Sew or weave it into the top to fit snugly around your monitor.
Beginner Tips for a Neat Caddy
- Keep your workspace tidy by organizing your yarn and tools before starting.
- Maintain tension by practicing your half double crochet stitches – it helps create a more polished look!
- Measure your work occasionally to ensure you're staying on track with size.
Common Mistakes (and How to Fix Them)
- "My caddy is too small." – You may have crocheted too tightly. Try relaxing your tension.
- "The edges are uneven." – Make sure to keep your starting chain and row counts consistent.
- "The colors look off." – Double-check you’re following the color changes as instructed.
How to Care for Your Caddy
Hand wash in cold water and lay flat to dry to maintain its shape and color. Avoid bleach, especially for dyed yarns.
FAQ
Can I customize the size?
Yes! You can adjust the length of the foundation chain to make the caddy wider or narrower. Just make sure to maintain the stitch count for even rows.
What yarn can I use?
You can substitute the yarn with any worsted weight (Category 4) yarn. Choose colors that complement your workspace!
How long will this take to make?
The total estimated working time is about 3 hours, which includes making the main body and completing the side edging.
Want a matching set? Check out our crochet purse patterns or see all our free crochet bag patterns.
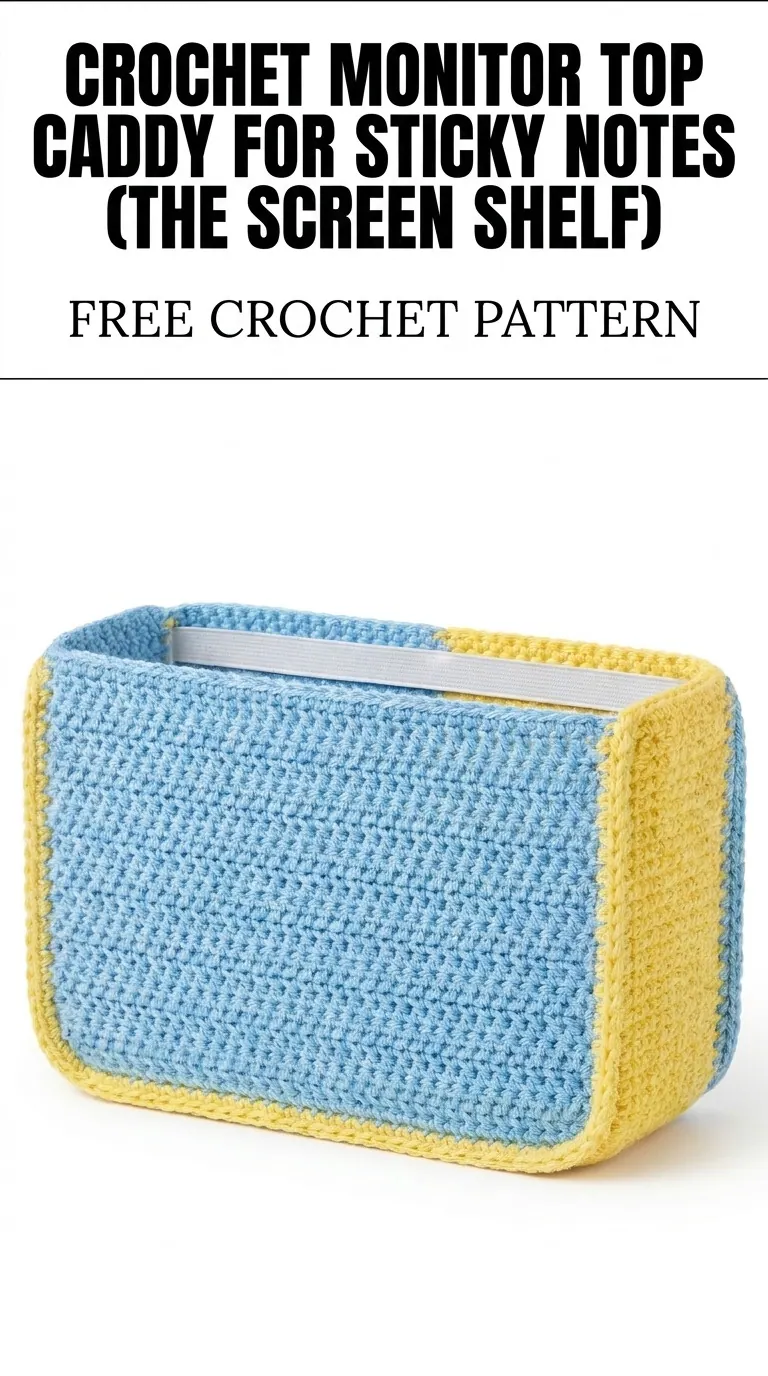
Image shown for inspiration — your finished result may vary slightly.