Crochet Scrunchie With Hidden Zip Pocket Pattern for Beginners
A free crochet scrunchie pattern featuring a hidden zip pocket for essentials. Perfect for beginners with clear steps and tips.
Published · by Sara
- Skill level
- Beginner
- Yarn weight
- Worsted (4)
- Hook size
- 5.0 mm (H-8)
- Yardage
- about 110 yards
- Gauge
- 12 dc and 7 rows = 10 cm
- Time
- 1.5 hours
- Sizes
- 10 cm (4 in)
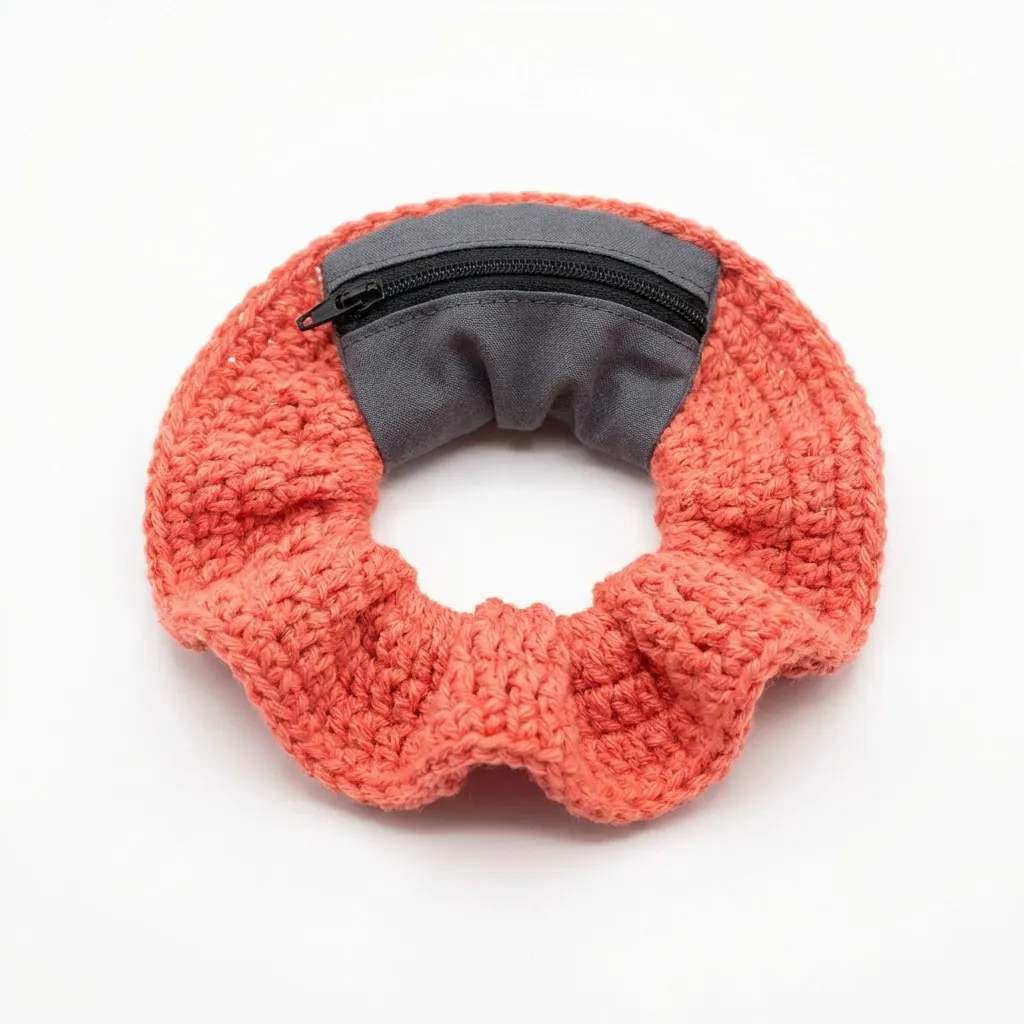
This crochet scrunchie with a hidden zip pocket is a fun and practical accessory! Not only does it keep your hair neatly tied back, but it also features a discreet pocket for your essentials like cash or keys. It’s easy to make, using basic stitches such as double crochet and single crochet, while giving you a chance to learn about working with zippers.
This project is perfect for anyone looking to enhance their crochet skills while creating something useful. You'll learn how to crochet a scrunchie and add a functional pocket.
Why You'll Love This Scrunchie
- Functional Design – With its hidden pocket, this scrunchie is perfect for securely holding small items.
- Quick to Make – You can whip up this project in just about 1.5 hours, making it great for a last-minute gift or accessory.
- Customizable – Choose your favorite colors or even variegated yarn for a personal touch!
- Practical Everyday Use – Ideal for keeping your hair tidy while allowing easy access to your essentials.
Is This Pattern Good for Beginners?
Yes! The scrunchie uses simple stitches and has step-by-step instructions. Plus, you’ll get to try sewing a zipper, which is a great skill to learn.
Crochet Abbreviations (US Terms)
- ch – chain
- dc – double crochet
- st(s) – stitch(es)
- sl st – slip stitch
- yo – yarn over
- RS – Right Side
- WS – Wrong Side
Size and Gauge
- Finished size: 10 cm (4 in) in diameter
- Gauge: 12 dc and 7 rows = 10 cm (4 in)
Make sure to check your gauge: if it doesn’t match, adjust your hook size for the best results.
Step 1: Crochet the Main Body
The main body is worked in rounds.
- Foundation: With Coral yarn, ch 10. Join with a sl st to form a ring.
- Round 1: Ch 3 (counts as first dc), dc in same ring, 9 dc in ring (10 sts).
- Round 2: Ch 3, dc in same st, 2 dc in each st around (20 sts).
- Round 3: Ch 3, dc in next st, 2 dc in next st; repeat from * to * around (30 sts).
- Round 4: Ch 3, dc in next 2 sts, 2 dc in next; repeat from * to * around (40 sts).
- Rounds 5–8: Ch 3, dc in each st around (40 sts). Repeat for 4 rounds.
- Round 9: Ch 1, sc in next 5 sts, 2 sc in next; repeat from * to * around (48 sts).
- Round 10: Ch 1, sc in each st around (48 sts).
- Finishing: Cut yarn, leaving a long tail for sewing. Use the tapestry needle to weave through the last round and pull tight to gather.
You should now have a gathered scrunchie approximately 4 inches in diameter with an elastic core prepared to insert.
Step 2: Create the Pocket
The pocket is worked in rows.
- Foundation: With Charcoal Gray yarn, ch 12.
- Row 1: Dc in 3rd ch from hook, dc in each remaining ch (10 sts).
- Rows 2–4: Ch 2, turn, dc in each st across (10 sts). Repeat for 3 rows.
- Row 5: Ch 1, sc in each st across (10 sts).
- Turn the work with the pocket side facing RS, and attach the zipper to the top side using stitch markers to hold it in place.
- Sew the zipper to the top edge of the fabric using a tapestry needle.
Step 3: Attach Pocket to Scrunchie
- Place the pocket on the inner side of the scrunchie.
- Use the long tail from the scrunchie to sew along the edges of the pocket to ensure it's securely attached.
- Make sure to sew around the zipper area to allow for easy access.
Finishing
- Insert a length of elastic (10 inches) into the scrunchie casing, tying a knot at both ends.
- Weave in all loose ends securely.
- Ensure the zipped pocket is functioning well by zipping and unzipping a few times.
Beginner Tips for a Neat Scrunchie
- Stay organized by keeping all your materials in one place.
- Maintain even tension on your yarn as you crochet to avoid a lumpy appearance.
- Check your size as you go to ensure your scrunchie fits well.
Common Mistakes (and How to Fix Them)
- My scrunchie is too small. – This may happen if your gauge is off. Make sure to check your gauge and adjust your hook size if needed.
- The stitches are uneven. – This could be due to inconsistent tension. Practice keeping an even grip on the yarn.
- The pocket doesn’t close properly. – Make sure the zipper is sewn securely to the pocket. Revisit sewing if needed.
How to Care for Your Scrunchie
Hand wash gently and lay flat to dry to preserve the scrunchie’s shape and maintain the zipper's integrity.
FAQ
Can I customize the size?
Yes! While this pattern is designed for a specific size, you can adjust the number of foundation chains and the rounds to fit your needs.
What if I don't have a zipper?
If you don't have a zipper available, you can make a scrunchie without a pocket by skipping the pocket-making steps.
How long will it take to make?
This scrunchie takes about 1.5 hours in total, with time divided across making the body, pocket, and assembly.
Want a matching set? Check out our crochet purse patterns or see all our free crochet bag patterns.
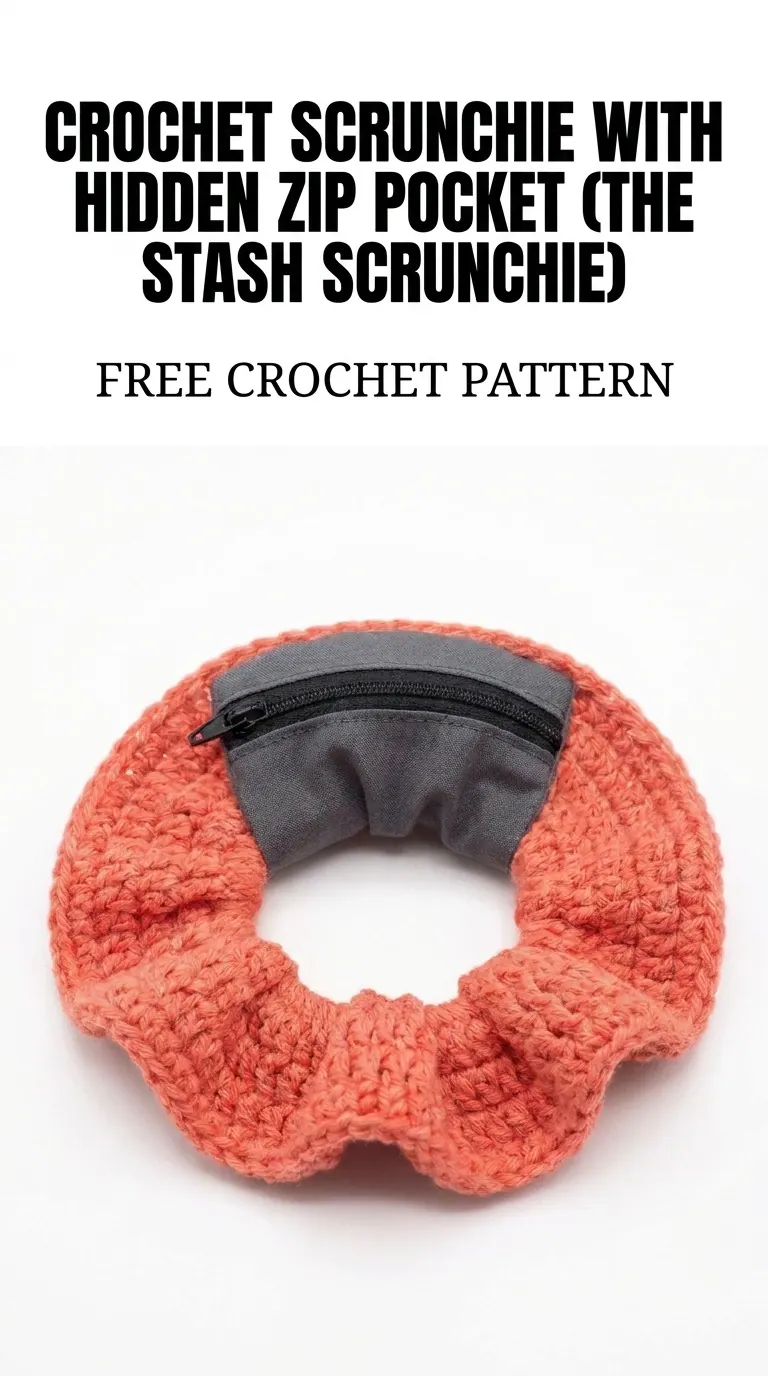
Image shown for inspiration — your finished result may vary slightly.