Crochet Seat Cushion That Folds Into a Bag (The Bleacher Bag)
A free, beginner-friendly crochet seat cushion pattern that transforms into a bag, perfect for outdoor events. Clear instructions and tips make it easy to follow.
Published · by Sara
- Skill level
- Beginner
- Yarn weight
- Worsted (4)
- Hook size
- 5.5 mm (I-9)
- Yardage
- about 300 yards
- Gauge
- 12 dc and 14 rows = 10 cm
- Time
- 5 hours
- Sizes
- 40.6 × 40.6 cm (16 × 16 in), 25.4 × 7.6 cm (10 × 3 in)
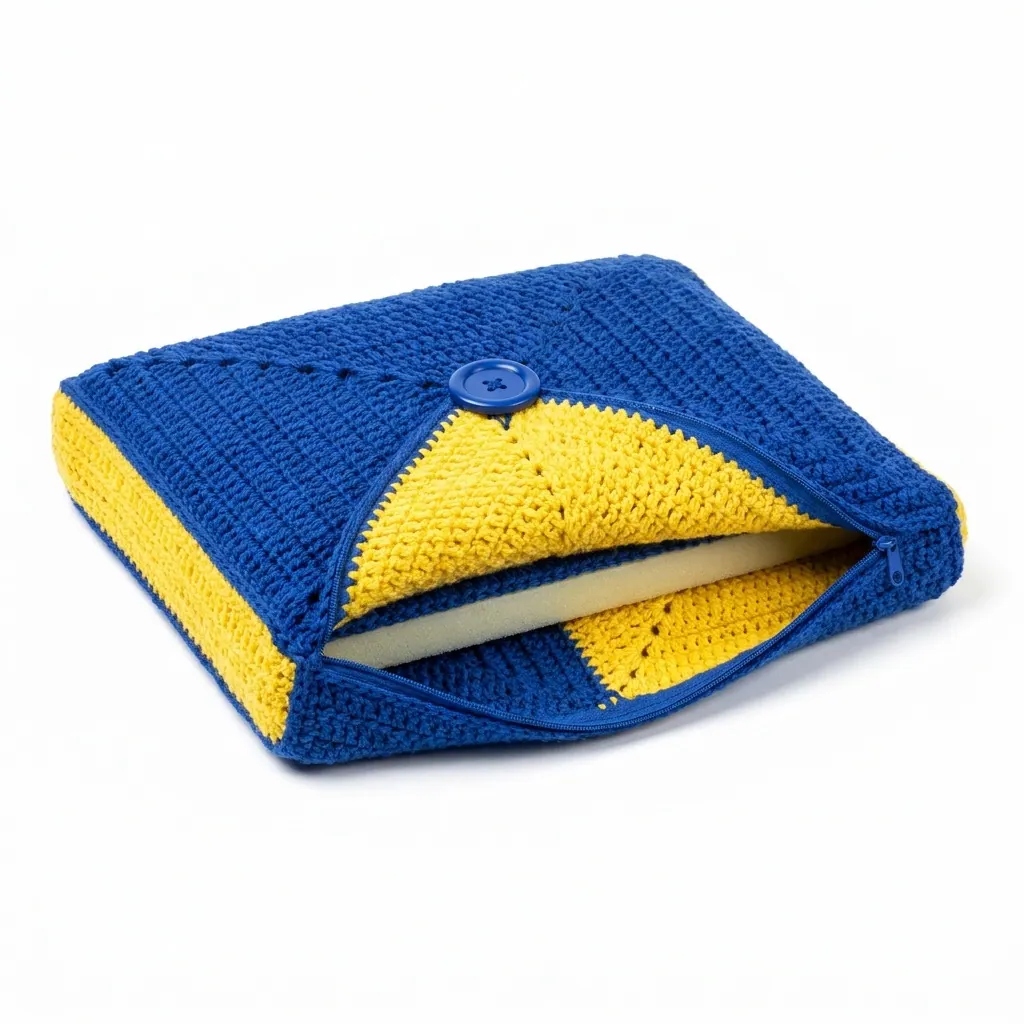
This crochet seat cushion pattern makes a fabulous Bleacher Bag that's both comfortable and practical for outdoor events. With its clever design, it easily folds into a compact bag, making it a joy to use. We’ll be working with basic stitches, such as double crochet and single crochet, which makes this a fulfilling project for you.
This pattern is perfect for crochet enthusiasts of all skill levels. You’ll learn how to create a versatile piece that offers both seating comfort and convenience for carrying to your favorite events.
Why You'll Love This Bleacher Bag
- Versatile design – It transforms from a comfy cushion to a handy bag for easy transport.
- Easy to make – With straightforward stitches, you'll be able to complete this project in no time.
- Great for outdoor events – It's the perfect companion for sports games, concerts, and picnics.
- Customizable colors – Use any combination of your favorite shades to personalize your Bleacher Bag.
Is This Pattern Good for Beginners?
Yes! This pattern uses simple stitches and includes clear, step-by-step instructions. You’ll gain confidence as you learn each part of the process.
Crochet Abbreviations (US Terms)
- ch – chain
- dc – double crochet
- sl st – slip stitch
- sc – single crochet
- st(s) – stitch(es)
- SP – space
- RS – right side
- WS – wrong side
Gauge and Finished Size
- Finished size: 40.6 cm × 40.6 cm (16 in × 16 in) when unfolded; 25.4 cm (10 in) wide by 7.6 cm (3 in) high when folded.
- Gauge: 12 dc and 14 rows = 10 cm (4 in).
Make sure to check your gauge by crocheting a swatch, as it helps ensure your cushion will fit perfectly.
Step 1: Body of the Cushion
The body is worked in two panels that will be joined.
Panel 1:
- Ch 34 (33 sts + 1 for turning).
- Row 1: dc in 4th ch from hook, dc in each ch across (32 dc).
- Rows 2–15: ch 3, turn, dc in each st across (32 dc).
- Row 16: ch 3, turn, dc in each st across (32 dc). Fasten off.
Panel 2:
- Join with CC in any corner.
- Ch 34 (33 sts + 1 for turning).
- Row 1: dc in 4th ch from hook, dc in each ch across (32 dc).
- Rows 2–15: ch 3, turn, dc in each st across (32 dc).
- Row 16: ch 3, turn, dc in each st across (32 dc). Fasten off CC.
Step 2: Joining the Panels
- With RS facing, place Panel 1 on top of Panel 2.
- Using MC, sc around the edge to join the panels together, leaving one side open for the zipper (approximately 30.5 cm / 12 in).
- Sl st to join. Fasten off and weave in ends.
Step 3: Making the Bag
- Fold the joined panels in half diagonally to form a triangle.
- Lay the foam piece inside the folded panels for added structure.
- Insert the zipper into the open edge, ensuring it is aligned properly. Attach using sc or by sewing, following the manufacturer's instructions.
Finishing Tip: Weave Ends Neatly
Turn the cushion right side out and press if necessary. If using a button, sew it onto the top of the bag for extra closure (optional). Weave in all ends.
Beginner Tips for a Neat Bleacher Bag
- Stay organized – Keep your materials and tools in one place to make the process smoother.
- Maintain tension – Even tension will make your stitches look consistent and professional.
- Check size as you go – Regularly measure your panels to ensure they’re the right size.
Common Mistakes (and How to Fix Them)
- "My cushion is too small." – This might happen if your gauge is off. Make sure to check your swatch gauge before starting.
- "The stitches are uneven." – This could be due to varying tension. Practice maintaining even tension as you crochet.
- "The zipper installation looks messy." – Take your time with the zipper. Align it carefully, and consider using sewing techniques if necessary for a cleaner finish.
How to Care for Your Bleacher Bag
Hand wash your Bleacher Bag when it needs cleaning. Lay it flat to dry, and avoid harsh detergents to keep the colors vibrant and the fabric looking its best.
FAQ
Can I customize the size?
Yes, you can adjust the size by increasing or decreasing the foundation chain and the number of rows. Just ensure your gauge remains consistent.
How long will it take to make?
The total estimated time for this project is about 5 hours, with approximately 2 hours for making each panel and 1 hour for joining and finishing.
Can I use different yarn?
Absolutely! Just be sure to choose a worsted weight yarn and check your gauge to ensure it still fits together properly.
Want a matching set? Check out our crochet purse patterns or see all our free crochet bag patterns.
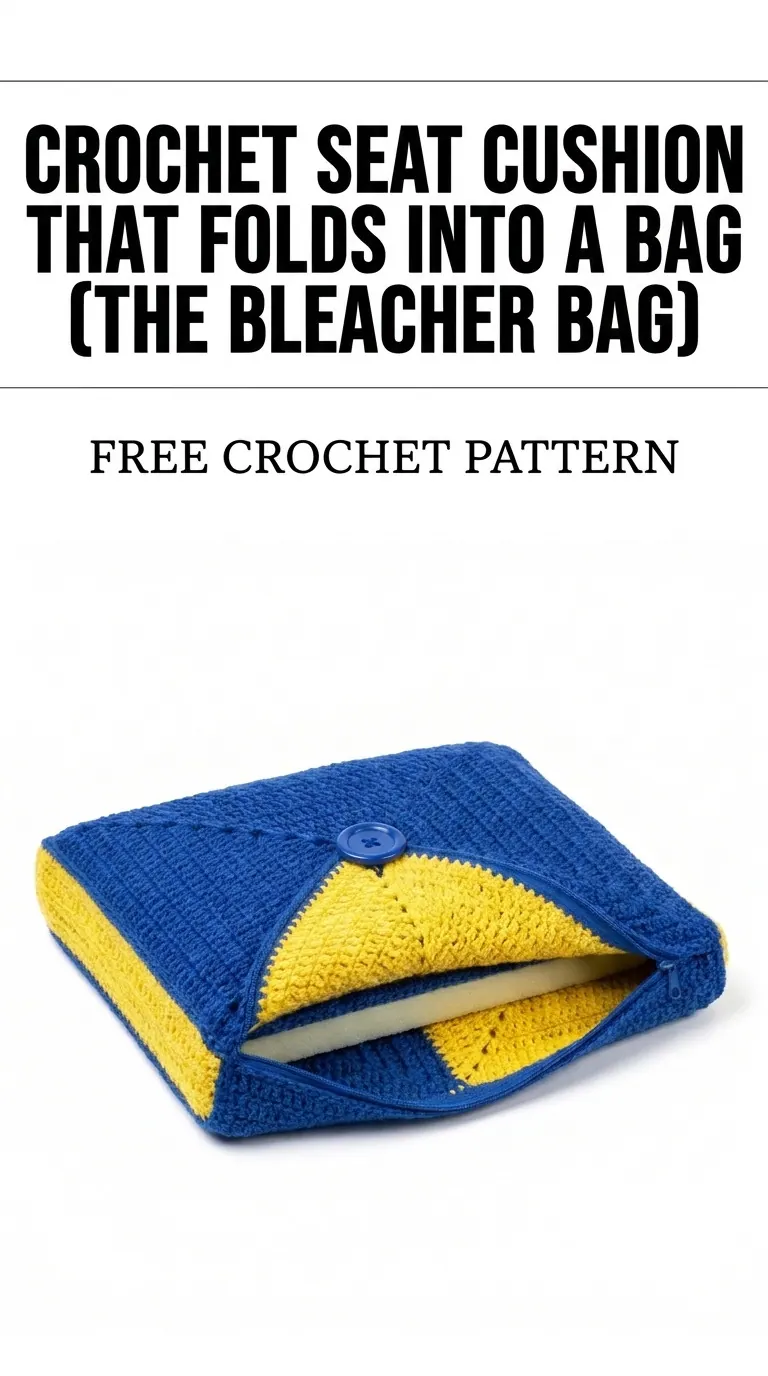
Image shown for inspiration — your finished result may vary slightly.