Free Crochet Chunky Floor Cushion Pattern With Carry Handle
A free, beginner-friendly pattern to create a stylish and practical chunky floor cushion with a convenient carry handle.
Published · by Sara
- Skill level
- Beginner
- Yarn weight
- Bulky (5)
- Hook size
- 9 mm (M/N)
- Yardage
- about 500 yards
- Gauge
- 9 dc and 6 rows = 10 cm
- Time
- 5 hours
- Sizes
- 46 cm (18 in) in diameter x 15 cm (6 in) thick
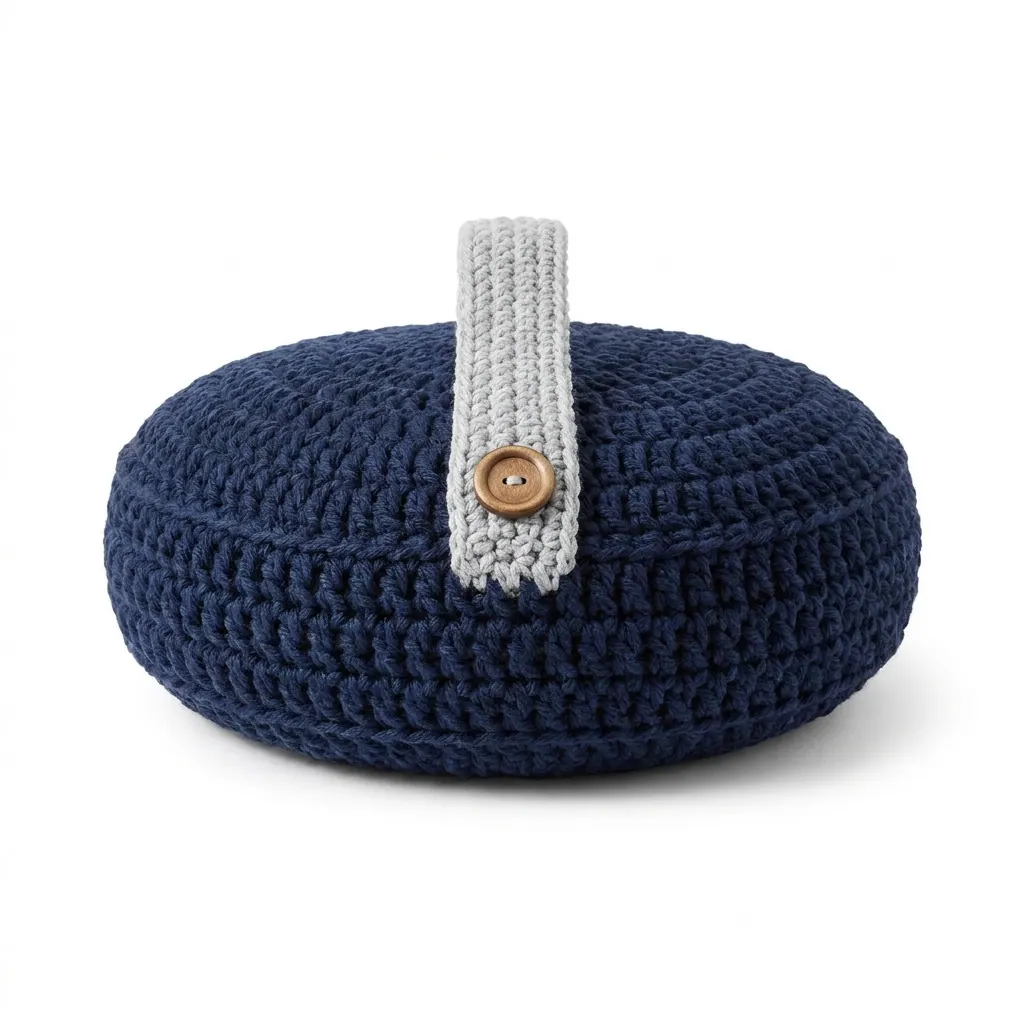
This crochet chunky floor cushion pattern makes a comfy and stylish seating option for any space. With its convenient carry handle, it’s great for moving around your home or taking with you to picnics and outdoor events. It uses basic stitches like single crochet, double crochet, and half double crochet, making it an enjoyable project for beginners.
This pattern is perfect for anyone looking to add a touch of coziness to their home or a decorative accent that’s also practical. You’ll learn how to work in the round and create a sturdy handle while crafting this fun cushion.
Why You'll Love This Chunky Floor Cushion
- Comfortable and supportive – ideal for seating while watching movies or talking with friends.
- Versatile design – fits perfectly in any room or can be taken outdoors.
- Easy to customize – choose your favorite colors and accents to match your decor.
- Quick to make – you can complete your cushion in just about 5 hours!
Is This Pattern Good for Beginners?
Yes! This pattern involves basic crochet stitches and simple construction techniques that are perfect for beginners. You’ll gain confidence as you learn to work in rounds and assemble different parts of the cushion.
Crochet Abbreviations (US Terms)
- ch – chain
- sl st – slip stitch
- sc – single crochet
- hdc – half double crochet
- dc – double crochet
How to Make a Magic Ring
- Hold the yarn to form a loop.
- Insert your hook into the loop, yarn over, and pull the yarn through to create a loop on your hook.
- Yarn over again and pull through the first loop on your hook to make a chain.
- Work your required stitches into the ring, then pull the tail to tighten the ring.
Size and Gauge
- Finished Cushion: 46 cm (18 in) in diameter and 15 cm (6 in) thick
- Gauge: 9 dc and 6 rows = 10 cm (4 in)
Make sure to check your gauge to ensure your finished cushion is the right size!
Step 1: Making the Base
The base is worked in rounds.
- Round 1: Make a magic ring, ch 2 (does not count as a stitch), work 12 dc into the ring, pull tight to close the ring. (12 sts)
- Round 2: Ch 2, 2 dc in each stitch around. (24 sts)
- Round 3: Ch 2, 1 dc in the next stitch, 2 dc in the next stitch, repeat from * around. (36 sts)
- Round 4: Ch 2, 1 dc in the next 2 stitches, 2 dc in the next stitch, repeat from * around. (48 sts)
- Round 5: Ch 2, 1 dc in the next 3 stitches, 2 dc in the next stitch, repeat from * around. (60 sts)
- Rounds 6–12: Ch 2, work 1 dc in each stitch around. (60 sts)
- Fasten off and leave a long tail for sewing.
Step 2: Crochet the Sides
The sides are also worked in rounds.
- Round 1: Attach yarn at any stitch, ch 2, work 1 hdc in the next 60 stitches. (60 sts)
- Rounds 2–6: Ch 2, work 1 hdc in each stitch around. (60 sts)
- Fasten off and leave a long tail for sewing.
Step 3: Finish the Carry Handle
The carry handle is worked in rows.
- Row 1: With Light Grey, ch 25, work 1 sc in each chain across. (24 sts)
- Rows 2–4: Ch 1, turn, work 1 sc in each stitch across. (24 sts)
- Fasten off and leave a long tail for sewing.
How to Join Your Pieces
- Pin the base to the sides, matching the stitches together. Use a whip stitch to sew the two parts together securely.
- Attach the carry handle to the center of the top of the cushion by sewing it down with the tapestry needle.
- Optionally, sew a button at the center of the carry handle for added flair.
- Weave in all ends and block if desired to shape.
Beginner Tips for a Neat Cushion
- Keep your stitches even by maintaining consistent tension throughout your work.
- Check your gauge before starting to ensure the cushion will be the right size.
- Count your stitches regularly to avoid accidentally missing any and to keep your cushion symmetrical.
Common Mistakes (and How to Fix Them)
- "My cushion is too floppy." – This may be due to incorrect gauge; make sure you’re using the recommended yarn and hook size.
- "I can't find my magic ring." – If the ring isn’t tight, it can open up; always pull the tail securely when you finish.
- "The sides are not lining up." – Ensure you’re correctly matching your stitches when sewing the base to the sides.
How to Care for Your Chunky Floor Cushion
For easy care, machine wash your cushion with cold water on a gentle cycle and tumble dry on low. Reshape as necessary after washing to maintain its form.
FAQ
Can I customize the size?
Yes! You can adjust the number of rounds for the base or sides to create a larger or smaller cushion to fit your needs.
What type of yarn can I use?
You can substitute with any bulky (5) yarn, but keep in mind that different fibers may affect the cushion's firmness and look.
How long will it take to create this cushion?
On average, it will take about 5 hours to complete, spread across making the base, sides, handle, and finishing.
Want a matching set? Check out our crochet purse patterns or see all our free crochet bag patterns.
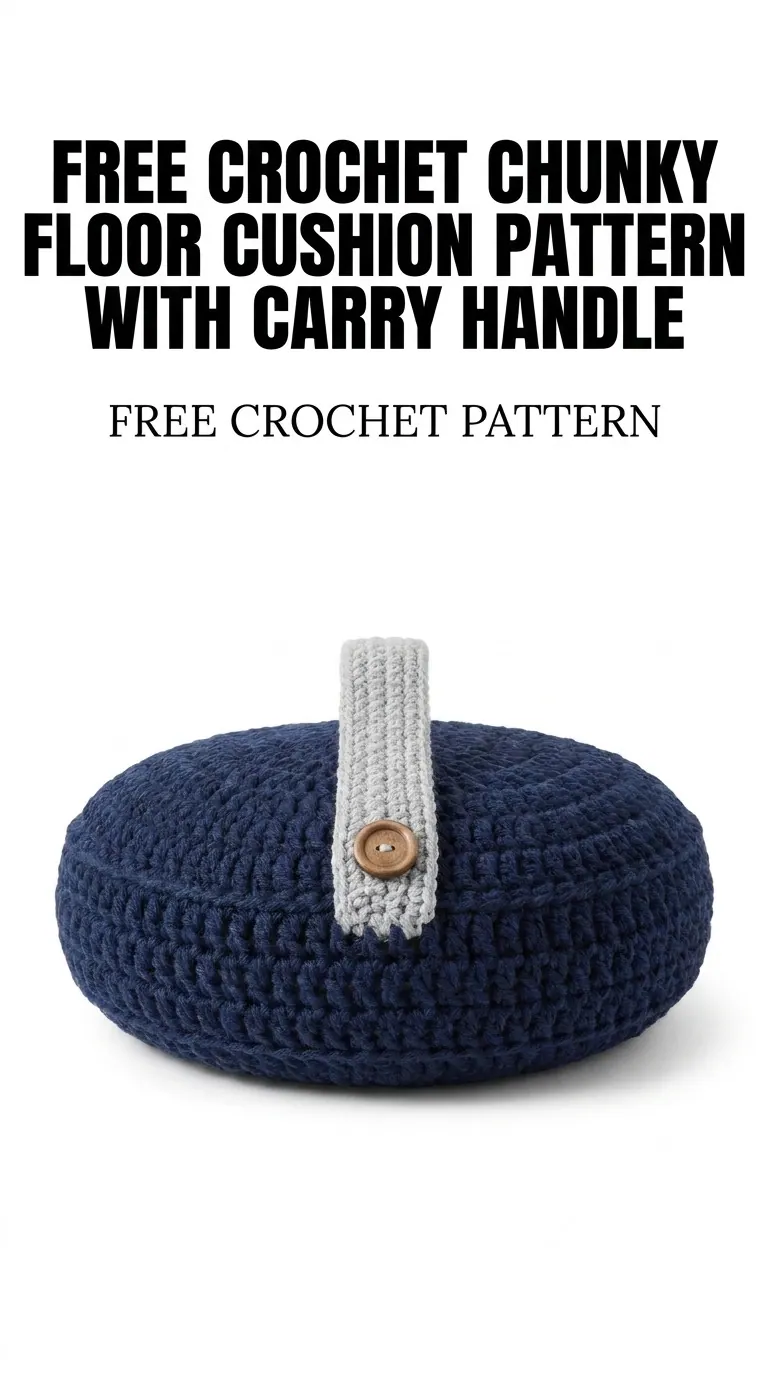
Image shown for inspiration — your finished result may vary slightly.