Free Crochet Entryway Wall Pocket Organizer Pattern for Beginners
A free crochet wall pocket organizer pattern featuring straightforward steps. Perfect for holding mail, keys, or small items!
Published · by Sara
- Skill level
- Beginner
- Yarn weight
- Worsted (4)
- Hook size
- 5.5 mm (I-9)
- Yardage
- about 300 m
- Gauge
- 16 dc and 10 rows = 10 cm
- Time
- 4–6 hours
- Sizes
- 30.5 cm × 61 cm (12 in × 24 in)
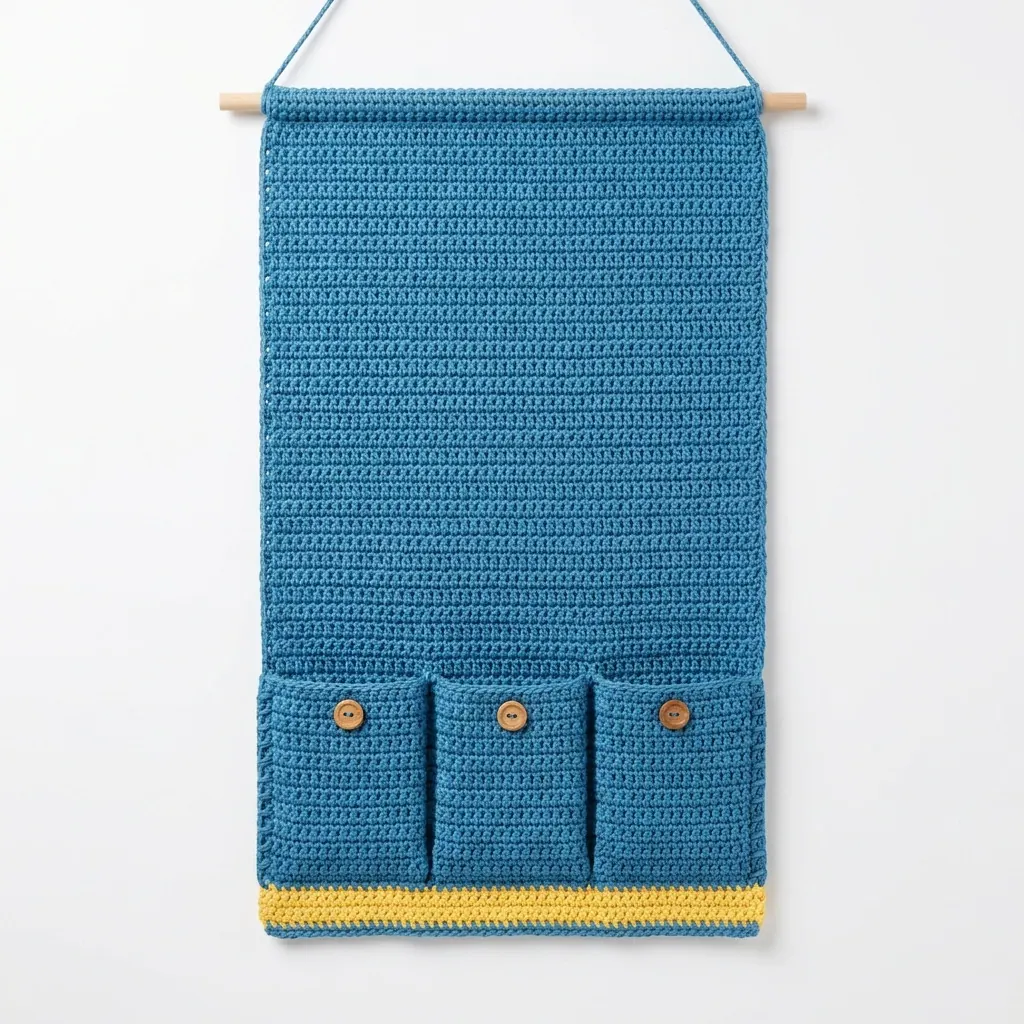
This crochet entryway wall pocket organizer pattern makes a functional and stylish addition to your home for managing mail and small items. Using basic stitches, it's easy to follow and great for beginners who enjoy practical projects. You'll learn how to create pockets and assemble them into a handy organizer.
Why You'll Love This Wall Pocket Organizer
- Simple construction – designed with beginner-friendly stitches.
- Functional design – perfect for organizing mail, keys, or small everyday items.
- Customizable colors – choose your own colors to match your décor!
- Quick to make – complete your organizer in just 4–6 hours.
Crochet Abbreviations (US Terms)
- ch – chain
- dc – double crochet
- sl st – slip stitch
- sc – single crochet
- st(s) – stitch(es)
- tr – treble crochet
Size and Gauge
- Finished dimensions: 30.5 cm × 61 cm (12 in × 24 in).
- Gauge: 16 dc and 10 rows = 10 cm (4 in).
To ensure your pocket organizer turns out the right size, check your gauge by making a swatch before starting the project. Adjust your hook size if necessary.
Step 1: Body of the Organizer
The body is worked in rows.
Foundation Row: Ch 41.
- (40 sts)
Row 1: Dc in 4th ch from hook, dc in each ch across, turn.
- (38 sts)
Row 2: Ch 3 (counts as first dc), dc in each st across, turn.
- (38 sts)
Row 3 to Row 18: Repeat Row 2.
- (38 sts)
Row 19: Change to Contrast Color. Ch 1, sc in each st across, turn.
- (38 sts)
Row 20: Switch back to Main Color. Ch 3, dc in each st across, turn.
- (38 sts)
Row 21 to Row 24: Repeat Row 20.
- (38 sts)
Row 25: Ch 1, sc in each st across, turn.
- (38 sts)
Row 26: Ch 3, dc in each st across, turn.
- (38 sts)
Row 27: Ch 1, sc in each st across, turn.
- (38 sts)
Row 28: Ch 1, sc in first 10 sts, ch 2, sk next 18 sts (creating pocket opening), sc in last 10 sts. Turn.
- (28 sts)
Row 29: Ch 1, sc in each st to ch, 2 sc in ch, sc in last 10 sts. Turn.
- (30 sts)
Row 30: Ch 1, sc in each st across.
- (30 sts)
Row 31 to Row 36: Repeat Rows 28-30 for bottom section of the organizer as follows:
- Row 32: Ch 1, sc in first 10 sts, ch 2, sk next 18 sts, sc in last 10 sts.
- Row 33: Ch 1, sc in each st to ch, 2 sc in ch, sc in last 10 sts.
- Row 34: Ch 1, sc in each st across.
- (Follow through)
Fasten off and weave in ends.
Step 2: Assembly
- Pockets: Fold up the bottom section to create three pockets.
- Use slip stitches to secure the sides where they touch.
- Attach the Buttons: Position each button on the secured areas of the pockets. Sew them on with a yarn needle and any remaining yarn from the project.
- Add the Dowel: Use the top edge of the organizer to create a sleeve, fold it over the wooden dowel, and secure it with additional slip stitches if needed.
Beginner Tips for a Neat Wall Pocket Organizer
- Keep your workspace tidy to avoid losing small pieces like buttons.
- Maintain consistent tension to ensure even stitches.
- Check your measurements frequently as you work to ensure accuracy.
Common Mistakes (and How to Fix Them)
- "My pockets are uneven." – This can happen if your stitch count is off. Count your stitches after each row to correct errors sooner.
- "The fabric is too loose." – This might mean your hook is too large for the yarn. Try using a smaller hook.
- "My rows have gaps." – Gaps often occur from skipping stitches. Take your time to ensure that no skips happen.
How to Care for Your Wall Pocket Organizer
For best results, hand wash in cold water and lay flat to dry. If you desire added structural support, consider using fabric stiffener on your organizer after it dries.
FAQ
Can I customize the size?
Yes! You can easily adjust the foundation row for a wider or narrower organizer. Just be sure to keep the stitch count divisible by the pattern repeat.
What if I want to change the colors?
Feel free to use any color combination! Just make sure to maintain the same weight of yarn for best results.
How long will it take to make?
You can expect to spend about 4-6 hours on completing this organizer, depending on your speed and familiarity with the stitches.
Want a matching set? Check out our crochet purse patterns or see all our free crochet bag patterns.
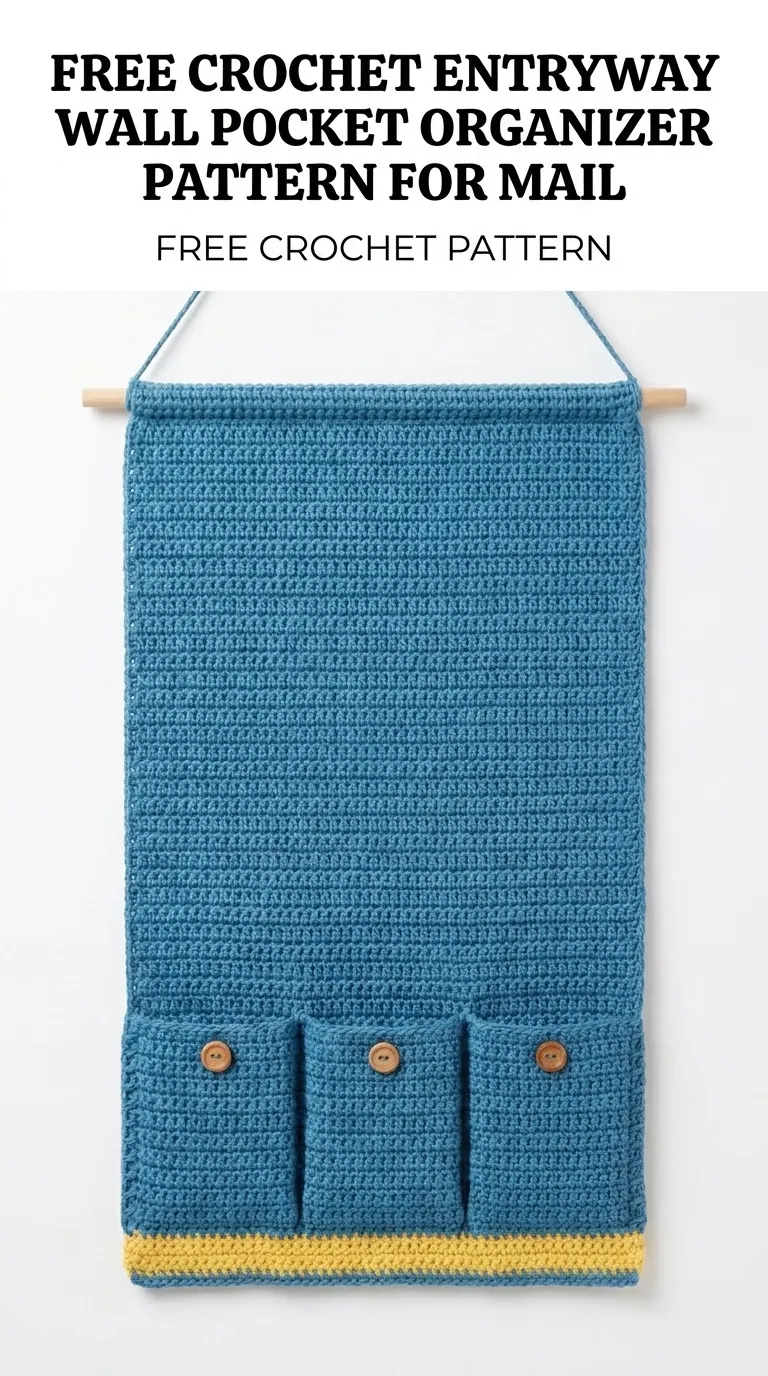
Image shown for inspiration — your finished result may vary slightly.