Free Crochet Mosaic Tote Bag Pattern for Beginners
A free crochet mosaic tote bag pattern with straightforward steps and helpful tips. Perfect for carrying daily essentials in style.
Published · by Sara
- Skill level
- Intermediate
- Yarn weight
- Worsted (4)
- Hook size
- 5.0 mm (H-8), 6.0 mm (J-10)
- Yardage
- about 400 m
- Gauge
- 14 dc and 10 rows = 10 cm
- Time
- 5–8 hours
- Sizes
- 30 × 35.5 cm (12 × 14 in)
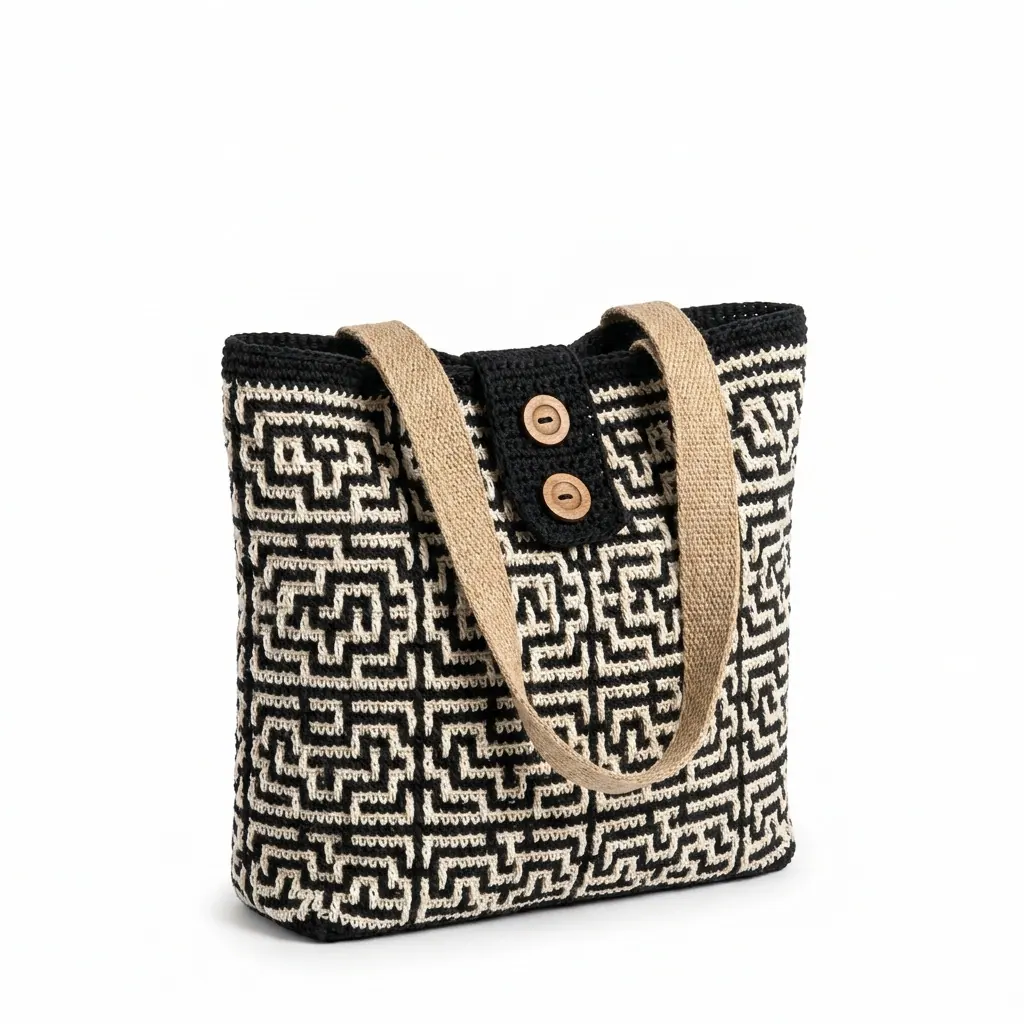
This crochet mosaic tote bag pattern makes a stylish accessory in a beautiful black and cream color scheme. The geometric pattern adds texture and color, creating a fashionable bag that is perfect for carrying your daily essentials. You'll enjoy the combination of double crochet and post stitches, making this project both engaging and enjoyable.
This pattern suits those looking to try their hand at intermediate-level stitches while creating a practical tote bag. You'll gain confidence as you learn new techniques, and soon you'll have a gorgeous bag to show off!
Why You'll Love This Mosaic Tote Bag
- Stylish and trendy – the black and cream colors make it a great addition to any outfit.
- Functional and spacious – it's perfect for carrying everything from groceries to craft supplies.
- Engaging texture – the mosaic pattern adds visual interest and keeps your crochet skills sharp.
- Opportunity to learn – perfect for practicing intermediate stitches and creating something fabulous.
Is This Pattern Good for Beginners?
Yes! While this pattern is marked as intermediate, it is very achievable for a determined beginner. You will learn new stitches like fptr and bpdc, all while constructing a useful bag.
Crochet Abbreviations (US Terms)
- ch – chain
- sl st – slip stitch
- sc – single crochet
- dc – double crochet
- dc2tog – double crochet two stitches together (decrease)
- fptr – front post treble crochet
- bpdc – back post double crochet
- (sts) – stitches
Special Stitches:
- dc2tog: Yarn over, insert hook into the next stitch, yarn over, pull through (3 loops on hook), yarn over again, pull through first 2 loops (2 loops remain), yarn over, insert hook into the next stitch, yarn over, pull through (4 loops on hook), yarn over and pull through all 3 loops.
Size and Gauge
- Finished dimensions: Approximately 30 × 35.5 cm (12 × 14 in) wide and tall, 10 cm (4 in) deep.
- Handle dimensions: Approximately 3.8 cm (1.5 in) wide and each 76 cm (30 in) long.
- Gauge: 14 dc and 10 rows = 10 cm (4 in).
- Check your gauge by crocheting a swatch of 20 stitches and 14 rows. Adjust your hook size if necessary.
Step 1: Bag Body
The bag body is worked in rows to create the geometric pattern.
Foundation Row: With cream, ch 60.
Row 1: Dc in 4th ch from hook, dc in each ch across. (58 sts)
Row 2: Ch 2 (counts as first dc), turn, *fptr around next st, dc in next st; repeat from * across. (58 sts)
Row 3: Ch 2, turn, *bpdc around the fptr of previous row, dc in next st; repeat from * to end. (58 sts)
Row 4: Ch 2, turn, repeat Row 2.
Row 5: Ch 2, turn, repeat Row 3.
Rows 6–10: Alternate between Row 2 and Row 3 for an additional 5 rows (Total: 10 rows).
Row 11: Change to black, ch 2, and repeat Row 2. (58 sts)
Row 12: Ch 2, turn, and repeat Row 3. (58 sts)
Rows 13–20: Continue this pattern (5 additional rows of each, ending on Row 3).
Row 21: Change to cream, repeat Rows 2 and 3 (5 times of each).
Finish: Continue the above pattern until the bag reaches 35.5 cm (14 in) tall. End with 1 row of black (Row 2) and 1 row of cream (Row 3) and leave open.
Step 2: Handles
The handles are made separately with sturdier yarn for durability.
- Row 1: With a 6.0 mm hook, chain 60 with sturdier yarn.
- Row 2: Sc in 2nd ch from hook, sc in each ch across. (59 sts)
- Row 3: Ch 1, turn, *sc2tog, sc in next 54 sts, sc2tog; repeat from * (57 sts).
- Continue to decrease until you have 3 sts left.
- Row 4: Sc in each remaining st.
Assembly & Finishing
- Fold the top of the bag down. Align the handles approximately 15 cm (6 in) from the edges and attach them securely using a tapestry needle.
- Optionally, sew buttons along the flap of the bag for decoration.
- Weave in all yarn ends.
Edging
Single crochet around the top opening of the bag for a finished edge.
Beginner Tips for a Neat Tote Bag
- Keep your workspace organized – it helps you stay focused and avoid losing things.
- Maintain consistent tension in your stitches – practice makes perfect.
- Measure your work regularly to ensure the desired size – it's easier to fix as you go!
Common Mistakes (and How to Fix Them)
- "My bag is much smaller than expected." – It could be due to a tight tension or incorrect gauge. Always check your gauge before starting.
- "The stitches are uneven." – This may happen if you pull your yarn too tight or loose. Focus on keeping a steady tension throughout.
- "The bag looks floppy." – If you didn't use a stiffener, consider adding fabric stiffener or interfacing on your next bag to give it more structure.
How to Care for Your Mosaic Tote Bag
To keep your tote bag looking its best, hand wash it in cool water and air dry. This will help maintain the shape and integrity of the cotton yarn.
FAQ
Can I customize the size?
Yes! You can adjust the number of chains in the foundation row to make a larger or smaller bag. Just remember to maintain the gauge for the best results.
What yarn can I use instead?
You can substitute cotton yarn with a similar worsted weight yarn, but be mindful of the fabric’s structure and care instructions to ensure durability.
How long will it take to finish?
Estimated working time is around 5–8 hours, depending on your skill level and speed. Enjoy the process and don’t rush!
Want a matching set? Check out our crochet purse patterns or see all our free crochet bag patterns.
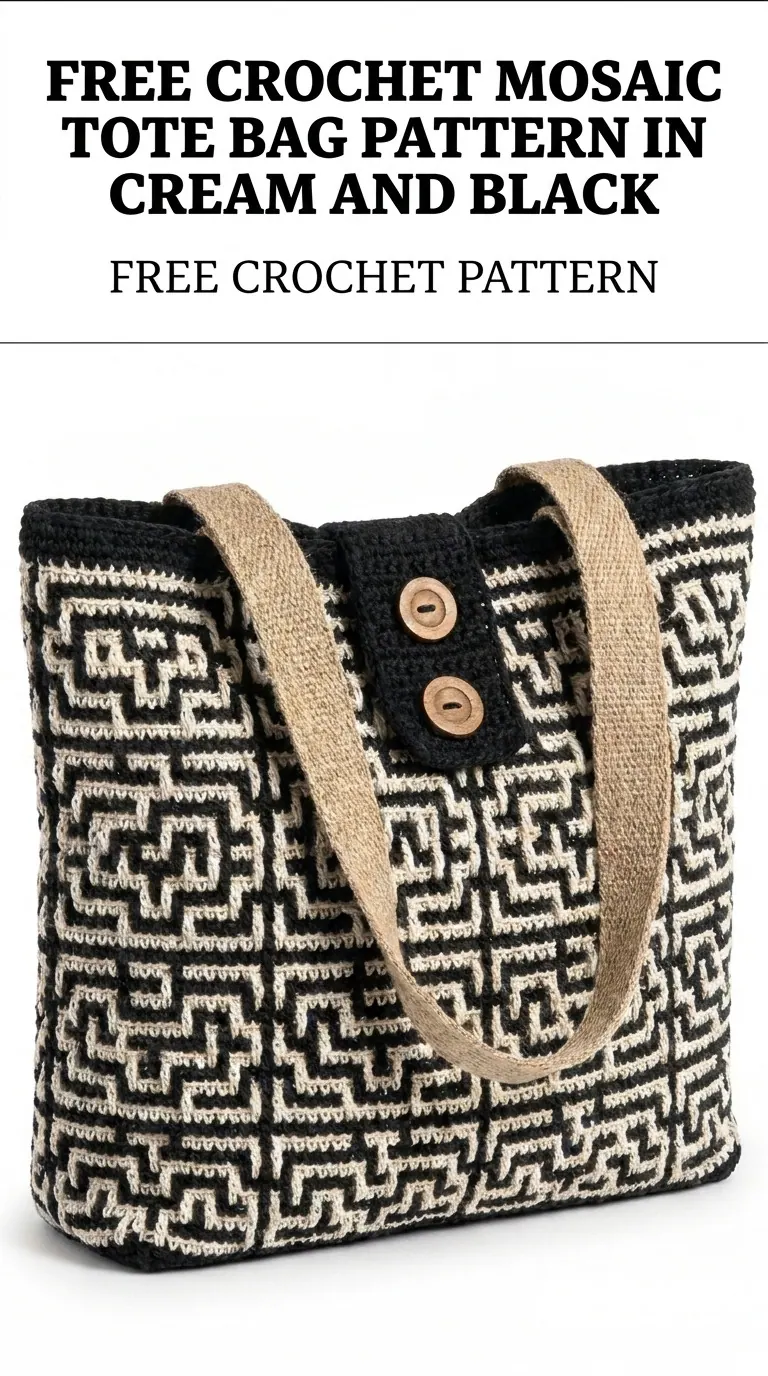
Image shown for inspiration — your finished result may vary slightly.