Free Crochet Wall Pocket Organizer Pattern for Mail and Keys
A free, beginner-friendly pattern with clear steps and helpful tips. Create a stylish wall pocket organizer for your mail and keys.
Published · by Sara
- Skill level
- Intermediate
- Yarn weight
- Medium (4)
- Hook size
- 5 mm (H-8)
- Yardage
- about 300 yards
- Gauge
- 14 sc and 18 rows = 10 cm
- Time
- 5–7 hours
- Sizes
- 30 × 61 cm (12 × 24 in)
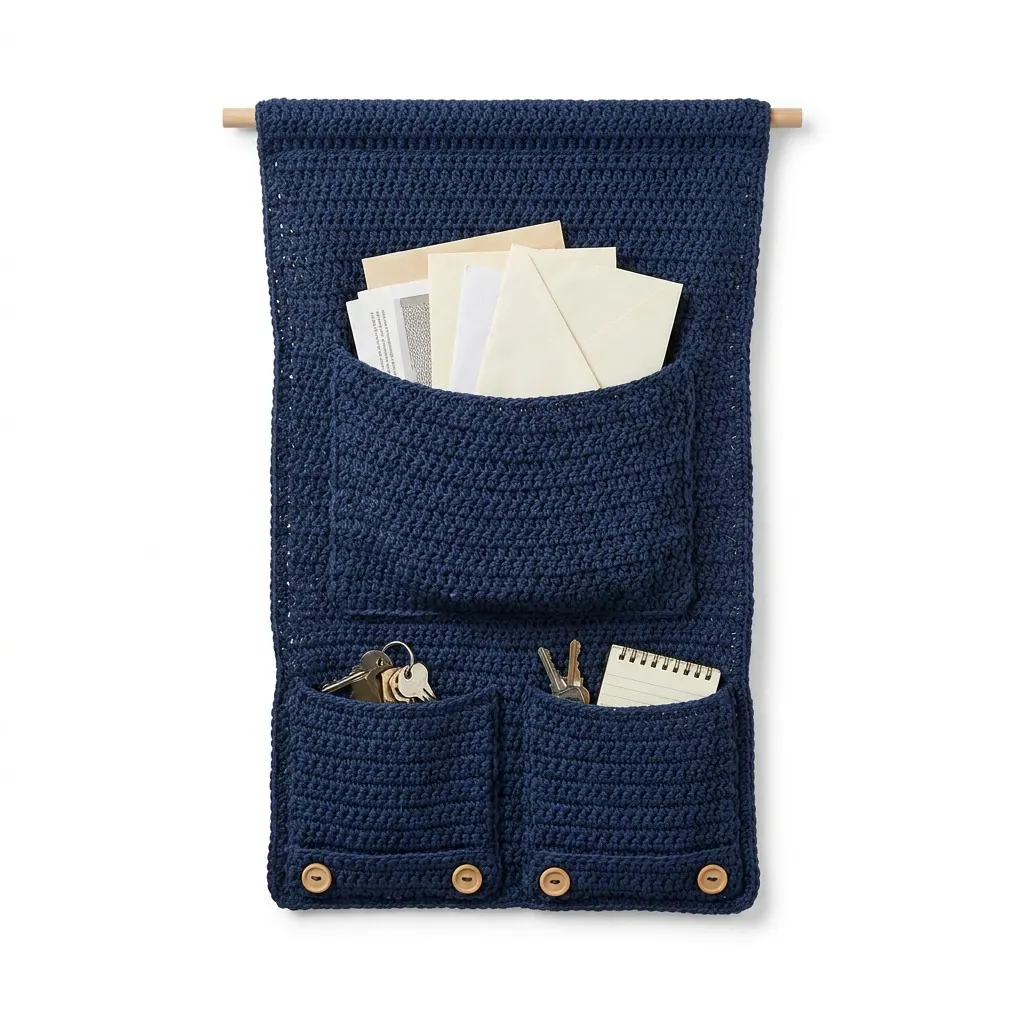
This crochet wall pocket organizer is a practical and stylish solution for holding mail and keys, keeping your space tidy while adding a decorative element to your home. The final design includes a central pocket for mail and two smaller pockets for keys, all made with a textured stitch pattern.
This project is suitable for those who love to keep their space organized, and you’ll gain confidence in working with intermediate stitches as we tackle this together!
Why You'll Love This Wall Pocket Organizer
- Practical and stylish – perfect for organizing your mail and keys.
- Easy to customize – choose colors that match your home décor.
- Designed with texture – showcasing interesting stitch patterns throughout.
- Quick to make – complete it in just a few hours from start to finish.
Is This Pattern Good for Beginners?
Yes! While this pattern is marked as intermediate, it primarily uses basic stitches. You'll deepen your skills without feeling overwhelmed.
Crochet Abbreviations (US Terms)
- ch – chain
- sc – single crochet
- st(s) – stitch(es)
- sl st – slip stitch
- sc2tog – single crochet 2 together (decrease)
- hdc – half double crochet
Size and Gauge
- Finished Size: 30 × 61 cm (12 × 24 in)
- Gauge: 14 sc and 18 rows = 10 cm (4 in)
Check your gauge by making a swatch of 20 stitches and 20 rows in single crochet. Adjust your hook size if needed.
Step 1: Body of Organizer
The body of the organizer is worked in rows.
- Foundation Row: Ch 56.
- Row 1: Sc in 2nd ch from hook and in each ch across. (55 sts)
- Row 2: Ch 1, turn. Sc in each st across. (55 sts)
- Row 3: Ch 1, turn. Sc in each st across. (55 sts)
- Row 4: Ch 1, turn. Sc in each st across. (55 sts)
- Row 5: Ch 1, turn. Sc in next 25 sts, hdc in next 5 sts, sc in next 25. (55 sts)
- Row 6: Ch 1, turn. Sc in each st across. (55 sts)
- Row 7: Ch 1, turn. Sc in each st across. (55 sts)
- Row 8: Ch 1, turn. Sc in next 25 sts, hdc in next 5 sts, sc in next 25. (55 sts)
- Row 9: Ch 1, turn. Sc2tog, sc in next 51 sts, sc2tog. (53 sts)
- Row 10: Ch 1, turn. Sc in each st across. (53 sts)
- Rows 11–12: Repeat Rows 9–10 two more times total. (51 sts)
- Rows 13–15: Ch 1, turn. Sc in each st across. (51 sts)
- Row 16: Ch 1, turn. Sc2tog, sc in next 47 sts, sc2tog. (49 sts)
- Row 17: Ch 1, turn. Sc in each st across. (49 sts)
- Rows 18–19: Repeat Rows 16–17 once more. (47 sts)
- Row 20: Ch 1, turn. Sc2tog, sc in next 43 sts, sc2tog. (45 sts)
- Row 21: Ch 1, turn. Sc in each st across. (45 sts)
- Rows 22–23: Repeat Rows 20–21 once more. (43 sts)
Step 2: Pockets
The pockets are added onto the body of the organizer.
- Row 24: Ch 1, turn. Sc in next 19 sts for the first pocket, turn, chain to create the second pocket, sc in the next 18 for the middle pocket. (19 for 1st pocket, 18 for the 2nd pocket)
- Rows 25–26: Repeat the sc for the first and second pockets separately (1st pocket: 19 sts, 2nd pocket: 18 sts).
- Finishing the Pockets: Fold the 1st pocket and sc across to create a base. Secure the sides with sl st. Repeat for the 2nd pocket, using hook-and-loop tape for security.
Assembly & Finishing
- Fold the top of the organizer over the wooden dowel (approx. 2.5 cm (1 in)) and secure using sl st.
- Weave button yarn tails through the base of each pocket and sew on the wooden buttons for decoration.
- Weave in all yarn ends.
- Trim any excess yarn.
Beginner Tips for a Neat Wall Pocket Organizer
- Keep your workspace organized, so you can easily find your materials.
- Check your tension regularly to ensure consistent stitches.
- Measure your pockets before finishing to ensure they are the right size.
Common Mistakes (and How to Fix Them)
- My organizer is not the right size. – This might be due to inconsistent gauge. Make sure to check your gauge before starting.
- The pockets are pulling away from the organizer. – This could be because they weren’t secured enough. Ensure you’ve tightened all sides with sl st.
- My stitches look uneven. – This usually happens if your tension varies. Practice keeping an even hold on your yarn as you crochet.
How to Care for Your Wall Pocket Organizer
Machine wash on a gentle cycle and lay flat to dry, or hand wash and air dry to maintain its shape and color.
FAQ
Can I customize the size?
Absolutely! To make a larger version, simply increase your initial chain and repeat the body instructions.
How long will this take to complete?
You can expect to spend about 5–7 hours in total: 3–4 hours on the body, 1–2 hours on the pockets, and 1 hour for assembly.
What yarn can I use instead?
You can substitute with any medium weight cotton yarn. Just make sure to match the gauge for the best fit.
Want a matching set? Check out our crochet purse patterns or see all our free crochet bag patterns.
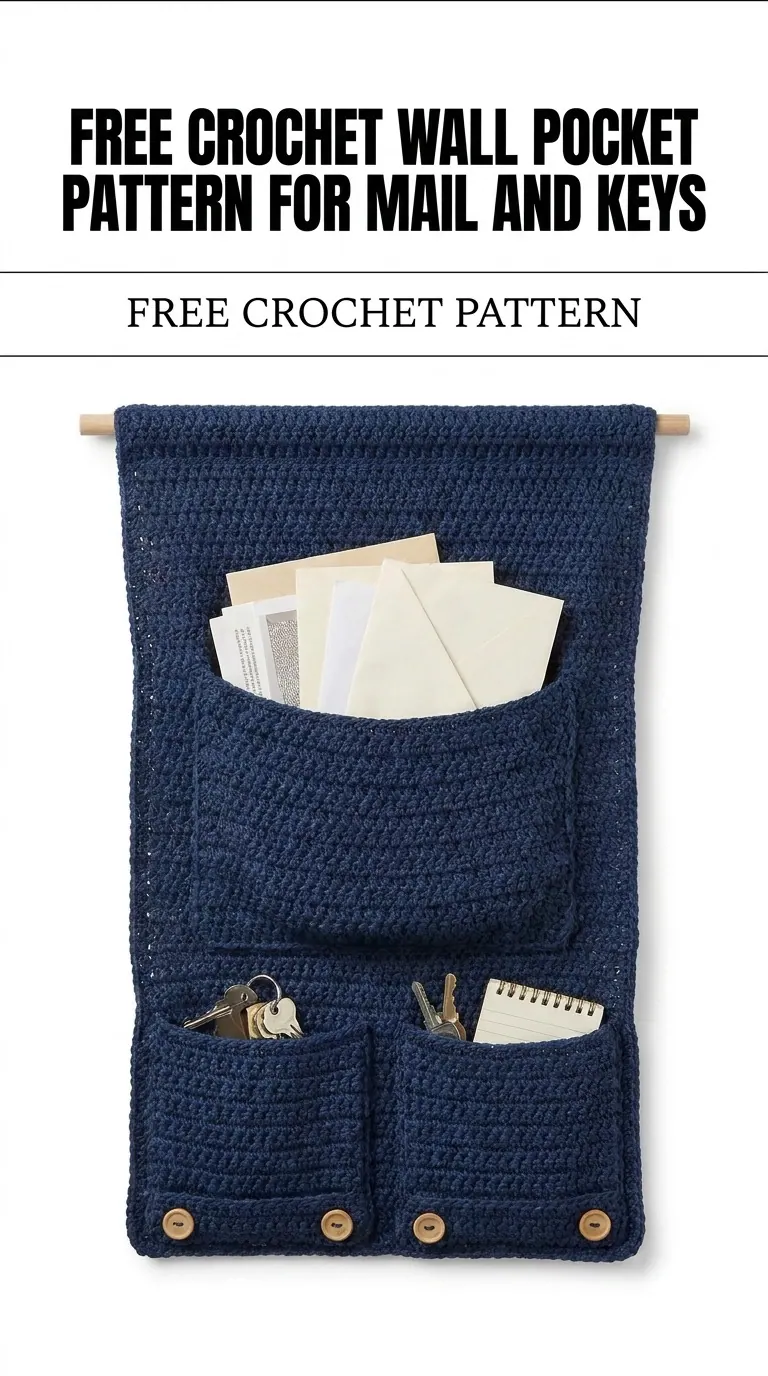
Image shown for inspiration — your finished result may vary slightly.