Free Mosaic Crochet Pillow Cover Pattern for Beginners
A stylish, free mosaic crochet pillow cover pattern that's beginner-friendly with clear steps and tips for a lovely home décor accent.
Published · by Sara
- Skill level
- Intermediate
- Yarn weight
- Worsted (4)
- Hook size
- 5.5 mm (I-9)
- Yardage
- about 500 yards
- Gauge
- 14 sc and 10 rows = 10 cm
- Time
- 4–5 hours
- Sizes
- 45 × 45 cm (18 × 18 in)
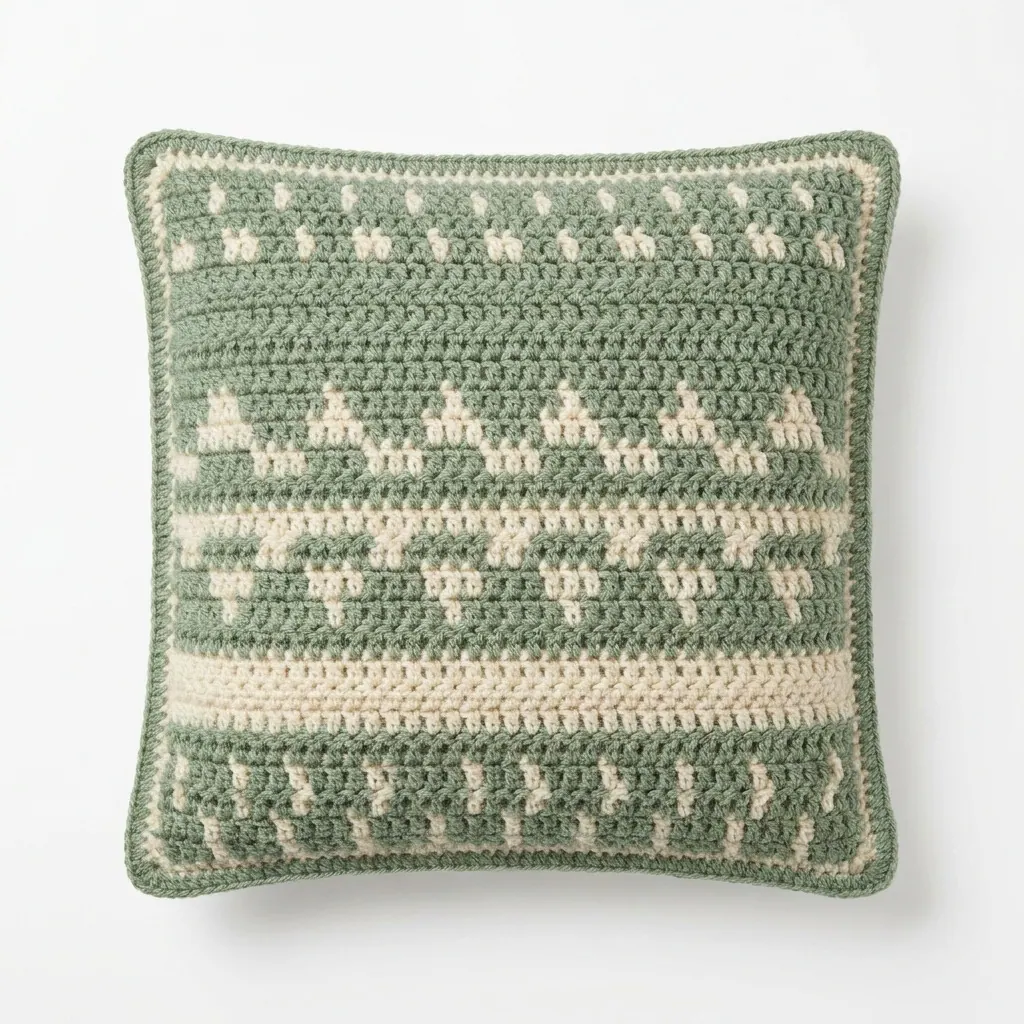
This free mosaic crochet pillow cover pattern makes a stylish addition to your home décor. The beautiful design in sage green and cream is both elegant and fun to create. This pattern uses basic stitches combined with the mosaic crochet technique, which adds a lovely texture to your project.
This pillow cover is perfect for those who want to enhance their living space or learn a new crochet technique. With its clear instructions, you’ll feel confident tackling this intermediate project.
Why You'll Love This Pillow Cover
- Eye-catching design – the mosaic technique creates a stunning visual effect.
- Cozy and comfortable – perfect for your couch or bed.
- Customizable colors – mix and match your favorite yarn colors.
- Great learning experience – practice advanced techniques like color changing.
Is This Pattern Good for Beginners?
Yes! Although this pattern is rated intermediate, it’s a great opportunity to advance your skills. You’ll gain confidence working with color and creating texture. Plus, with clear instructions, you'll easily follow each step.
Crochet Abbreviations (US Terms)
- ch – chain
- sc – single crochet
- dc – double crochet
- sl st – slip stitch
- mosaic crochet technique – alternating color in related rows while keeping track of which stitches are worked in which color to create the pattern.
Size and Gauge
- Finished Size: 45 × 45 cm (18 × 18 in)
- Gauge: 14 sc and 10 rows = 10 cm (4 in) in single crochet.
- To ensure the best fit, check your gauge by crocheting a swatch of at least 10 cm (4 in) in the main stitch pattern.
Step 1: Body of Pillow Cover
The body of the pillow cover is worked in rows.
- Foundation Row: With Sage, ch 61.
- Row 1: Sc in the second ch from the hook and across (60 sts).
- Row 2: Ch 2 (this counts as your first dc), turn. *Dc in the next sc, sc in the next sc; repeat from * across (60 sts).
- Row 3: Change to Cream. Ch 1, turn. *Sc in the next dc, dc in the next sc; repeat from * across (60 sts).
- Row 4: Change to Sage. Ch 1, turn. *Sc in the next dc (from Row 3), dc in the next sc (from Row 2); repeat from * across (60 sts).
- Row 5: Change to Cream. Repeat Row 3 (60 sts).
- Row 6: Change to Sage. Repeat Row 4 (60 sts).
- Row 7: Change to Cream. Repeat Row 3 (60 sts).
- Row 8: Change to Sage. Repeat Row 4 (60 sts).
- Repeat Rows 5–8 a total of 6 times (this creates the mosaic pattern).
- Final Row: With Sage, repeat Row 2 (60 sts).
- Fasten off Sage, leaving a long enough tail for sewing.
Step 2: Assembly
- Fold the pillow cover in half with the right sides facing each other.
- With Sage yarn, sew each side of the pillow cover using a whip stitch, leaving one side open for the pillow insert.
- Turn the cover right side out.
- Insert the pillow into the cover and sew the open side closed with the same whip stitch.
Beginner Tips for a Neat Pillow Cover
- Keep your workspace organized to find your supplies quickly.
- Maintain even tension throughout your stitches for a professional finish.
- Check your size as you go to ensure your pillow fits perfectly.
Common Mistakes (and How to Fix Them)
- "My pillow cover is too small." – You may have crocheted too tightly. Try using a larger hook next time to achieve the correct gauge.
- "The colors are uneven." – Inconsistent tension can cause color shifts. Pay attention to the way you hold your yarn.
- "My stitches are not aligning properly." – Be sure to follow the stitch pattern carefully. Reread the instructions if you get confused.
How to Care for Your Pillow Cover
To keep your pillow cover looking great, hand wash it in cold water and lay it flat to dry. Avoid bleach to maintain the yarn's quality and color.
FAQ
Can I customize the size?
Yes! To make a larger or smaller pillow cover, adjust the number of chains in the foundation row while maintaining the stitch pattern for the body.
What if I can’t find the exact yarn?
You can substitute with a different worsted weight yarn. Just ensure it matches the gauge for the best fit.
How long will it take to make?
The total estimated time to complete your pillow cover is about 4–5 hours, which includes both the body and assembly steps.
Want a matching set? Check out our crochet pillow patterns or see all our free crochet bag patterns.
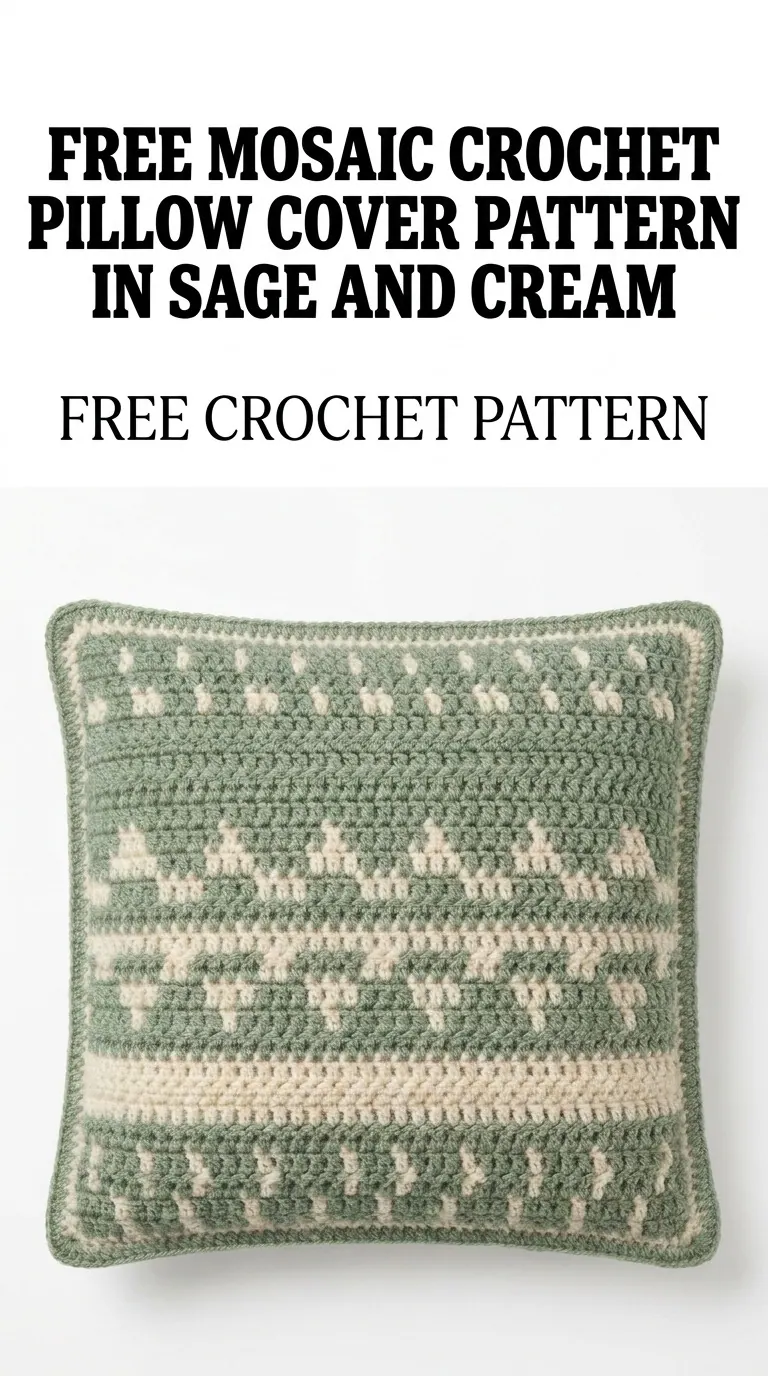
Image shown for inspiration — your finished result may vary slightly.