How to Block a Crochet Granny Square Pillow Cover (Free)
A free crochet pattern for a stylish granny square pillow cover. It's perfect for adding a pop of color to your home decor.
Published · by Sara
- Skill level
- Intermediate
- Yarn weight
- Worsted (4)
- Hook size
- 5.0 mm (H-8)
- Yardage
- about 720 yards
- Gauge
- 4 squares = 20.3 × 20.3 cm (8 × 8 in)
- Time
- approximately 11 hours
- Sizes
- 40 × 40 cm (16 × 16 in)
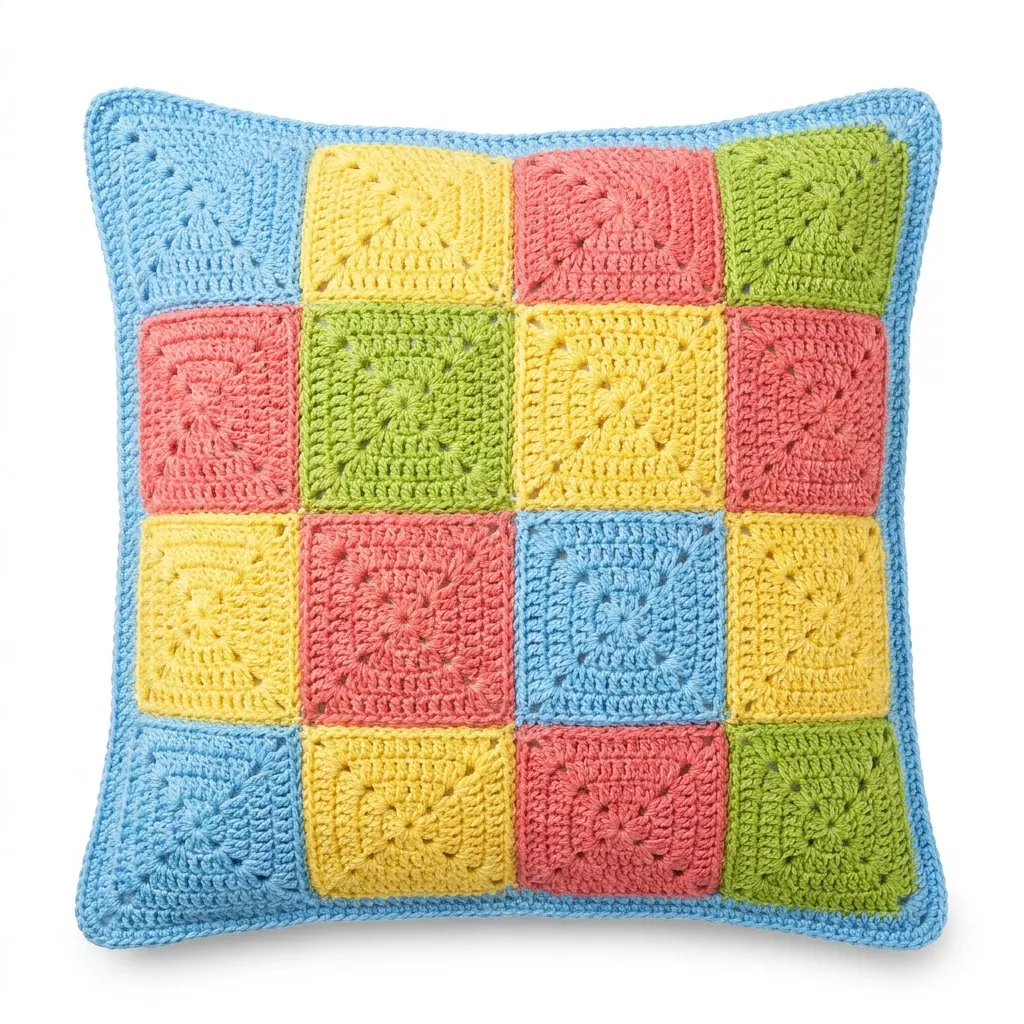
This crochet granny square pillow cover features a classic design made up of colorful granny squares. Once completed, the pillow cover is blocked for a crisp finish, giving it a polished look. You'll find this project enjoyable and straightforward, using basic stitches like double crochet and slip stitch.
This pattern is perfect for intermediate crocheters ready to create a beautiful pillow cover that will enhance any room. You’ll learn how to make granny squares and assemble them into a lovely finished product.
Why You'll Love This Granny Square Pillow Cover
- Versatile design – Create a pillow cover that matches your home decor.
- Fun colors – Use different shades to express your personal style.
- Productive project – Make it as a perfect gift for friends and family.
- Learn new techniques – Improve your skills with granny squares and blocking.
Skill Level: Intermediate
You'll need to know how to make chains, slip stitches, and double crochet stitches. You’ll also be introduced to the granny square technique.
Crochet Abbreviations (US Terms)
- ch – chain
- sl st – slip stitch
- dc – double crochet
- sp – space
- rnd – round
- st(s) – stitch(es)
Size and Gauge
- Finished Pillow Cover Dimensions: 40 × 40 cm (16 × 16 in)
- Gauge: 4 squares = 20.3 × 20.3 cm (8 × 8 in).
To ensure your squares are the correct size, make sure to check your gauge. Adjust your hook size if necessary.
Step 1: Making the Granny Squares
The granny squares are made in rounds. You’ll need to make 16 squares.
Square 1 (Using Color A):
- Make a magic ring.
- Ch 3, (2 dc, ch 1) x 3, join (4 groups) (4 sts).
- Rnd 2: Sl st to next ch 1 sp, ch 3, (2 dc, ch 1, 3 dc) in same sp, [(3 dc, ch 1) in next ch 1 sp] x 3, join (12 sts).
- Rnd 3: Sl st to next ch 1 sp, ch 3, (2 dc, ch 1, 3 dc) in same sp, [(3 dc, ch 1) in next ch 1 sp] x 3, join (20 sts).
- Rnd 4: Sl st to next ch 1 sp, ch 3, (2 dc, ch 1, 3 dc) in same sp, [(3 dc, ch 1) in next ch 1 sp] x 3, join (28 sts).
Repeat for Squares 2 to 16:
Change colors using the following sequence: A, B, C, D, A, B, C, D, A, B, C, D, A, B, C, D. Each square will finish with 28 stitches.
Step 2: Joining Squares
Now, we’ll assemble the squares into a pillow cover.
- Lay the 16 squares in a 4 × 4 formation.
- Using a slip stitch, join the squares side by side.
- Join the rows first, then connect the rows.
Step 3: Edging
With the final color of your choice (Color E):
- Work a round of single crochets evenly around the perimeter of the pillow cover (approximately 60 stitches).
- Fasten off and weave in any ends.
Step 4: Blocking
To finish the pillow cover:
- Use a wet cloth or steam to dampen the cover.
- Lay the cover flat on blocking mats and shape it to 40 × 40 cm (16 × 16 in).
- Pin into place, ensuring the corners are square.
- Allow it to dry completely.
Step 5: Inserting Pillow
Once blocked, insert your pillow form into the cover. Adjust for fullness as necessary.
Beginner Tips for a Neat Granny Square Pillow Cover
- Keep your yarn organized to avoid tangles.
- Maintain consistent tension throughout your work for even squares.
- Check your gauge periodically as you make your squares.
Common Mistakes (and How to Fix Them)
- "My squares aren’t the same size." – This may be due to inconsistent tension. Keep your tension even and check your gauge.
- "The squares look wobbly." – This can happen if you start your rounds too tightly. Loosen your grip to create a more uniform square.
- "The edges aren’t straight." – Ensure you pin your cover nicely while blocking. This helps maintain shape and crisp edges.
How to Care for Your Granny Square Pillow Cover
Hand wash your pillow cover in cool water with mild detergent. Lay it flat to dry and avoid direct sunlight to prevent color fading.
FAQ
Can I customize the size?
Yes! You can adjust the number of squares and the overall dimensions if you want a larger or smaller pillow cover.
What yarn can I use instead?
You can substitute any worsted-weight yarn for a different texture or color. Just make sure to check the gauge.
How long does it take to make?
Making the granny squares takes about 8 hours total, with an additional 3 hours for joining, edging, and blocking, so you can expect around 11 hours for the whole project.
Want a matching set? Check out our crochet purse patterns or see all our free crochet bag patterns.
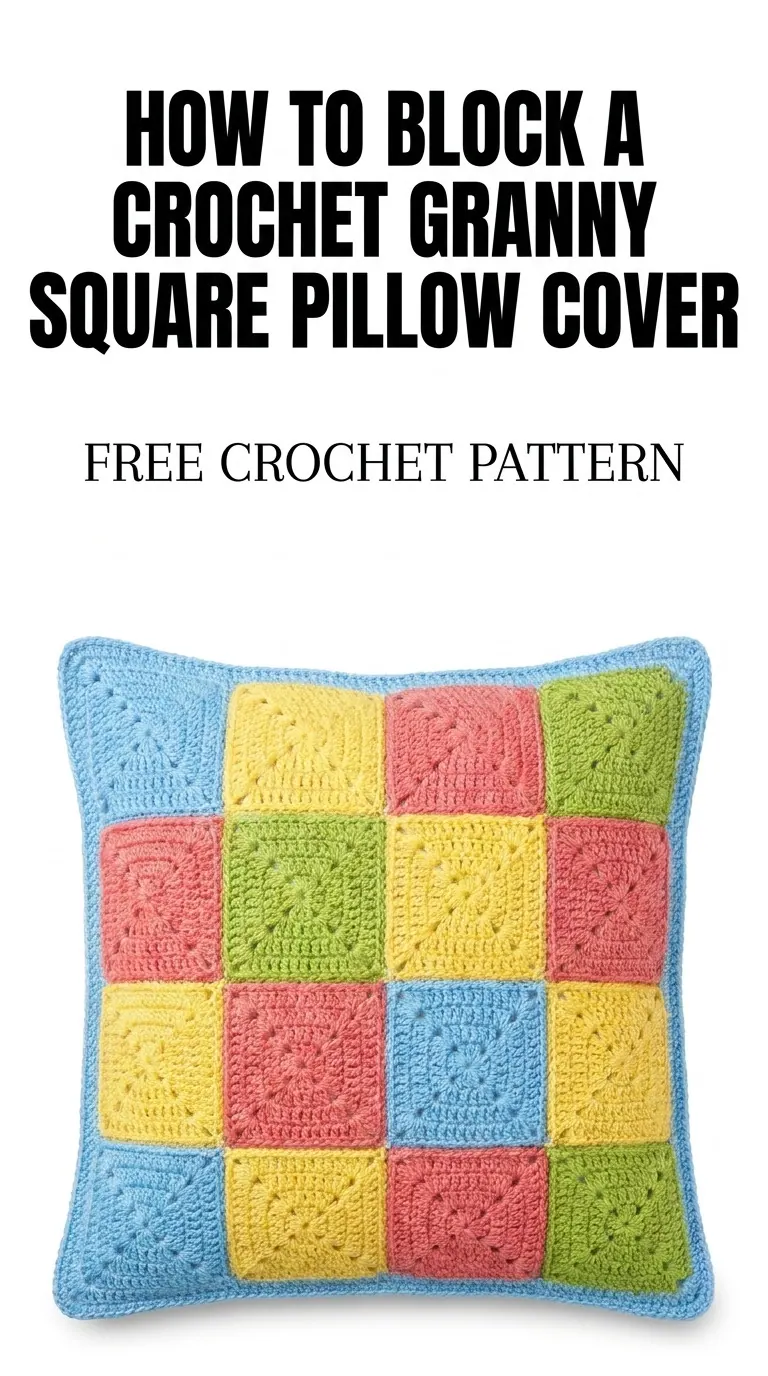
Image shown for inspiration — your finished result may vary slightly.